Response Field Mapping
When you import data from an API into Notion using Note API Connector, you'll first go through a step called Response Field Mapping.
This step lets you review the incoming data, decide which fields to import, and choose where each field should go in your Notion database or table.
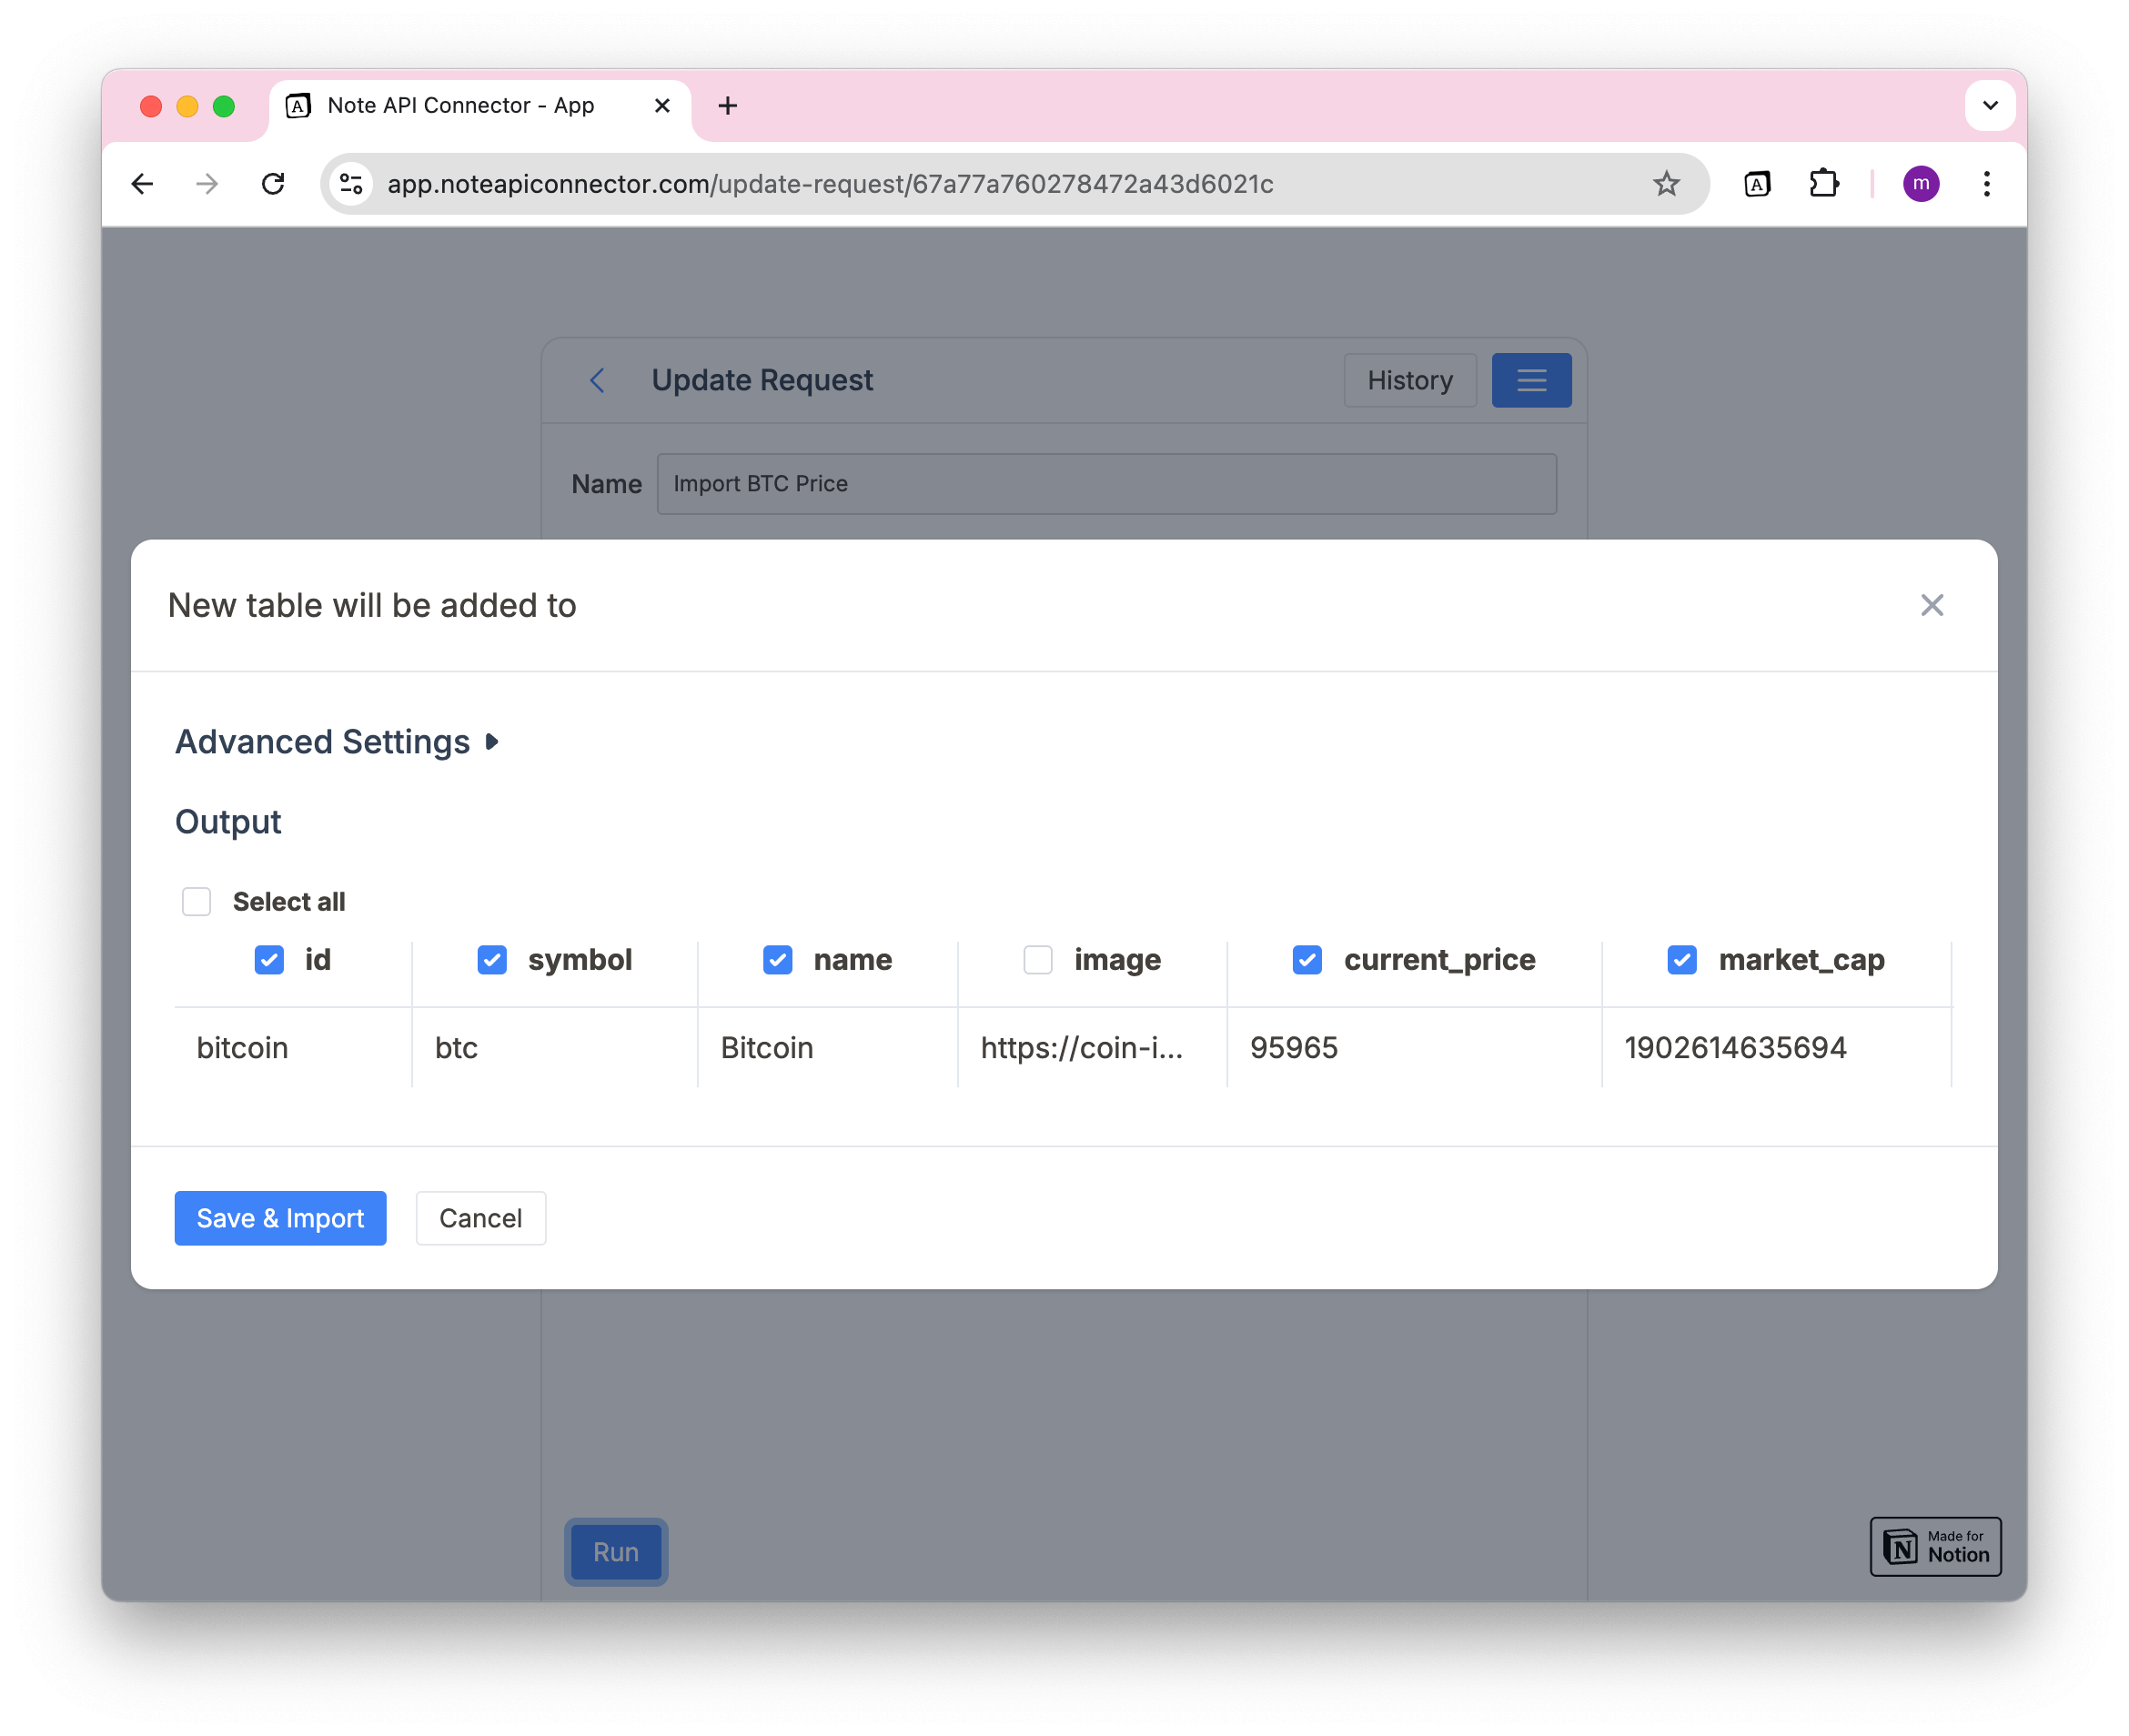
After running a request, you’ll see the Response Field Mapping that shows:
✅ The fields returned by the API (shown as columns)
✅ The data from the API response (sample rows)
✅ Options to match each API field to a Notion property
If your target destination is a Notion database, this is where you tell Note API Connector where each piece of data should go.
You can also use the JMESPath editor to interactively filter or transform the API data before mapping it to Notion fields.
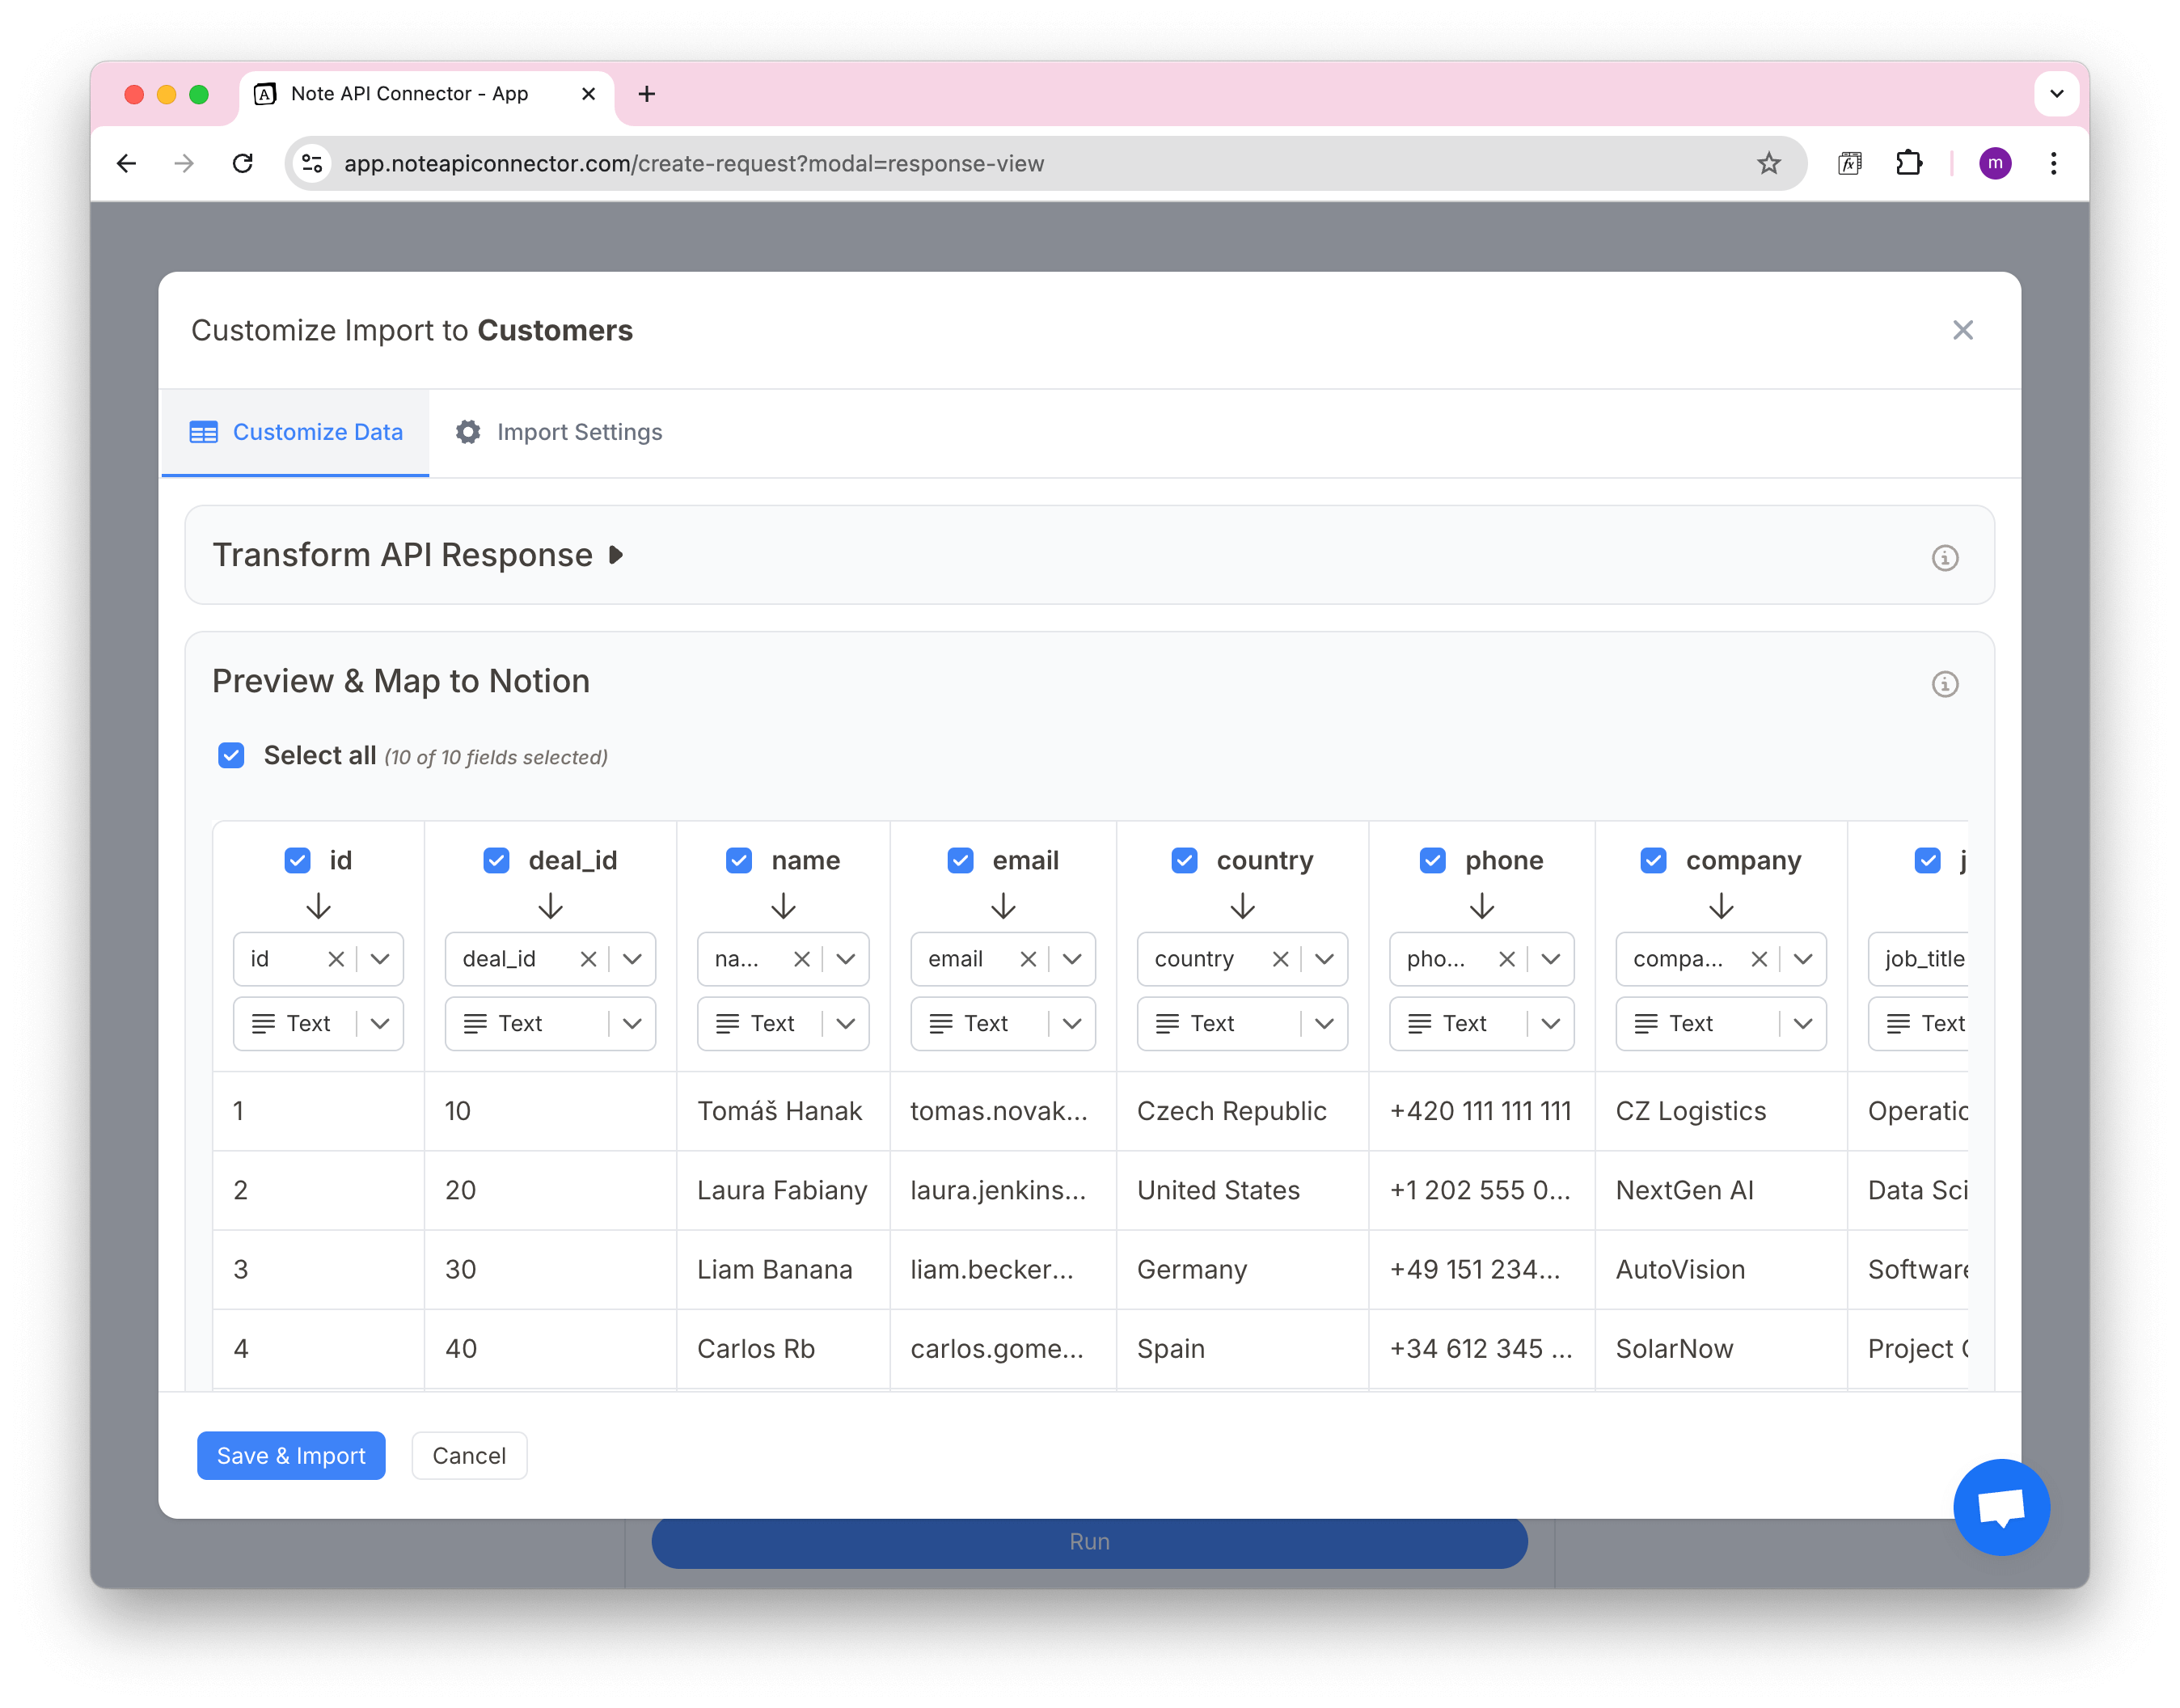
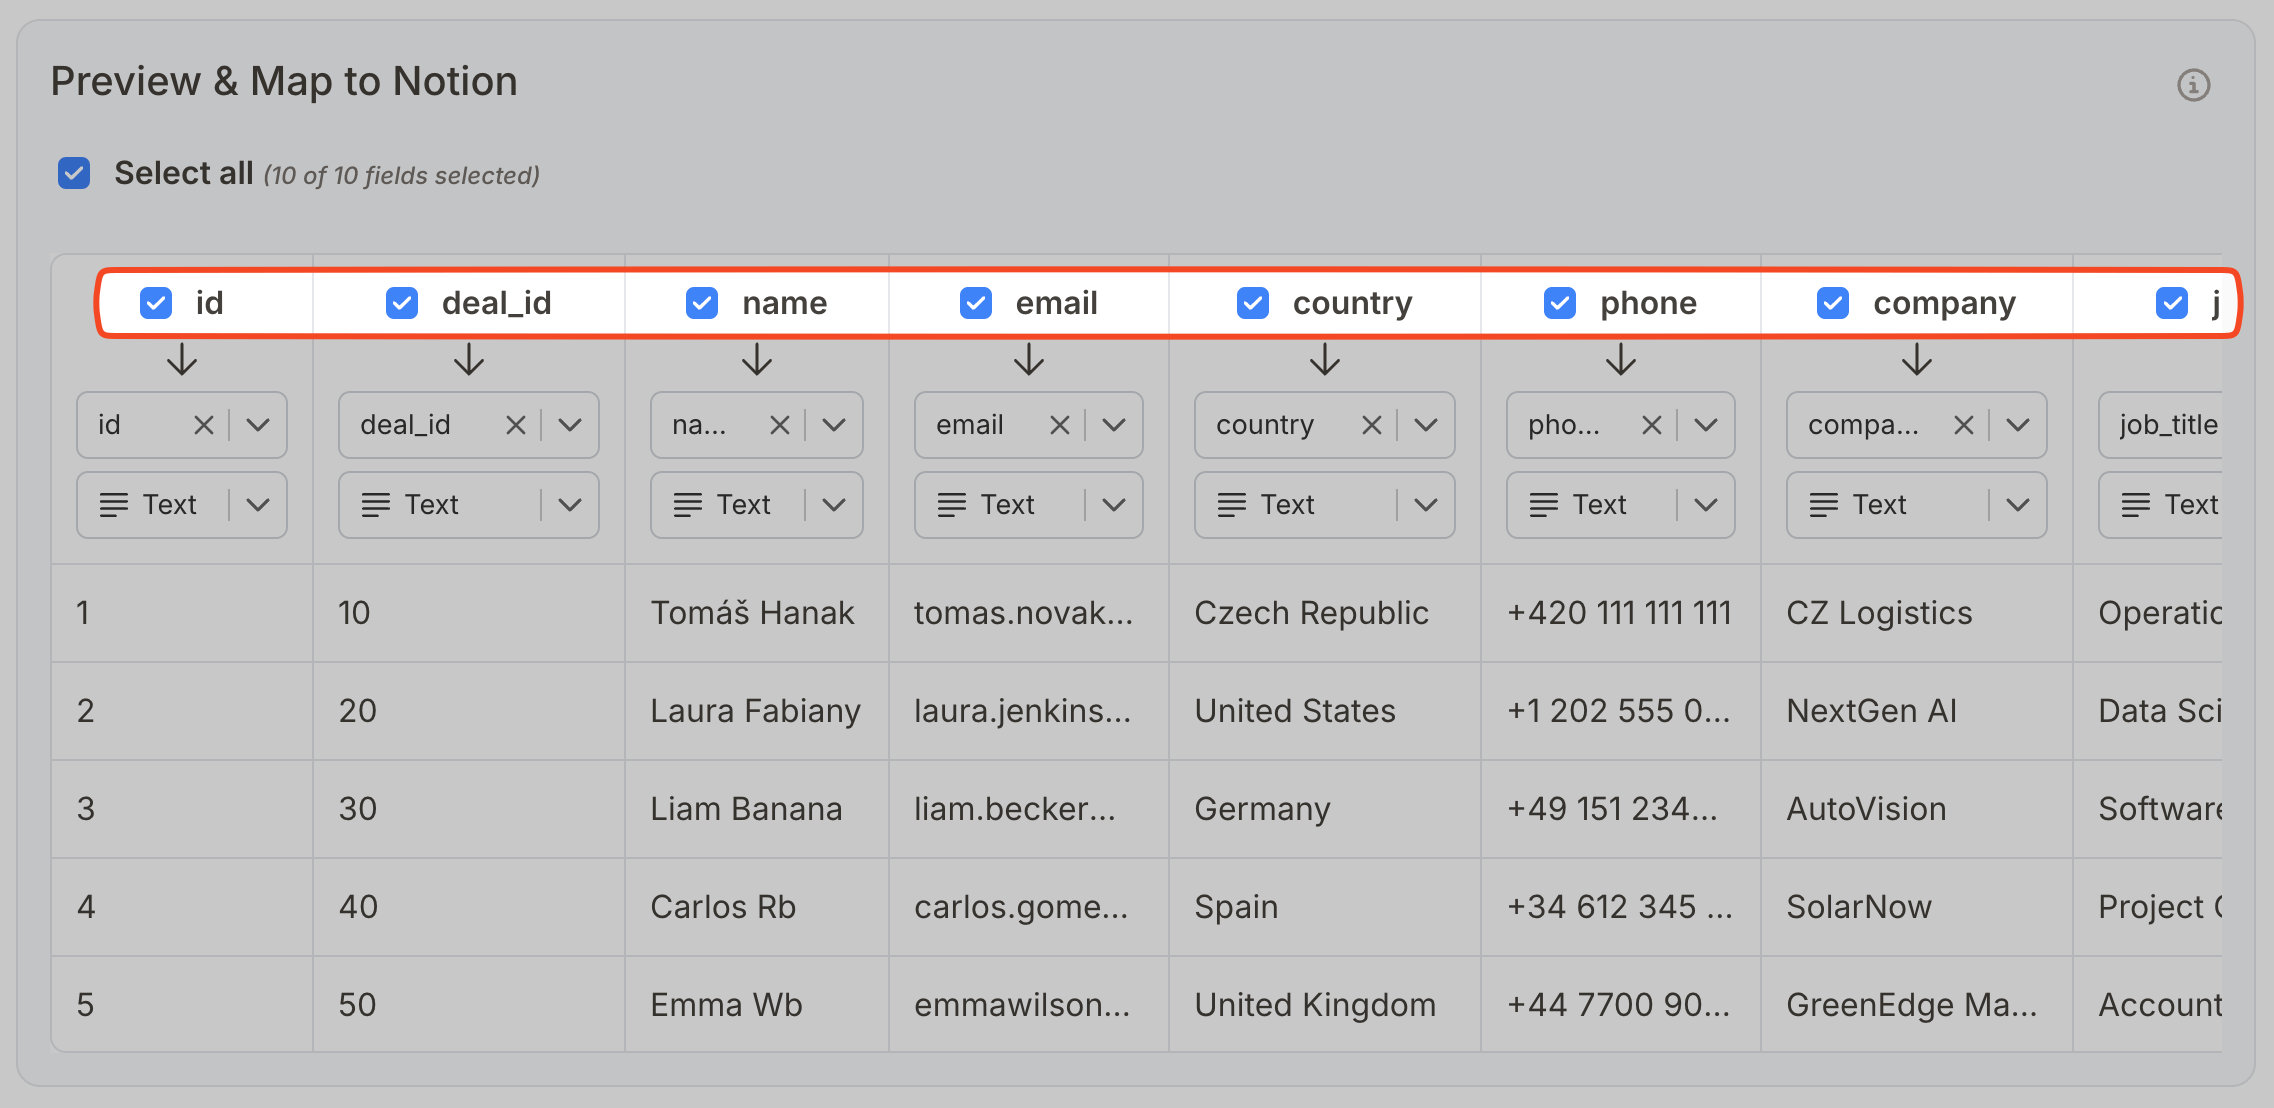
Step 1: Choose Which Fields to Import
You can check or uncheck the boxes above each column to choose which fields to include. Only checked fields will be added to Notion.
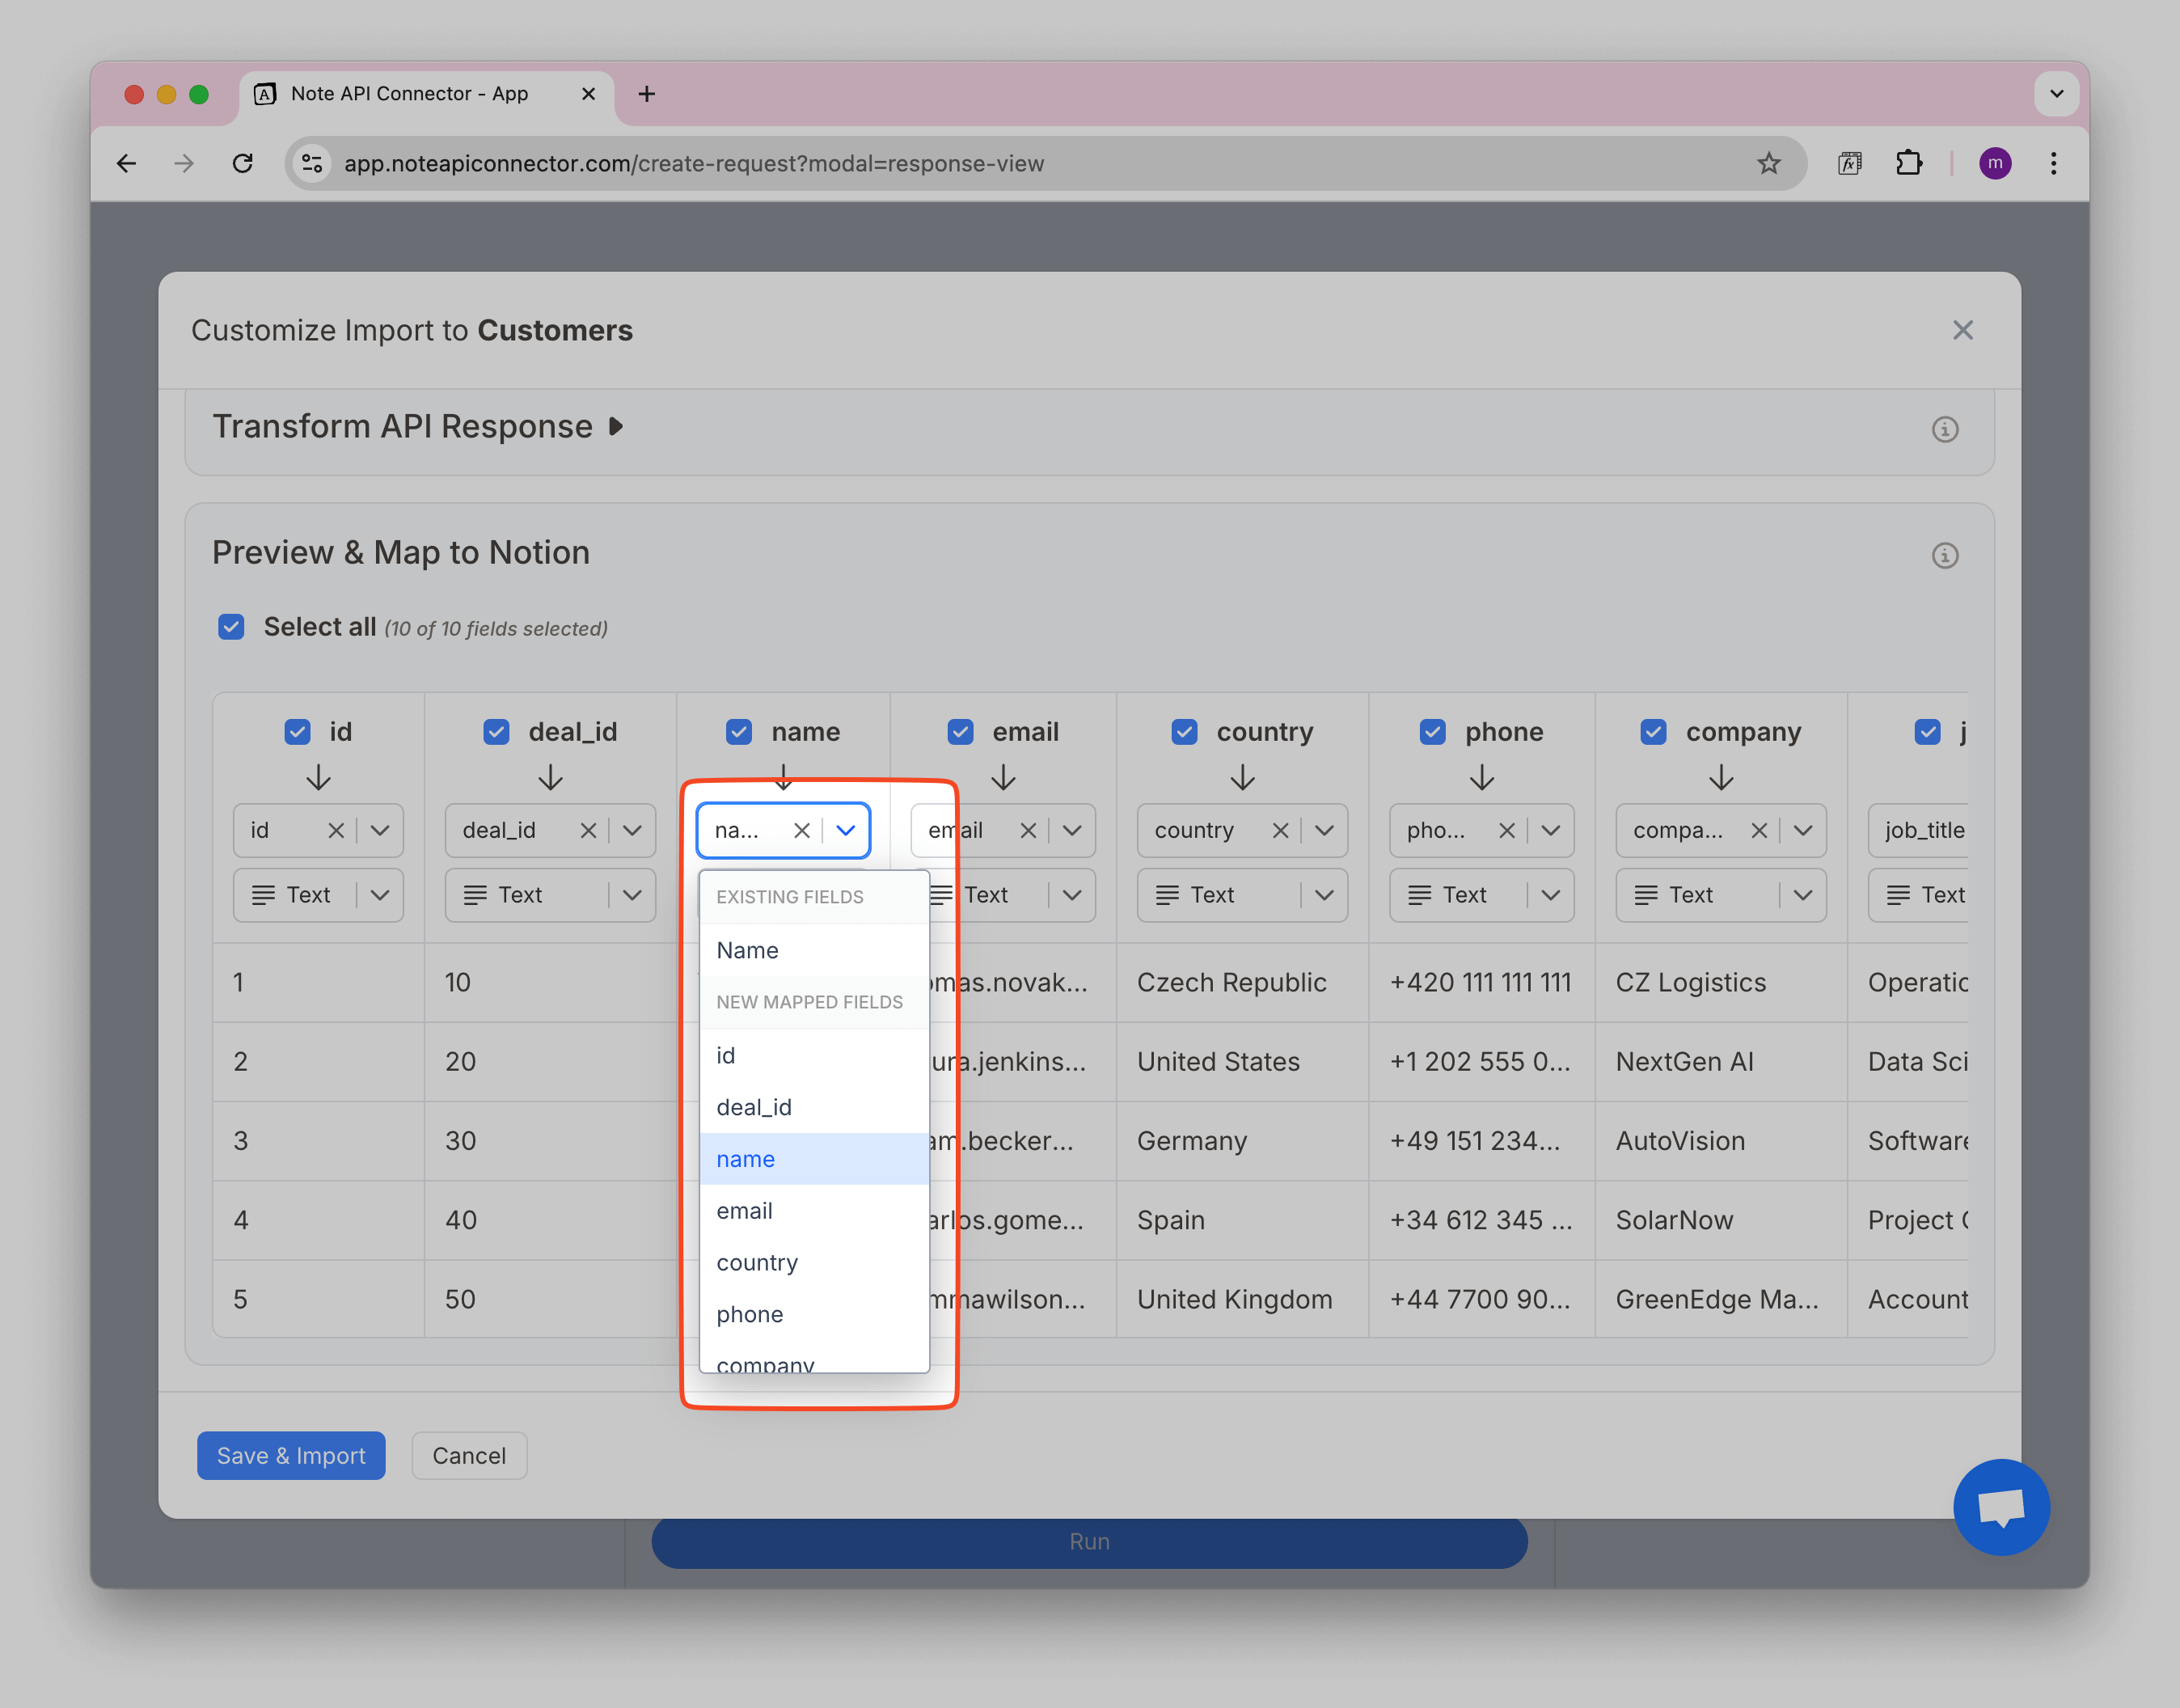
Step 2: Map Each API Field to a Notion Property
Each column from the API can be connected to a field in Notion using the first dropdown under the column name.
You’ll see three options in that dropdown:
| Option | What it means |
|---|---|
| 🧩 Existing Fields | These are properties already in your Notion database |
| 📦 New Mapped Fields | These are fields detected from your API response |
| ➕ Create New Field | Create a new column in Notion for this data |
Use this dropdown to match the API field to the right Notion property. If you don’t have a matching field yet, you can create one directly.
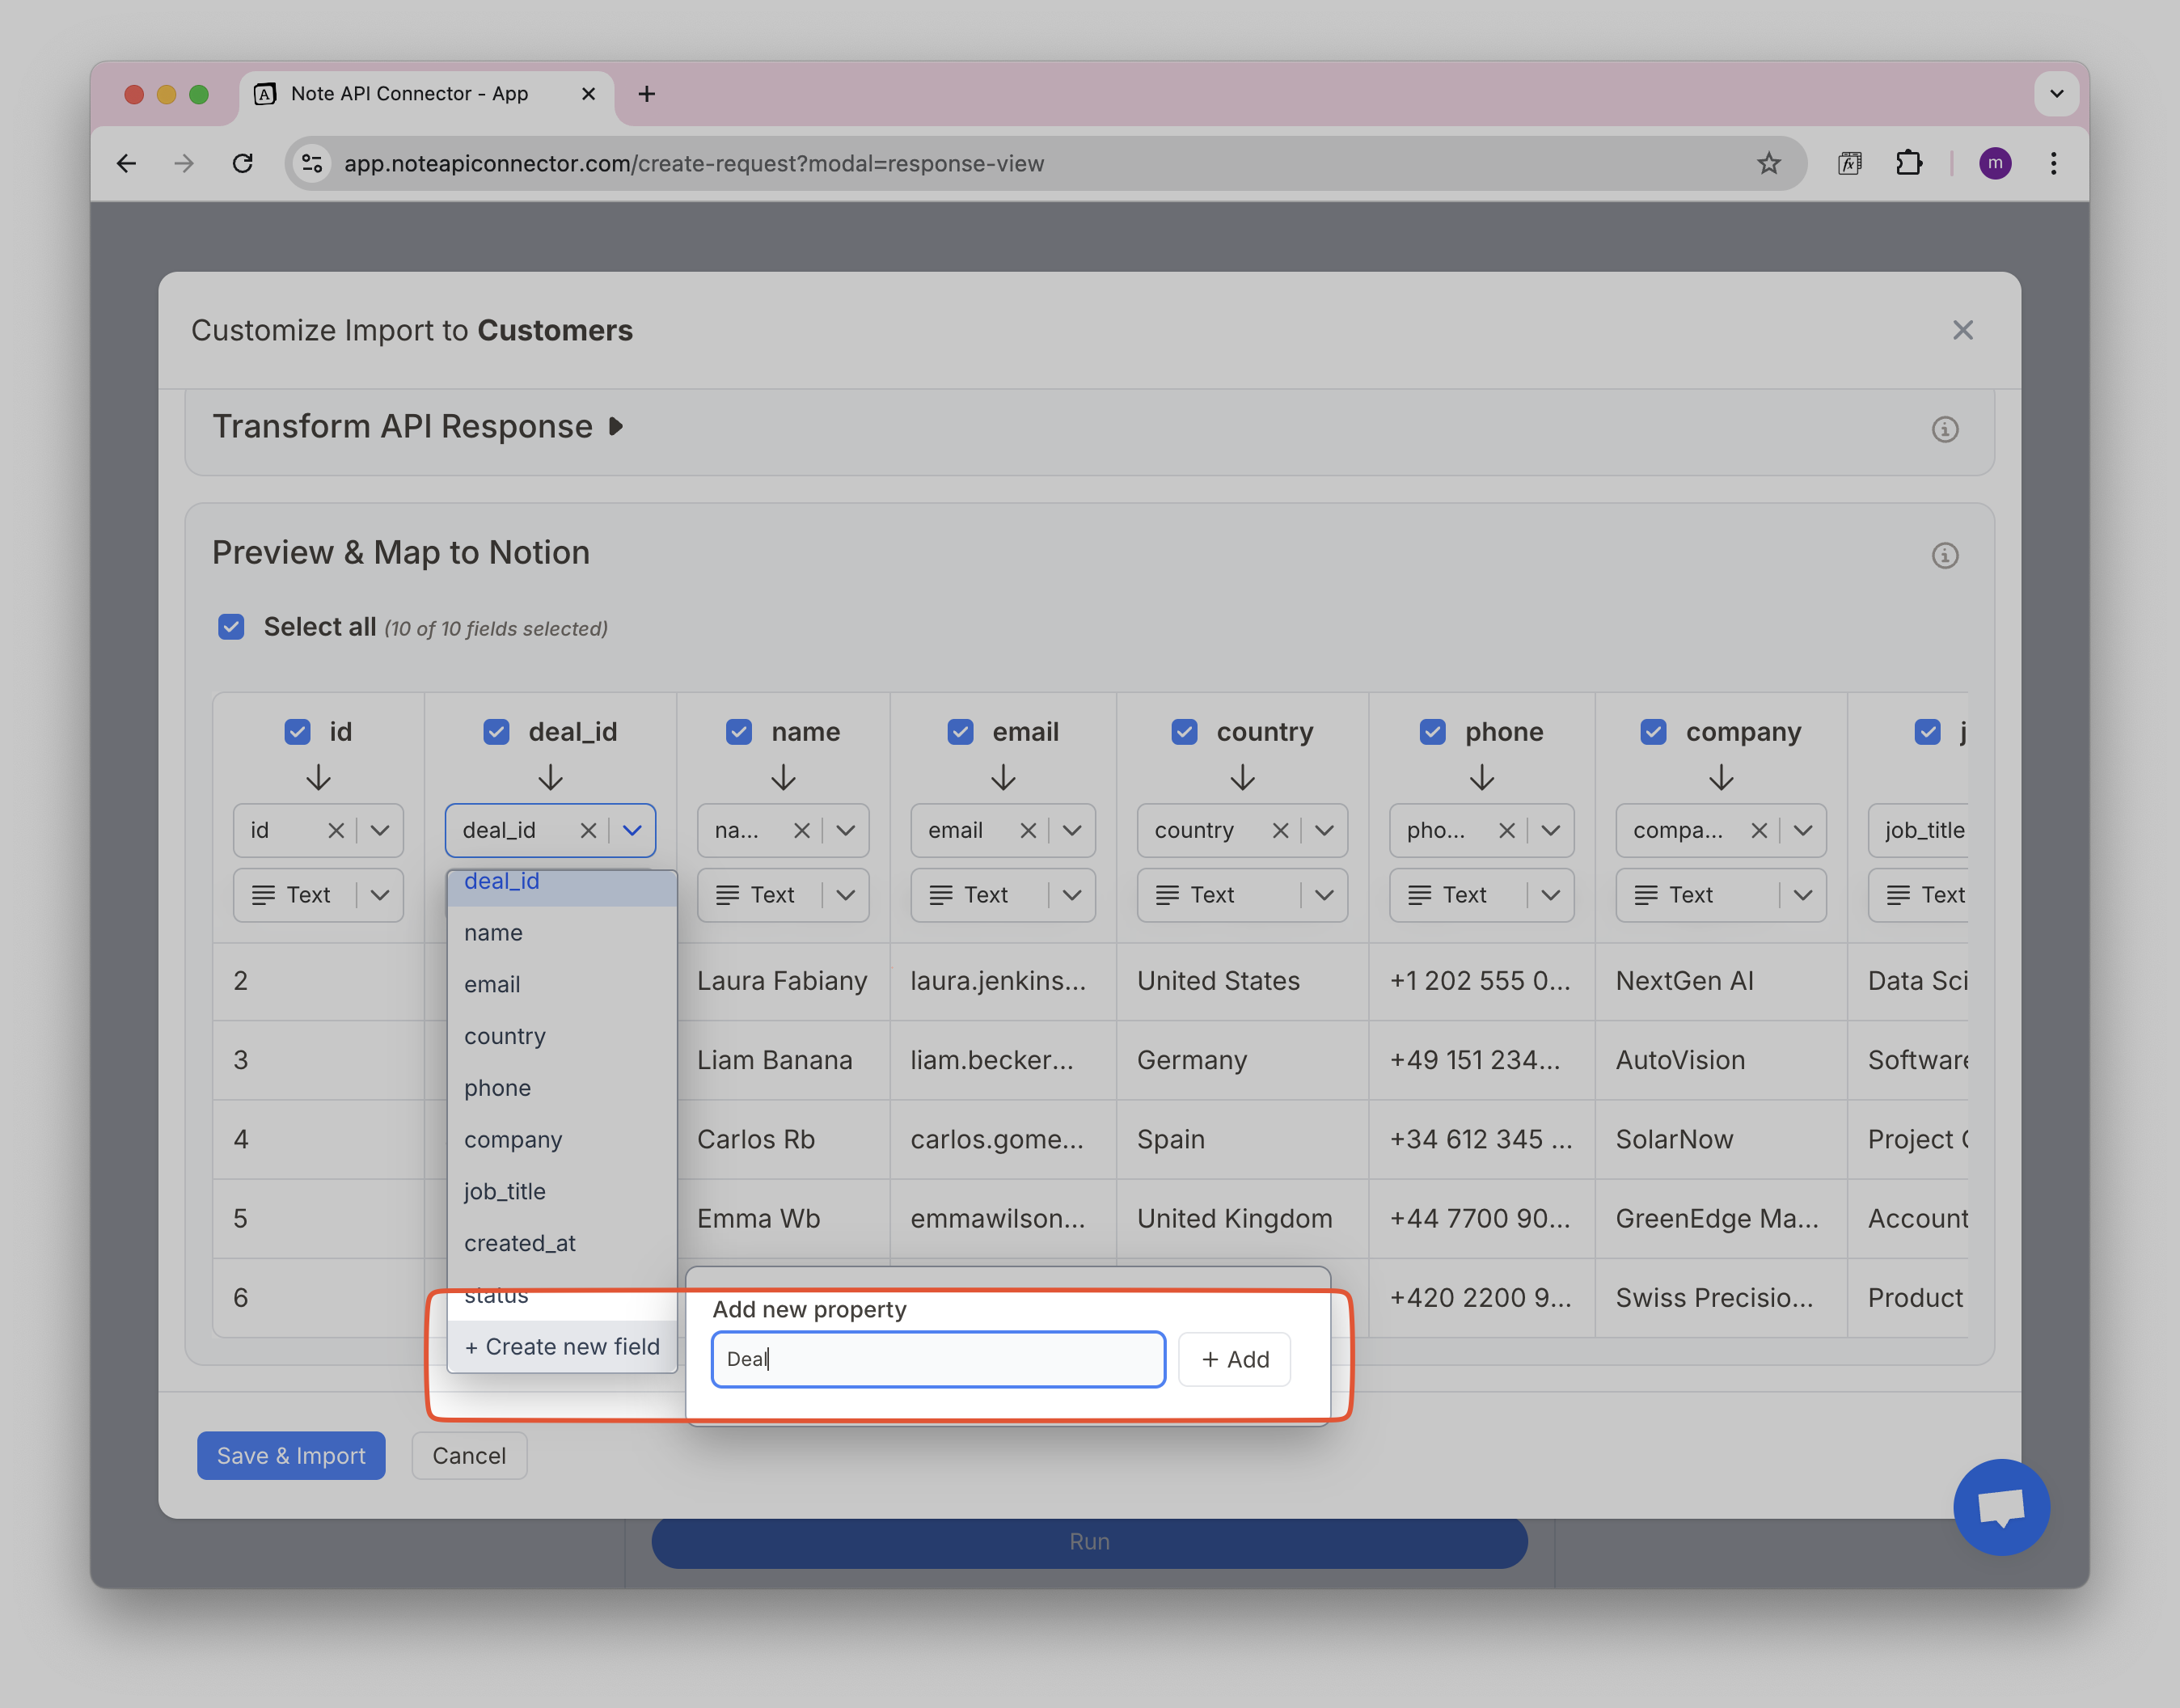
Creating Custom Fields
If a suitable Notion field doesn't exist, you can create one:
1️⃣ Start typing a field name.
2️⃣ Click Create New Field to add it.
Another way is using the last option + Create New Field.
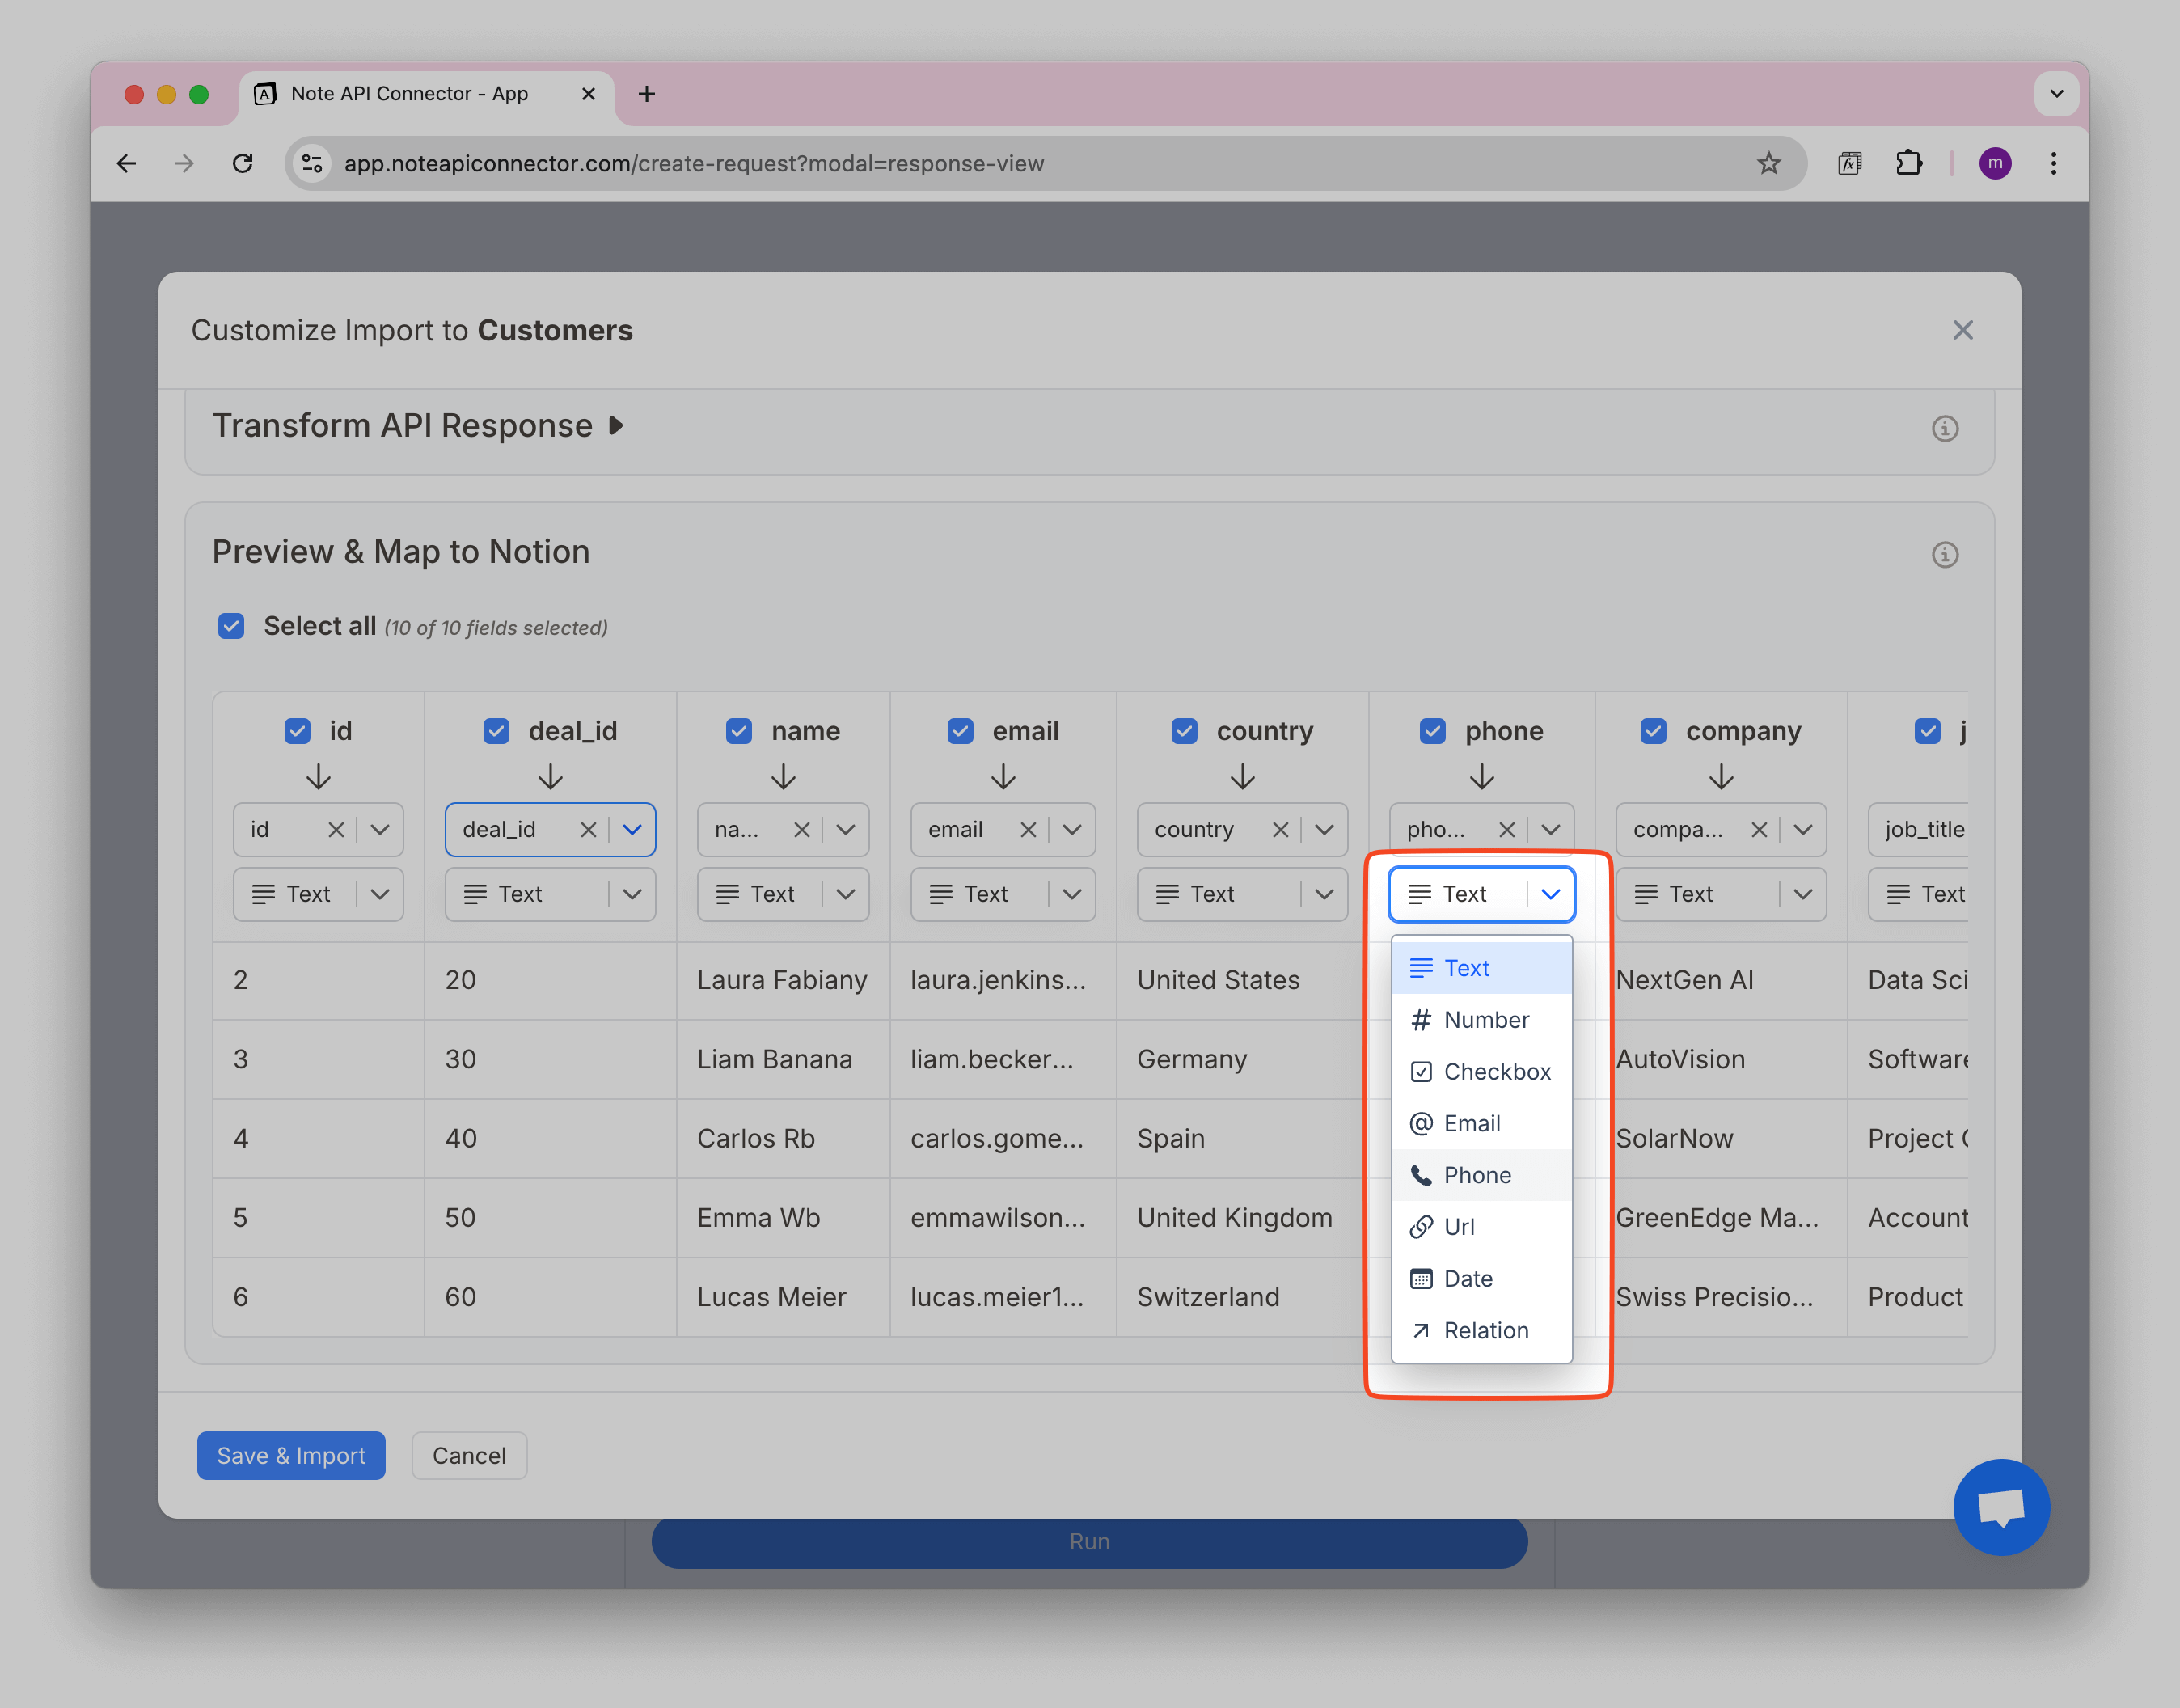
Step 3: Choose Field Type
Under the field name dropdown, you’ll see a second dropdown where you can set the field type (e.g. text, number, phone, relation).
Choose the one that matches the kind of data you're importing:
- 📄
Text– for names, emails, or labels - 📞
Phone– for phone numbers - 🔗
Relation– for linking to another database - 🧮
Number, 📅Date, ✅Checkbox– and more, depending on your data
Make sure the data format matches the type you select.
For example, selecting Date requires data in date format. If the format does not match, the field will be imported as empty.
Create Relations Between Databases
If you want to link records between two Notion databases, you can do that using the Relation field type.
Note API Connector allows you to create relations automatically during import, no manual setup needed in Notion.
Example: Linking a Customer to a Deal
Let’s say your API response includes a field called deal_id, and you want to connect each customer to their matching deal in another Notion database (e.g. "Deals").
To do that:
- In the field type dropdown under
deal_id, choose Relation.
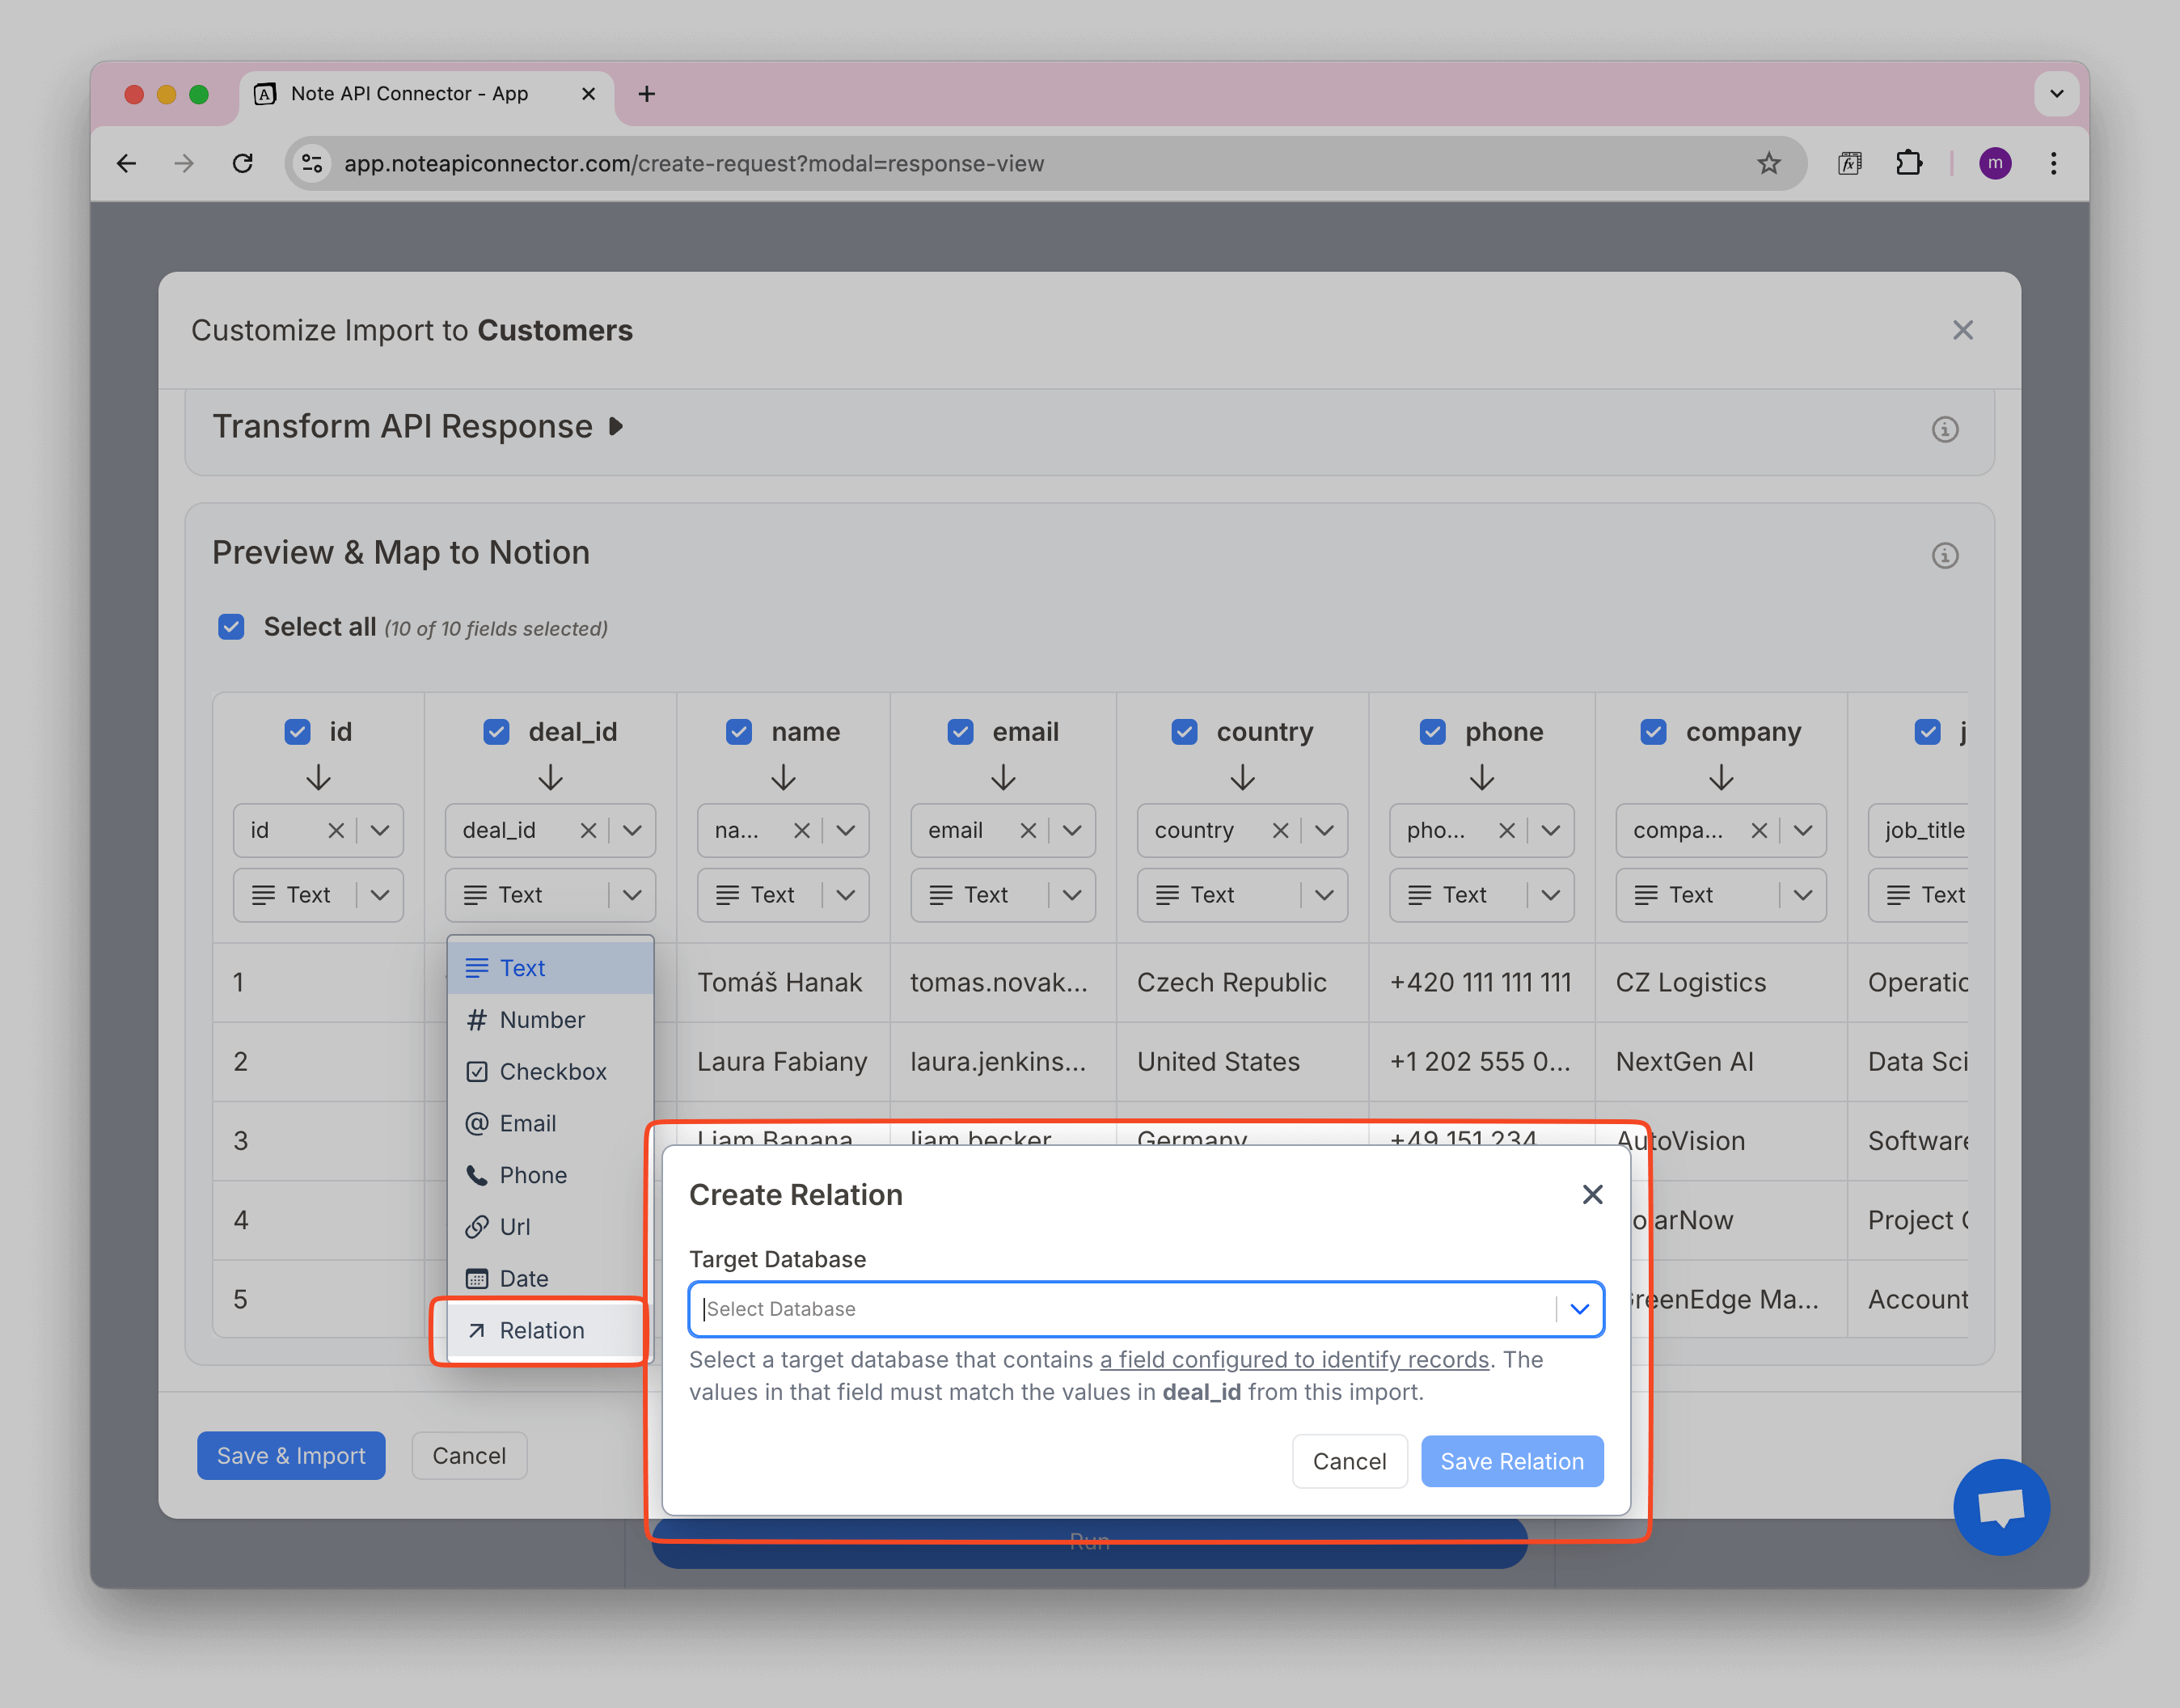
- A dialog will open where you can select the target database, this is the database you want to link to (e.g. "Deals").
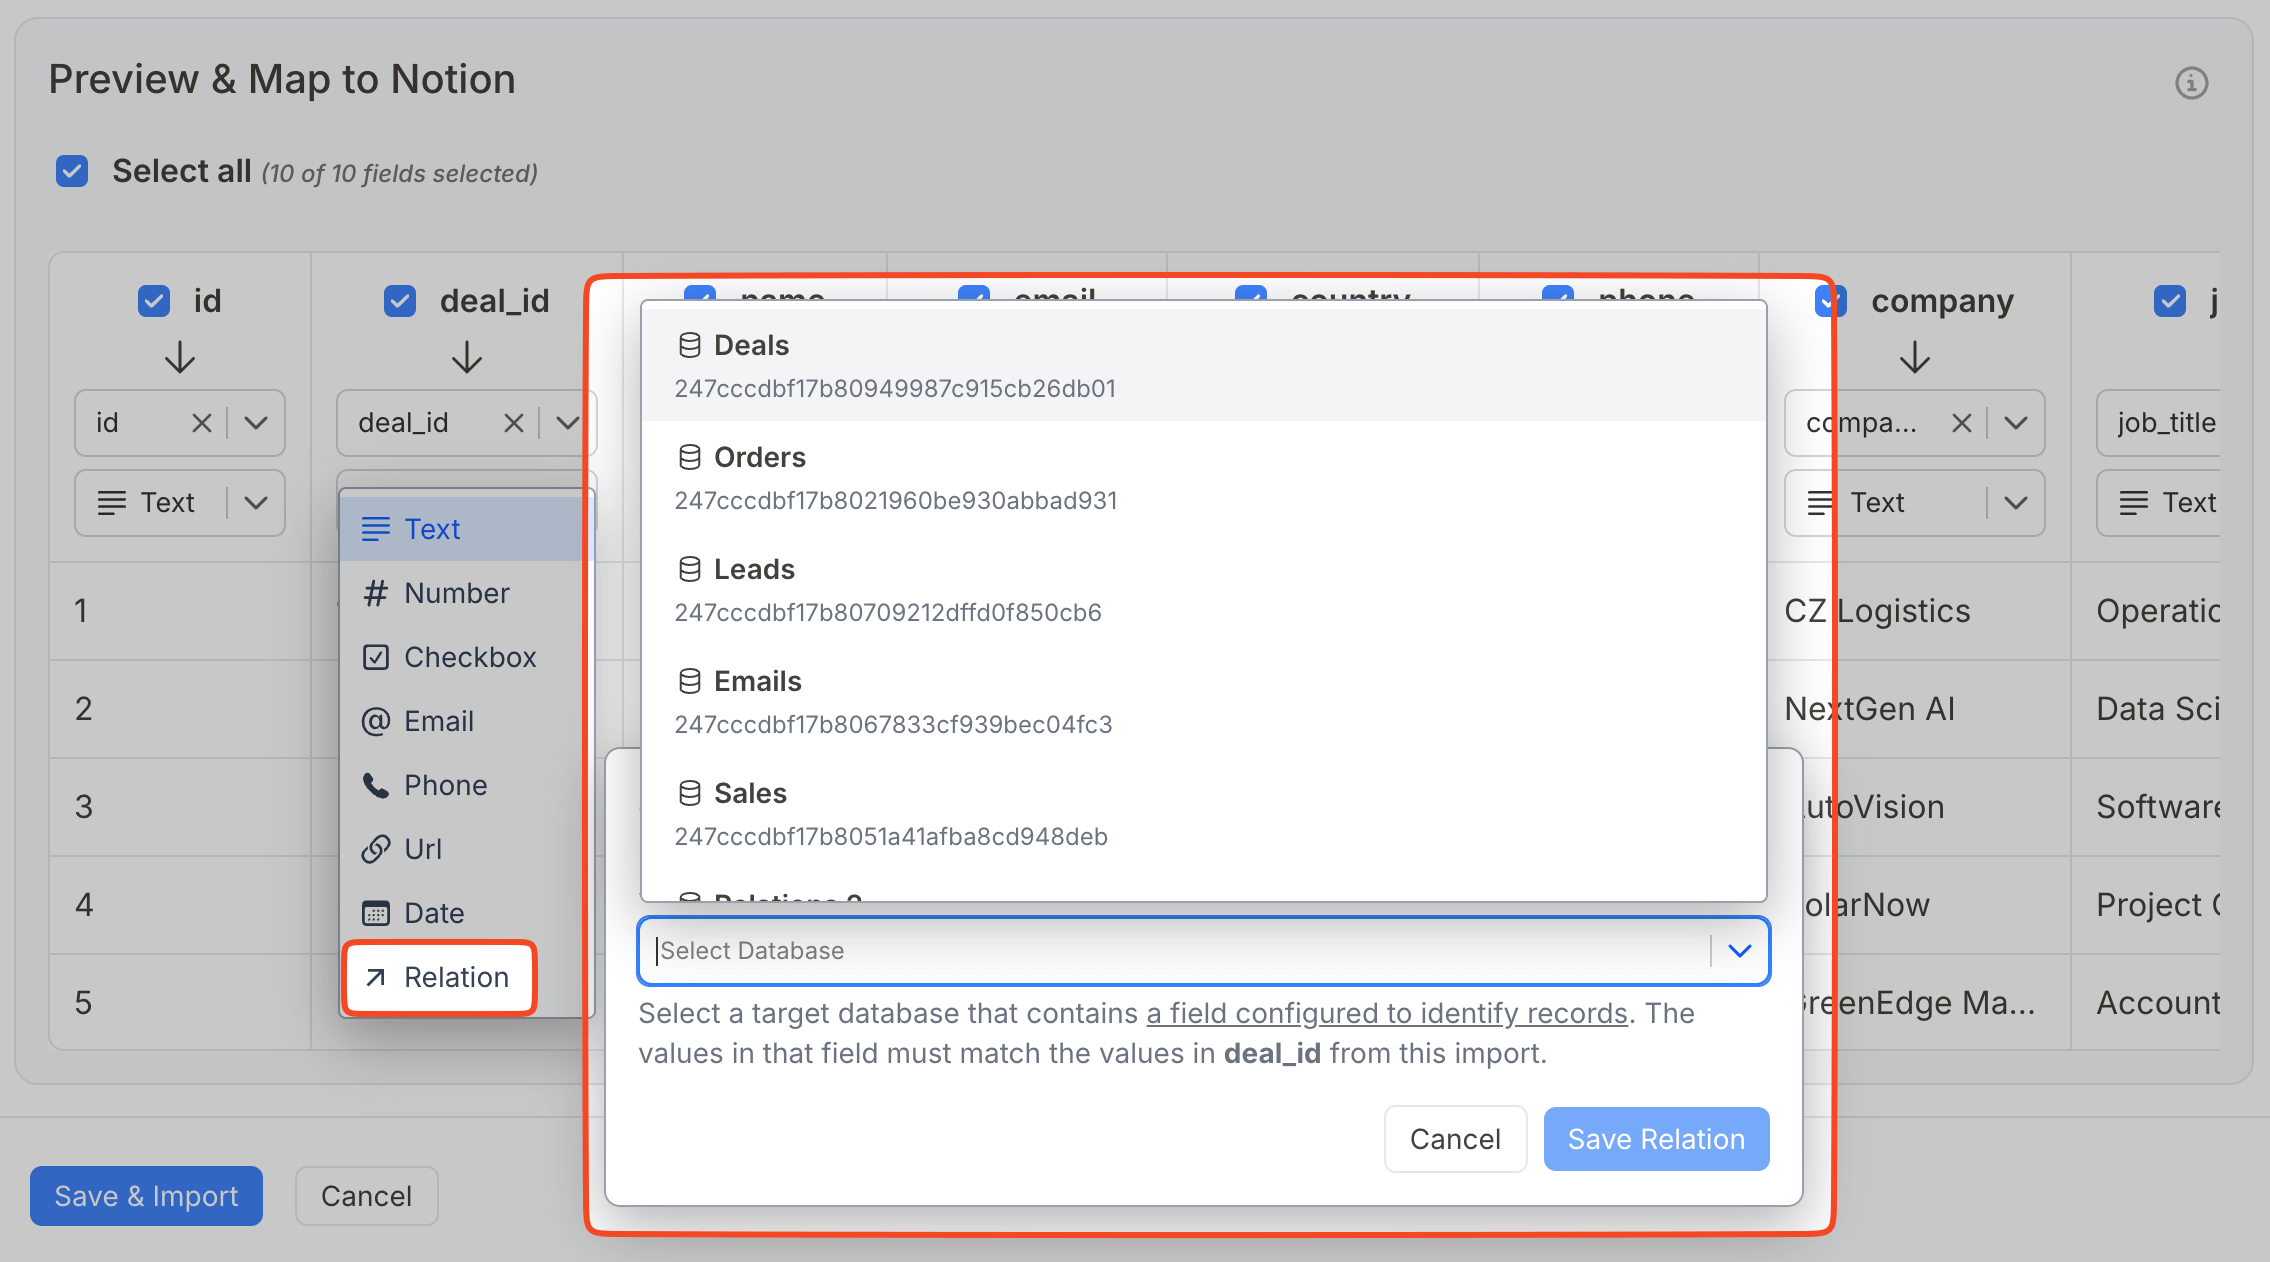
To successfully create a Relation, make sure:
- ✅ The target database was created by Note API Connector
- ✅ It contains a field that is configured to identify and update records or identify records and its values match the values from your current import (e.g.
deal_id).
👉 Check this youtube tutorial on how to link Pipedrive people to organizations.
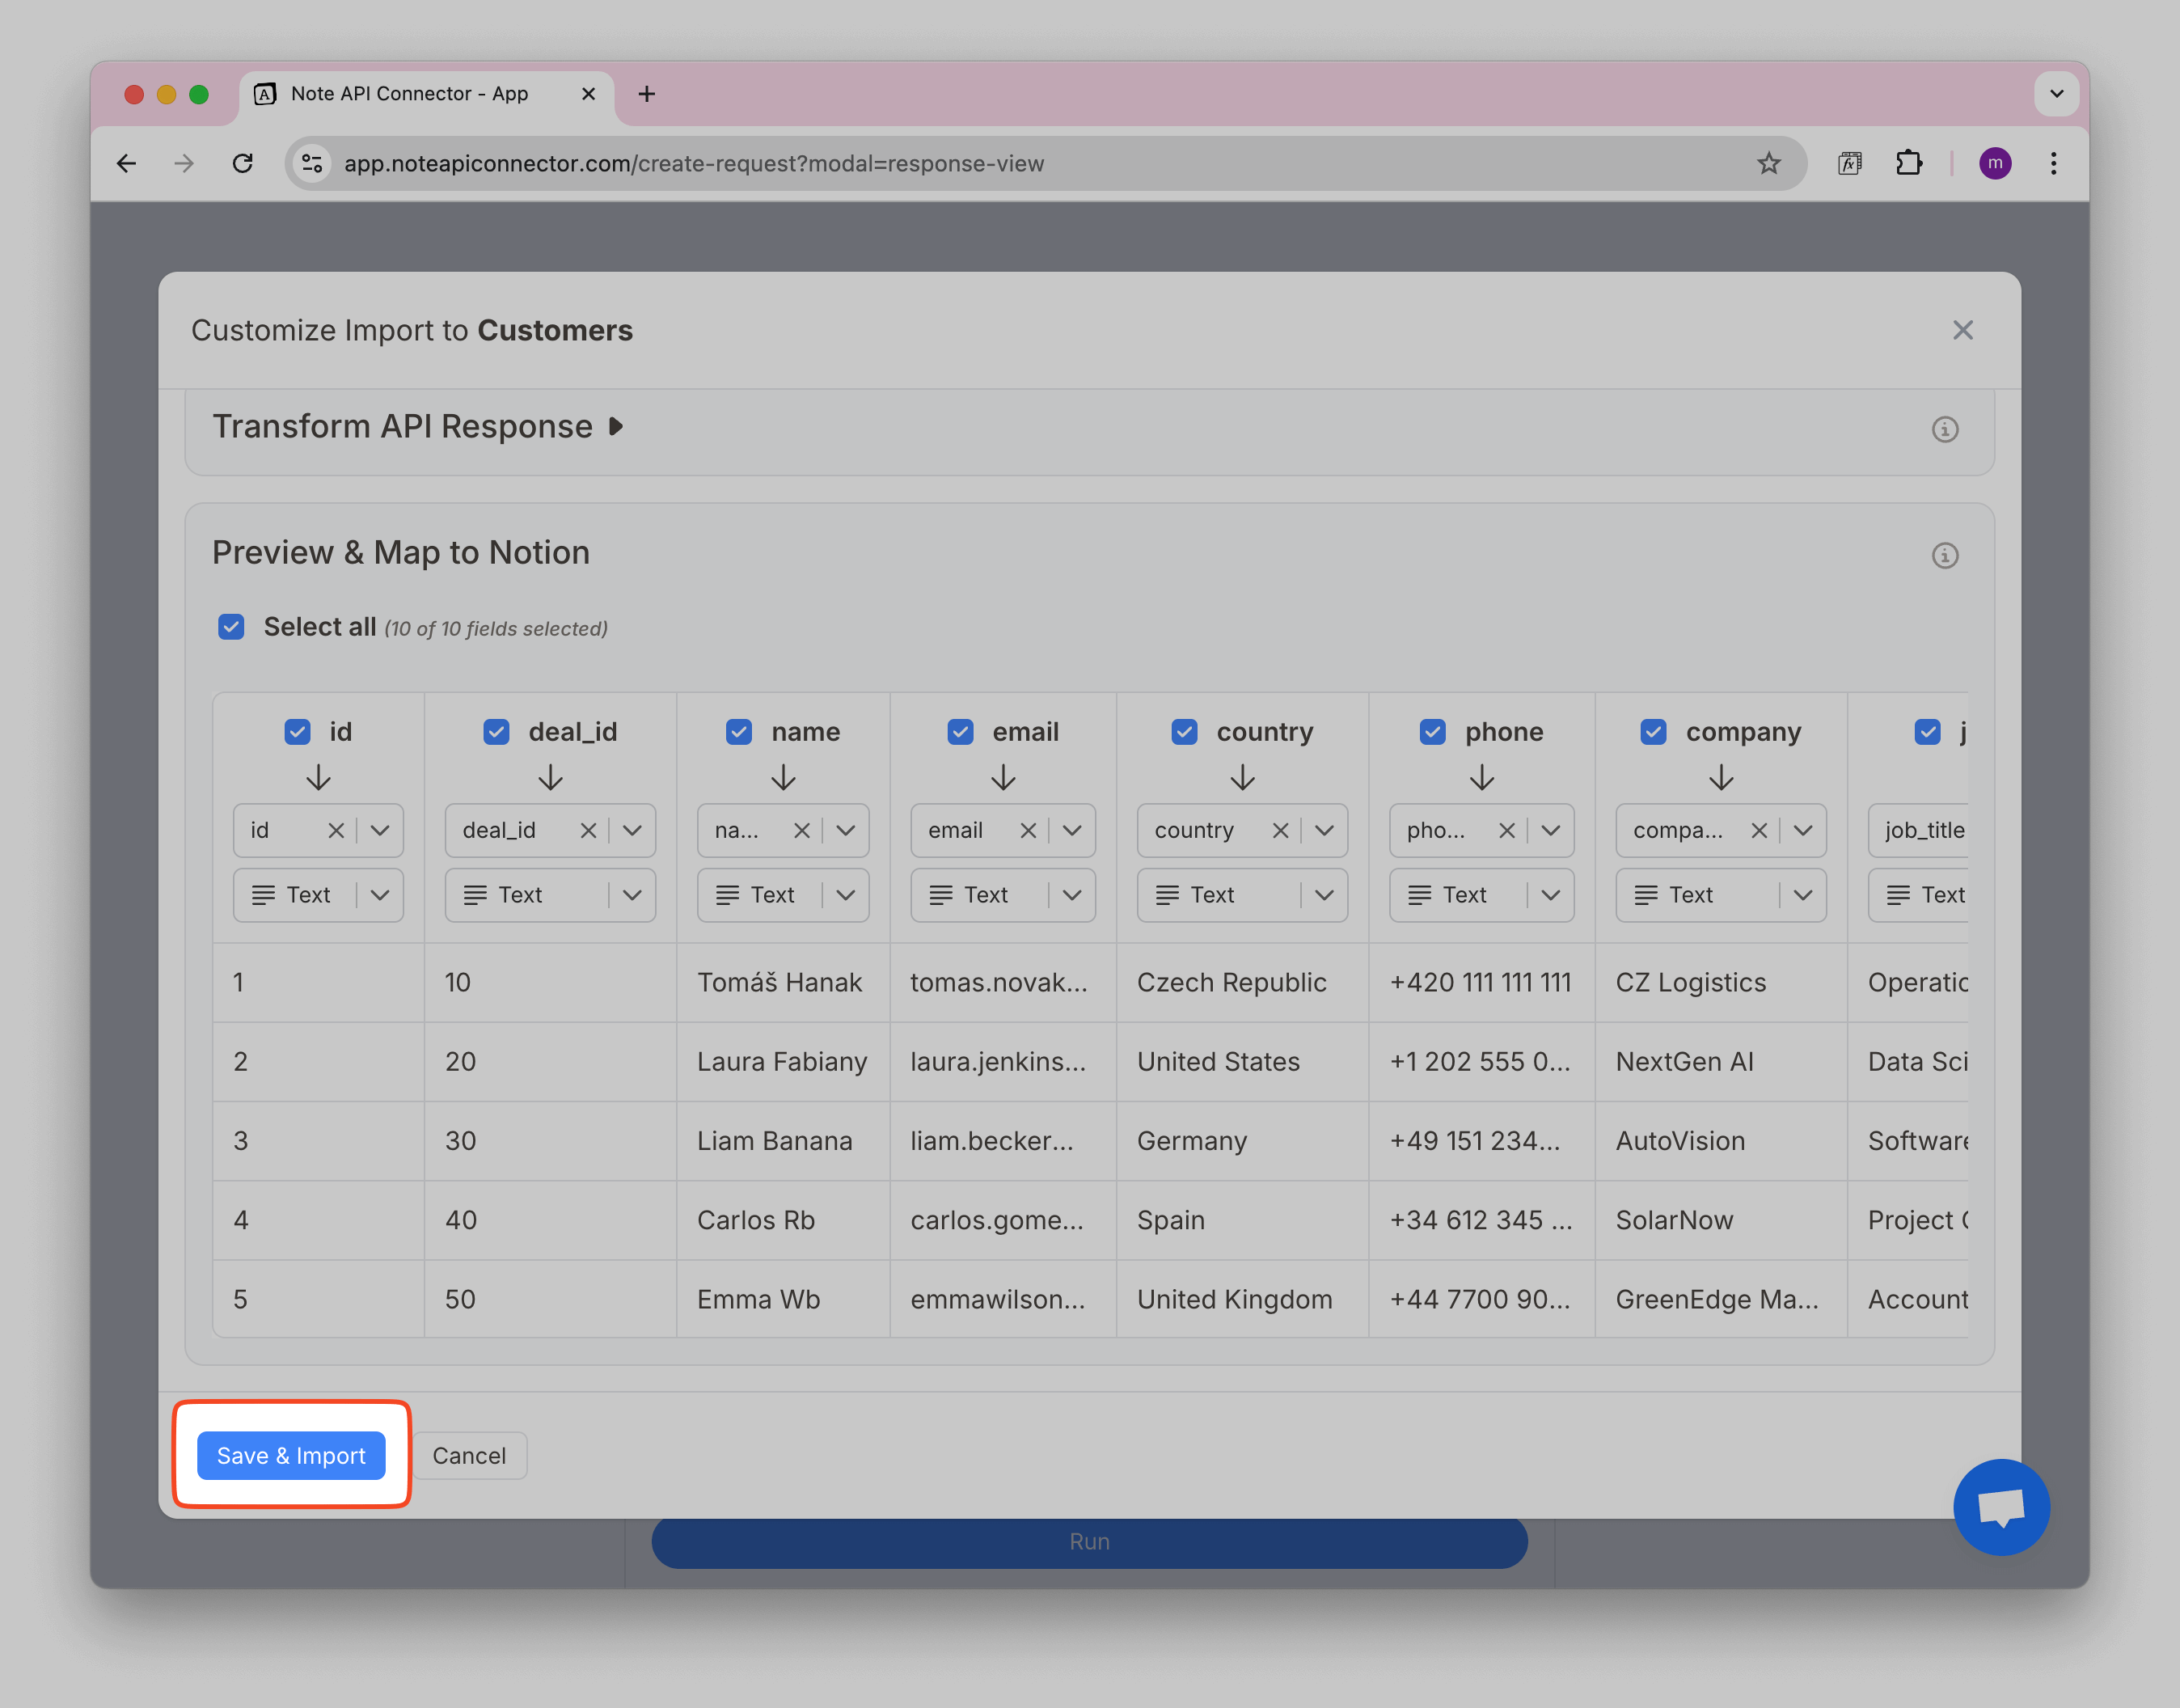
Step 4: Save and Import
When you’ve finished mapping:
- Click Save & Import
- New fields will be created in Notion (if needed)
- The selected data will be added to your database
What if I’m Not Using a Database?
If your target destination is a Notion page (Notion table, not Notion database), field renaming is not available.
You can only select which fields to import.