Request Authorization
Some APIs require authorization to ensure secure access. This usually means sending specific headers or parameters along with your request.
You can set this up in the Authorization tab. Once configured, Note API Connector will automatically include these details whenever your request is executed.
Note API Connector supports the following methods:
Most APIs provide an "Authentication" section in their documentation to tell you which method to use.
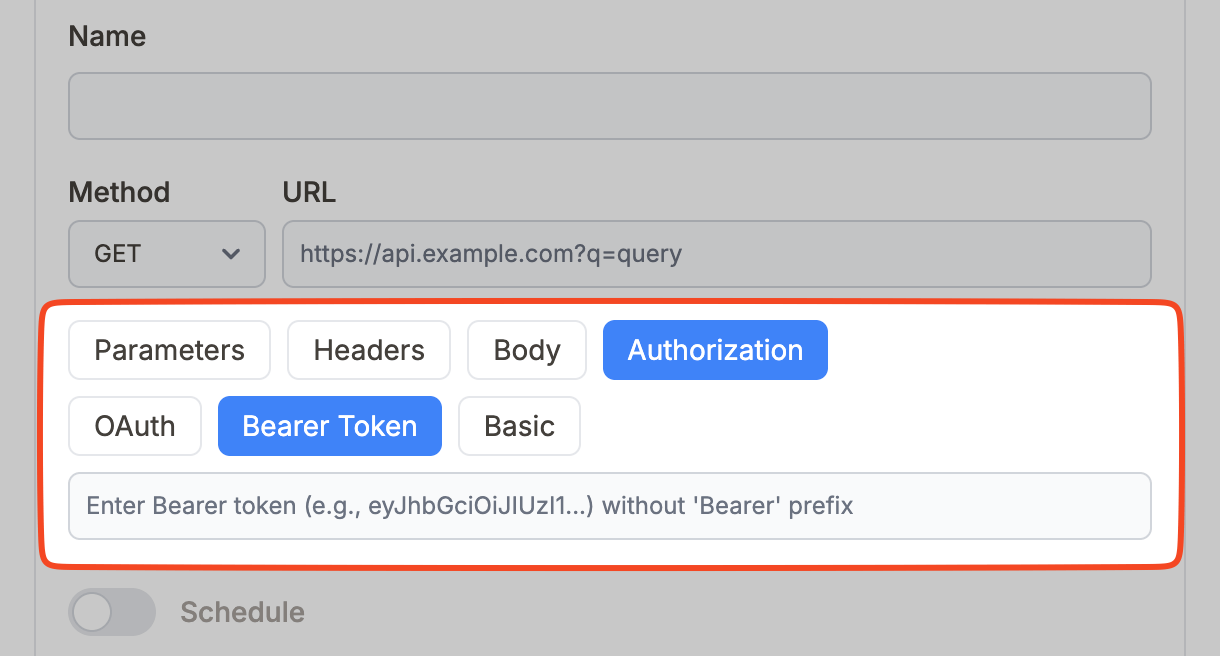
Bearer token authentication
To authorize an API request:
1️⃣ Open the Create Request screen.
2️⃣ Click the Authorization tab.
3️⃣ Click the Bearer token tab.
4️⃣ Enter your token in the Bearer token input field without 'Bearer' prefix.
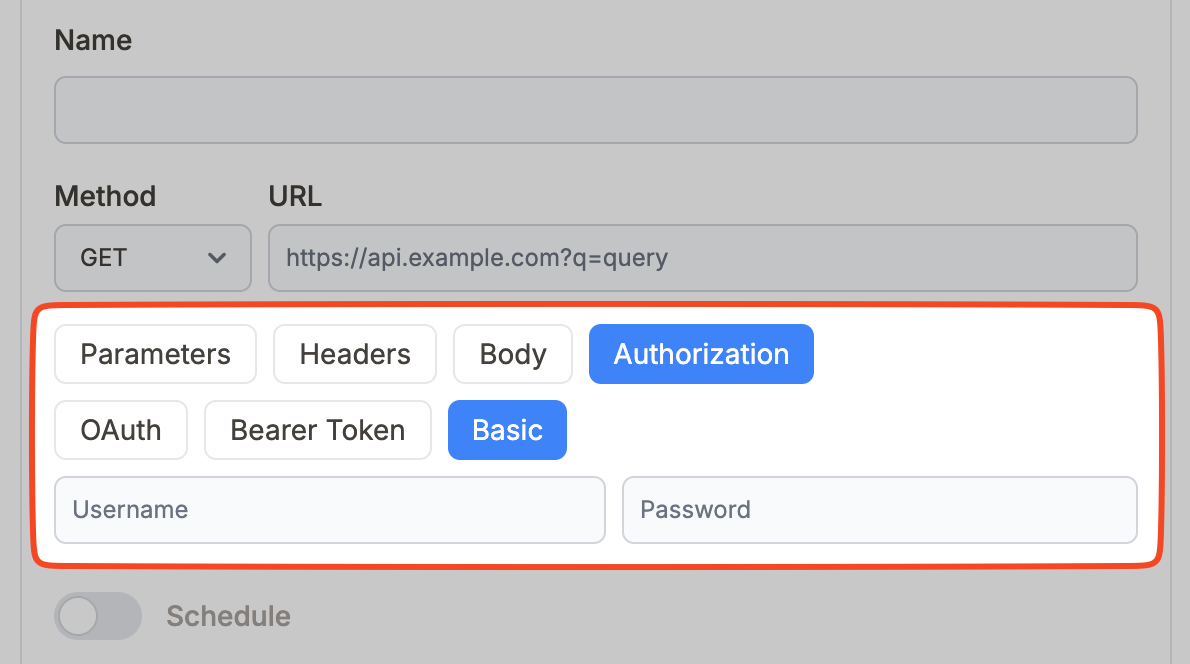
Basic authentication
1️⃣ Open the Create Request screen.
2️⃣ Click the Authorization tab.
3️⃣ Click the Basic tab.
4️⃣ Enter the username in the Username input.
5️⃣ Optionally, enter the password in the Password input.
OAuth connection
OAuth is a secure way to let Note API Connector access other services without sharing your password. It uses short-lived tokens that you can revoke at any time.
Note API Connector supports two ways to connect:
Preset OAuth connections - Ready-made setups for popular providers like Google. Connect in a few clicks. See: Connect to a preset OAuth.
Custom OAuth connections - Use this when your provider isn’t listed under Presets or you manage your own OAuth app. See: Create a custom OAuth connection.