Pagination
This setting is available in the Response Field Mapping view. Open Import Settings → Pagination.
APIs often return a large number of records, too many to send all at once. To avoid this, many APIs split the data into pages. This technique is called pagination.
Instead of giving you everything in a single response, the API returns a portion (for example, 100 records), along with either a link to the next page of data or a special cursor value. You use these to request more results until all the data is retrieved.
How Note API Connector Handles Pagination
Note API Connector supports multiple common pagination methods. Choose the method that matches how your API provides access to additional pages of results.
Page Parameter Pagination (Query Parameter)
Increment a page number in the URL query string (for example ?page=1, ?page=2, ?page=3).
Use this when the API expects a numeric page parameter in the request URL.
Next URL Pagination
Follow the full URL provided by the API for the next page of results.
Use this when the API response includes a direct link such as next, next_url, or links.next.
Cursor Pagination
Use a cursor (token or bookmark) returned by the API to request the next page.
Use this when the API provides a value like next_cursor, cursor, or offset_token that must be sent back in the next request.
Offset & Limit Pagination
Increment an offset value alongside a fixed limit to fetch successive pages of results.
Use this when the API accepts parameters like offset and limit (or skip and take)
to control which records are returned.
Page Parameter Body Pagination (JSON Body Parameter)
Increment a page number inside the request body (for example "page": 1 inside a JSON payload).
Use this when the API requires pagination values in the POST body instead of the URL.
All pagination methods share the same basic setup pattern:
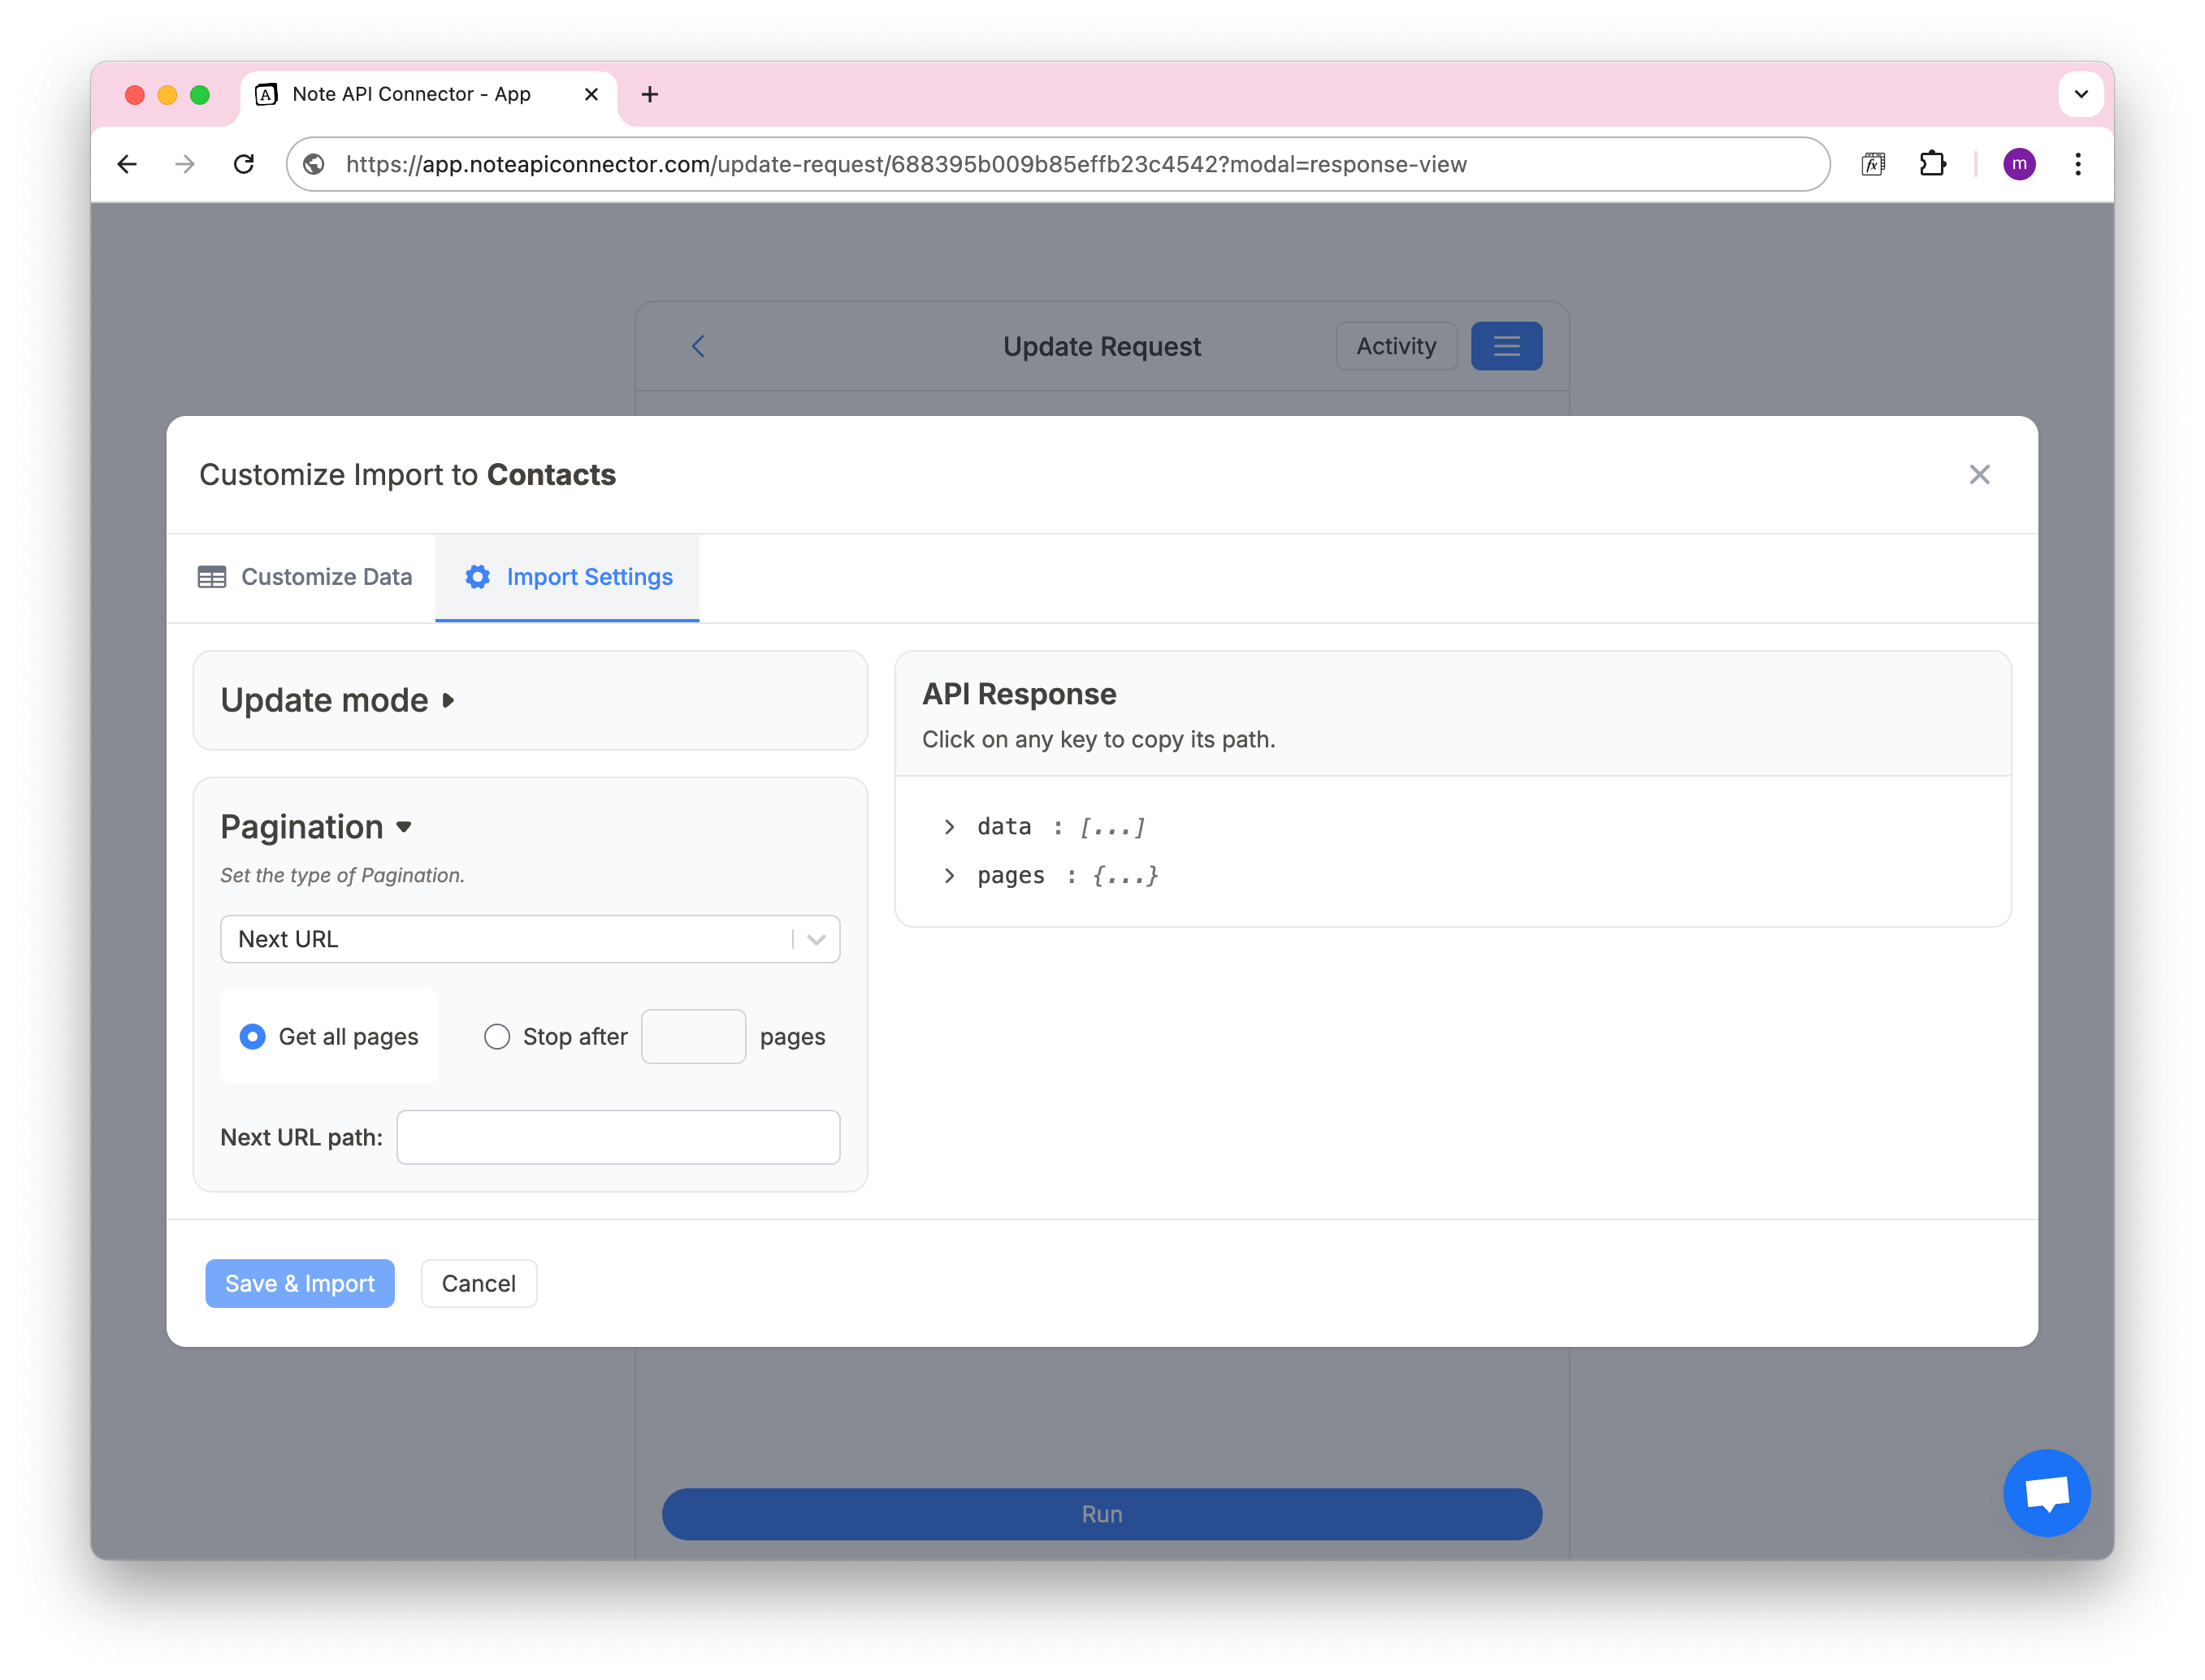
- In the Response View, open Import Settings tab and enable Pagination.
- Choose the pagination method that matches the API you are integrating (Next URL, Cursor, Page Parameter, Page Parameter Body).
- Choose whether to:
- ✅ Fetch all pages — Note API Connector will continue following the next URLs until there are no more pages.
- 🔢 Fetch a limited number of pages — Stop after the number of pages you specify.
- Provide the method-specific settings described below.
Page Parameter Pagination
Some APIs use a simple page number approach for pagination. Instead of providing a "next URL" or cursor, you simply increment a page number (like page=1, page=2, page=3) in each request until all data is retrieved.
This is one of the most common pagination methods, especially in REST APIs. The page number is typically passed as a query parameter in the URL (e.g., ?page=1).
Setup Steps
- In Response View → Import Settings → Pagination, choose Page Parameter as the pagination method.
- Choose Fetch all pages or Fetch a limited number of pages.
- In Page parameter name, enter the query parameter name used by the API (e.g.
page,pageNumber,p).

How It Works
Note API Connector automatically:
- Starts with page 1.
- Makes the first request with
?page=1. - Checks if the response contains data.
- If data is found, increments to the next page
?page=2and repeats. - Stops when the response is empty or contains no more results.
Example
Initial request
GET https://api.example.com/items?perPage=50&page=1
Requests sent by the connector (Get all pages):
GET https://api.example.com/items?perPage=50&page=1
GET https://api.example.com/items?perPage=50&page=2
GET https://api.example.com/items?perPage=50&page=3
...
Next URL Pagination
Note API Connector can automatically follow the "next page" link provided by the API, fetch more data, and continue until all the pages are loaded, or until you've reached a page limit you define.
Setup Steps
- In Response View → Import Settings → Pagination, choose Next URL as the pagination method.
- Choose Fetch all pages or Fetch a limited number of pages.
- In the Next URL Path field, specify where the next page URL is located in your API response.
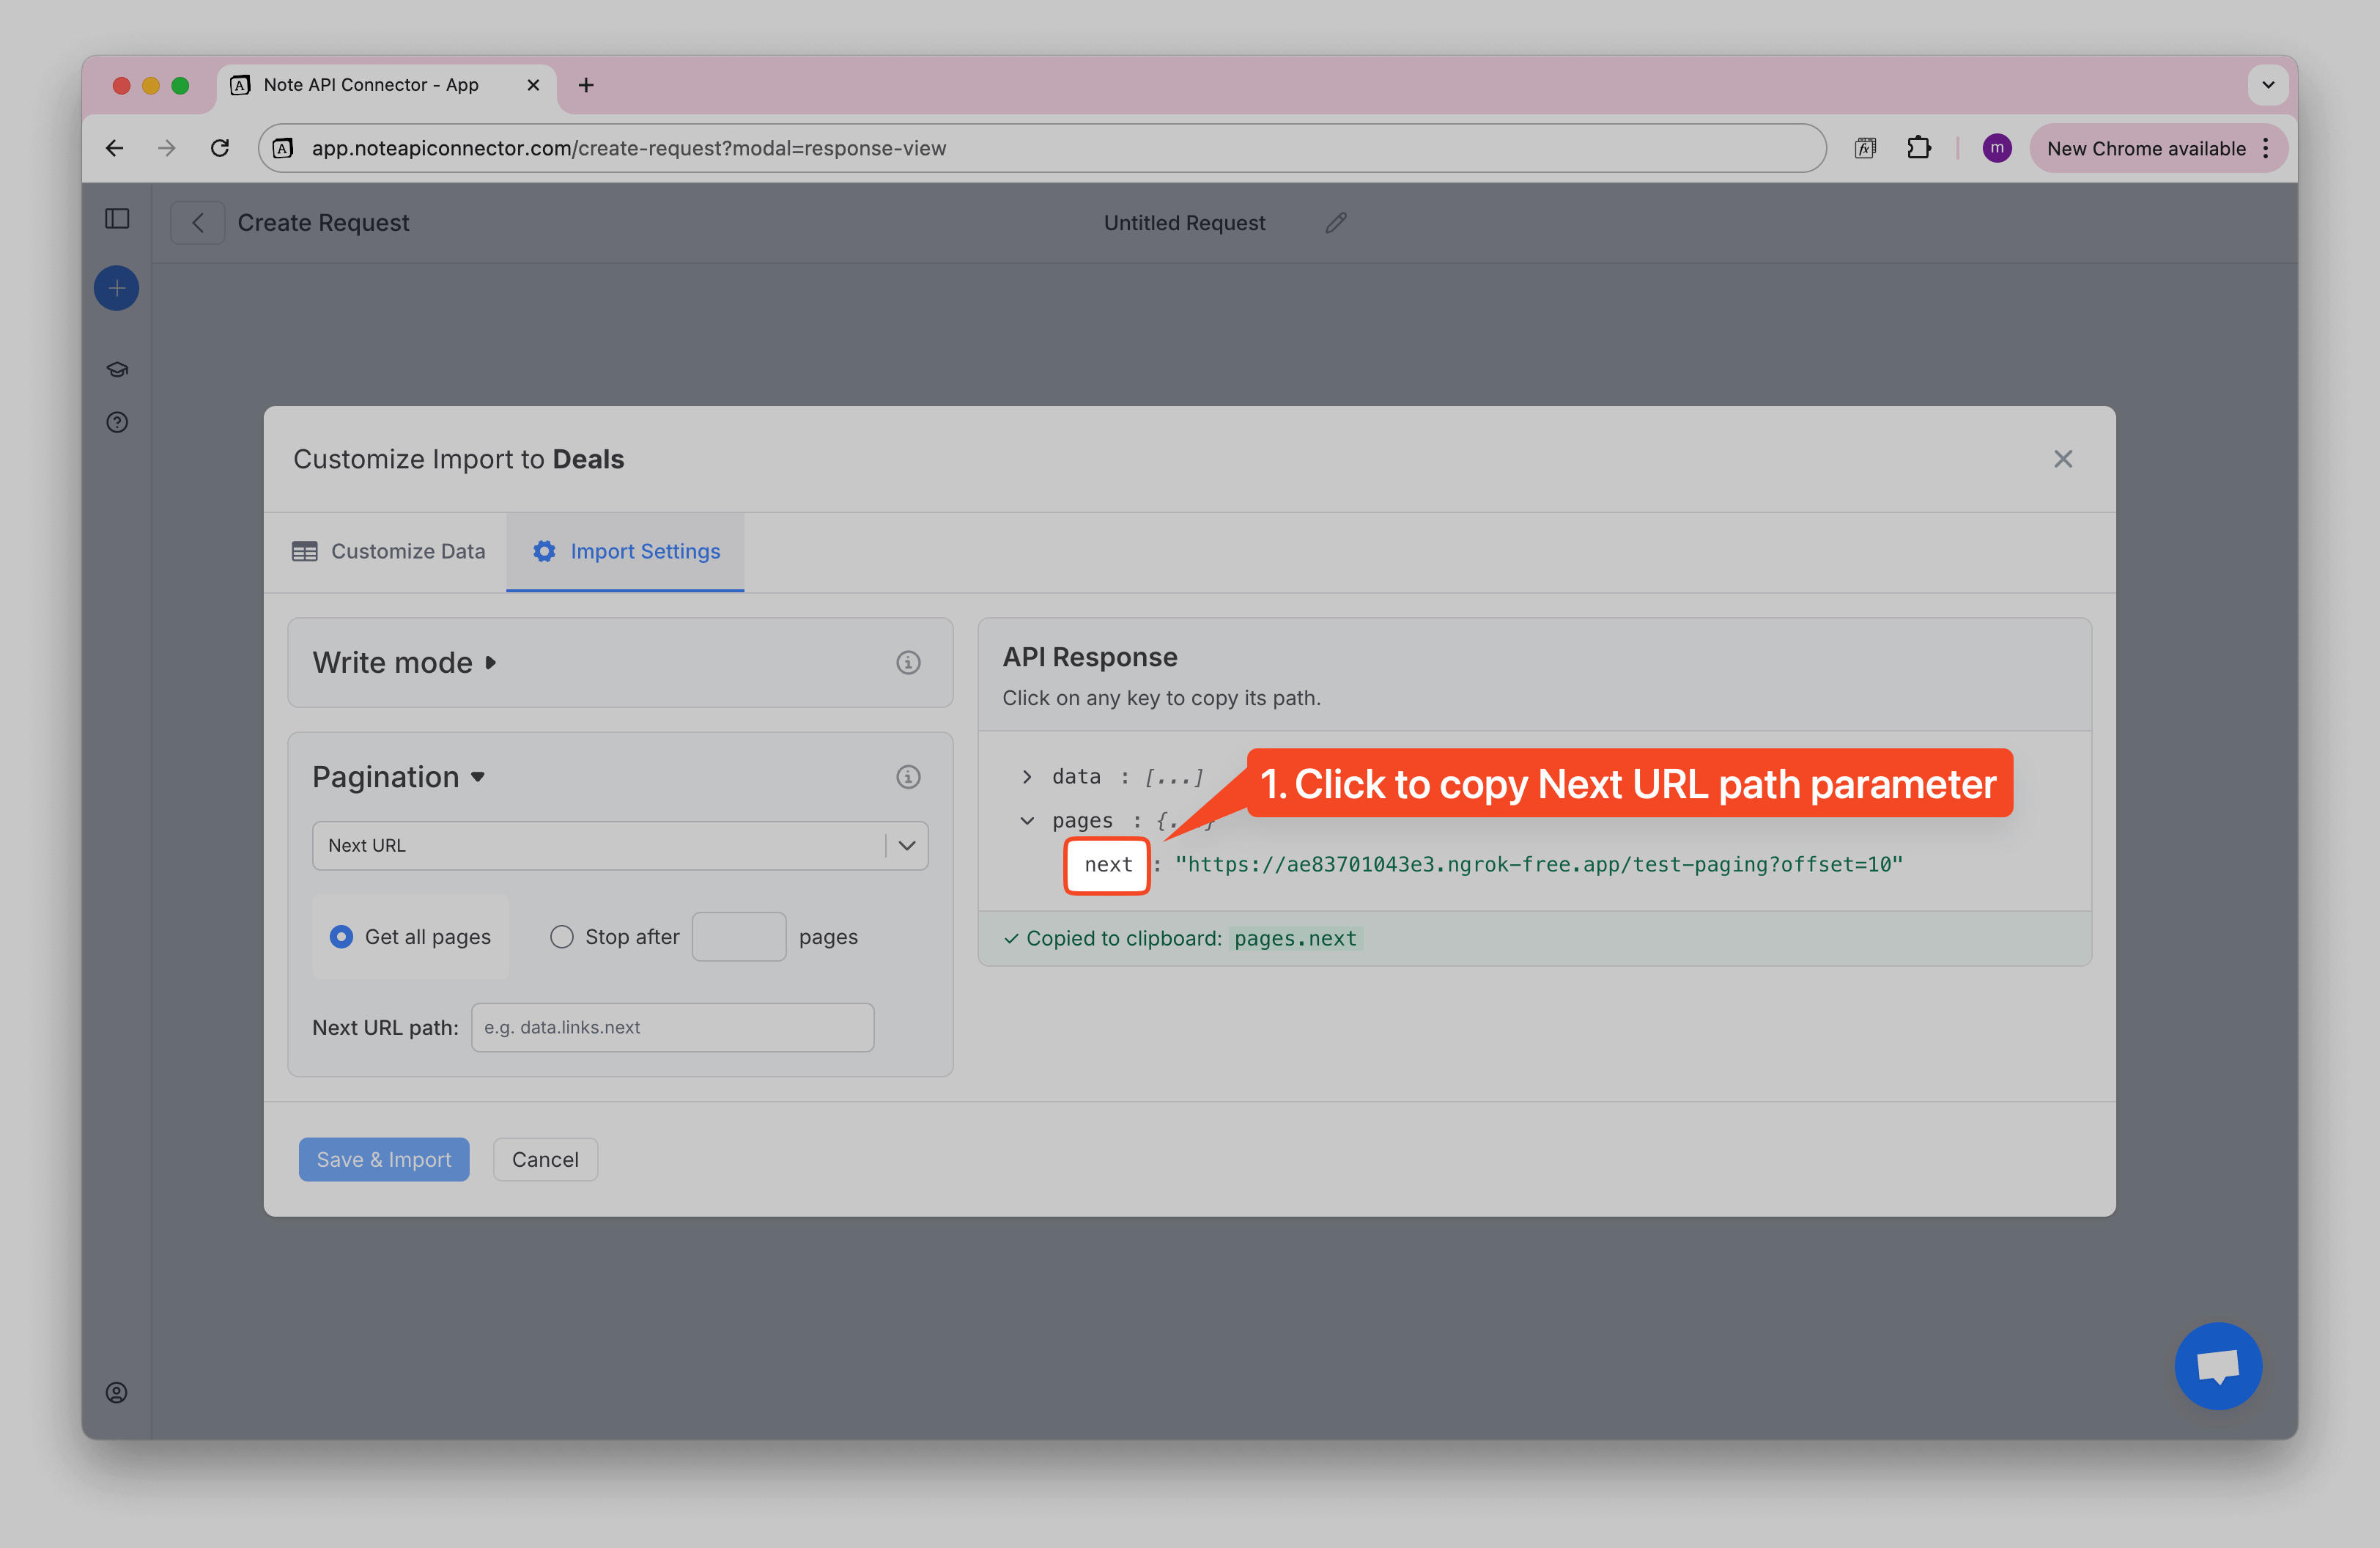
How to Find the Next URL Path
To help you find the correct path:
1️⃣ On the right side, you'll see a tree view of your API response.
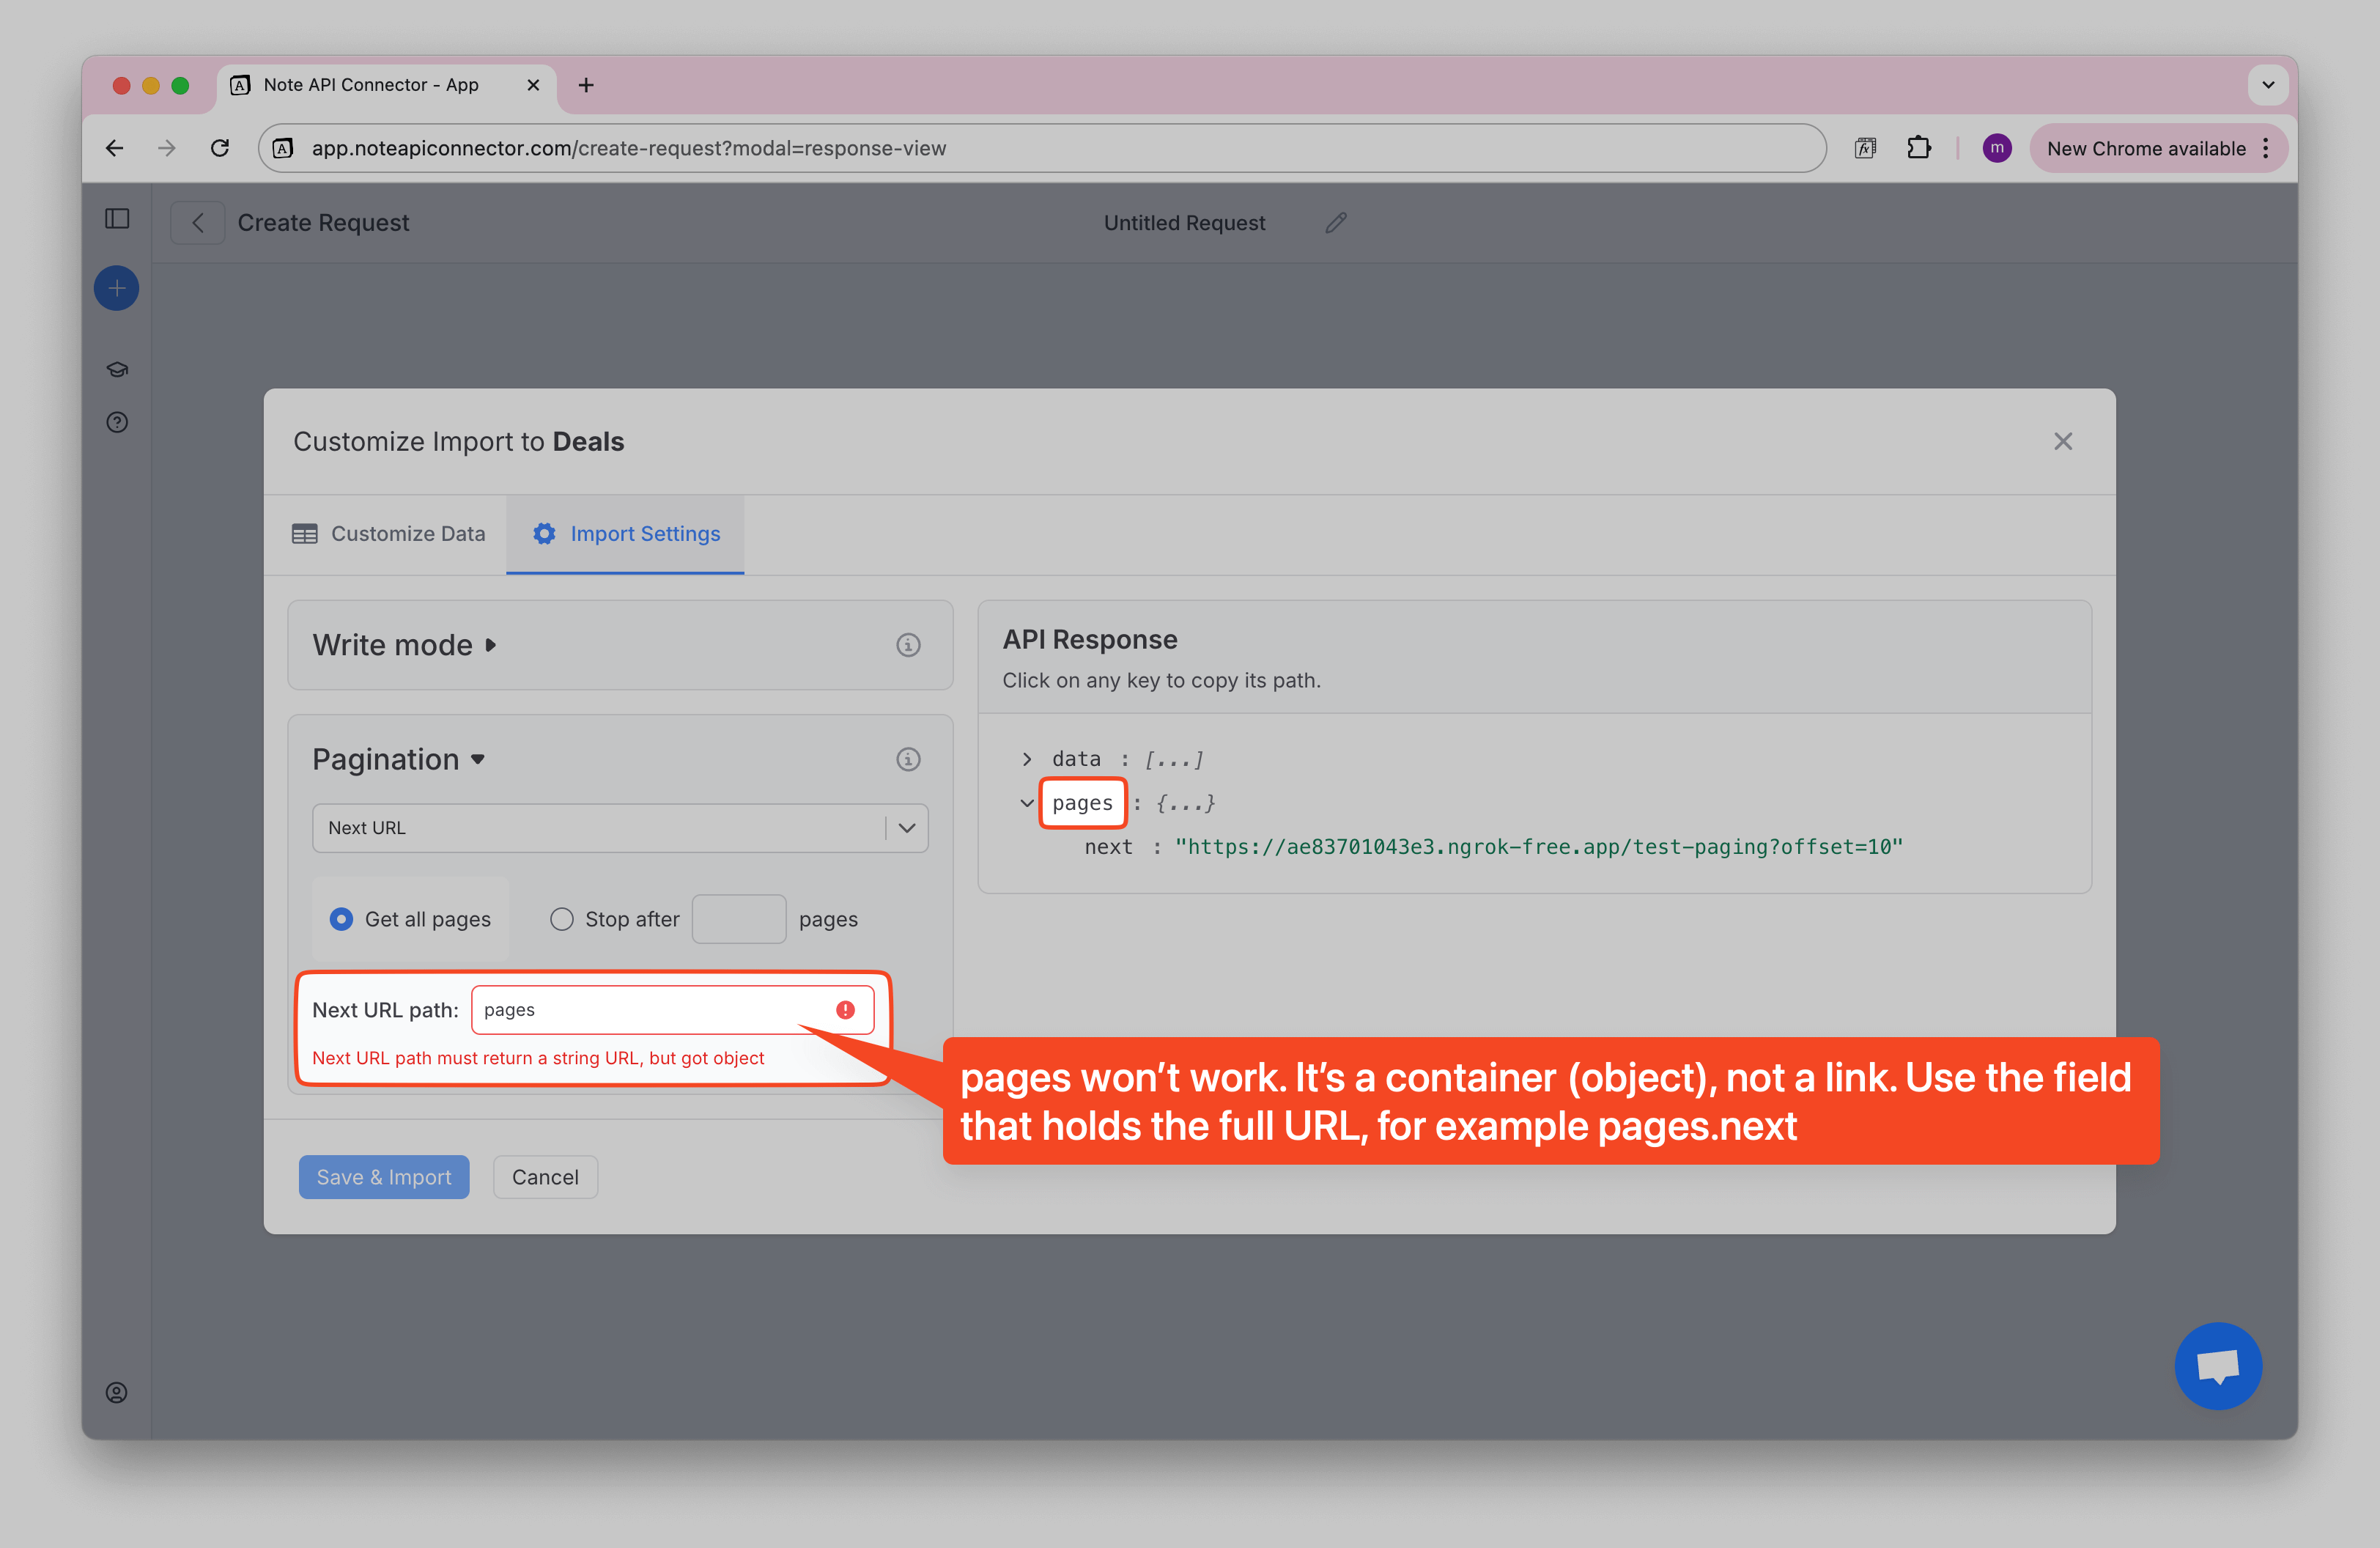
2️⃣ Find the field that contains the "next page" URL (e.g., pagination.next, meta.next, or links.next_url).
3️⃣ Click the copy icon to copy the path.
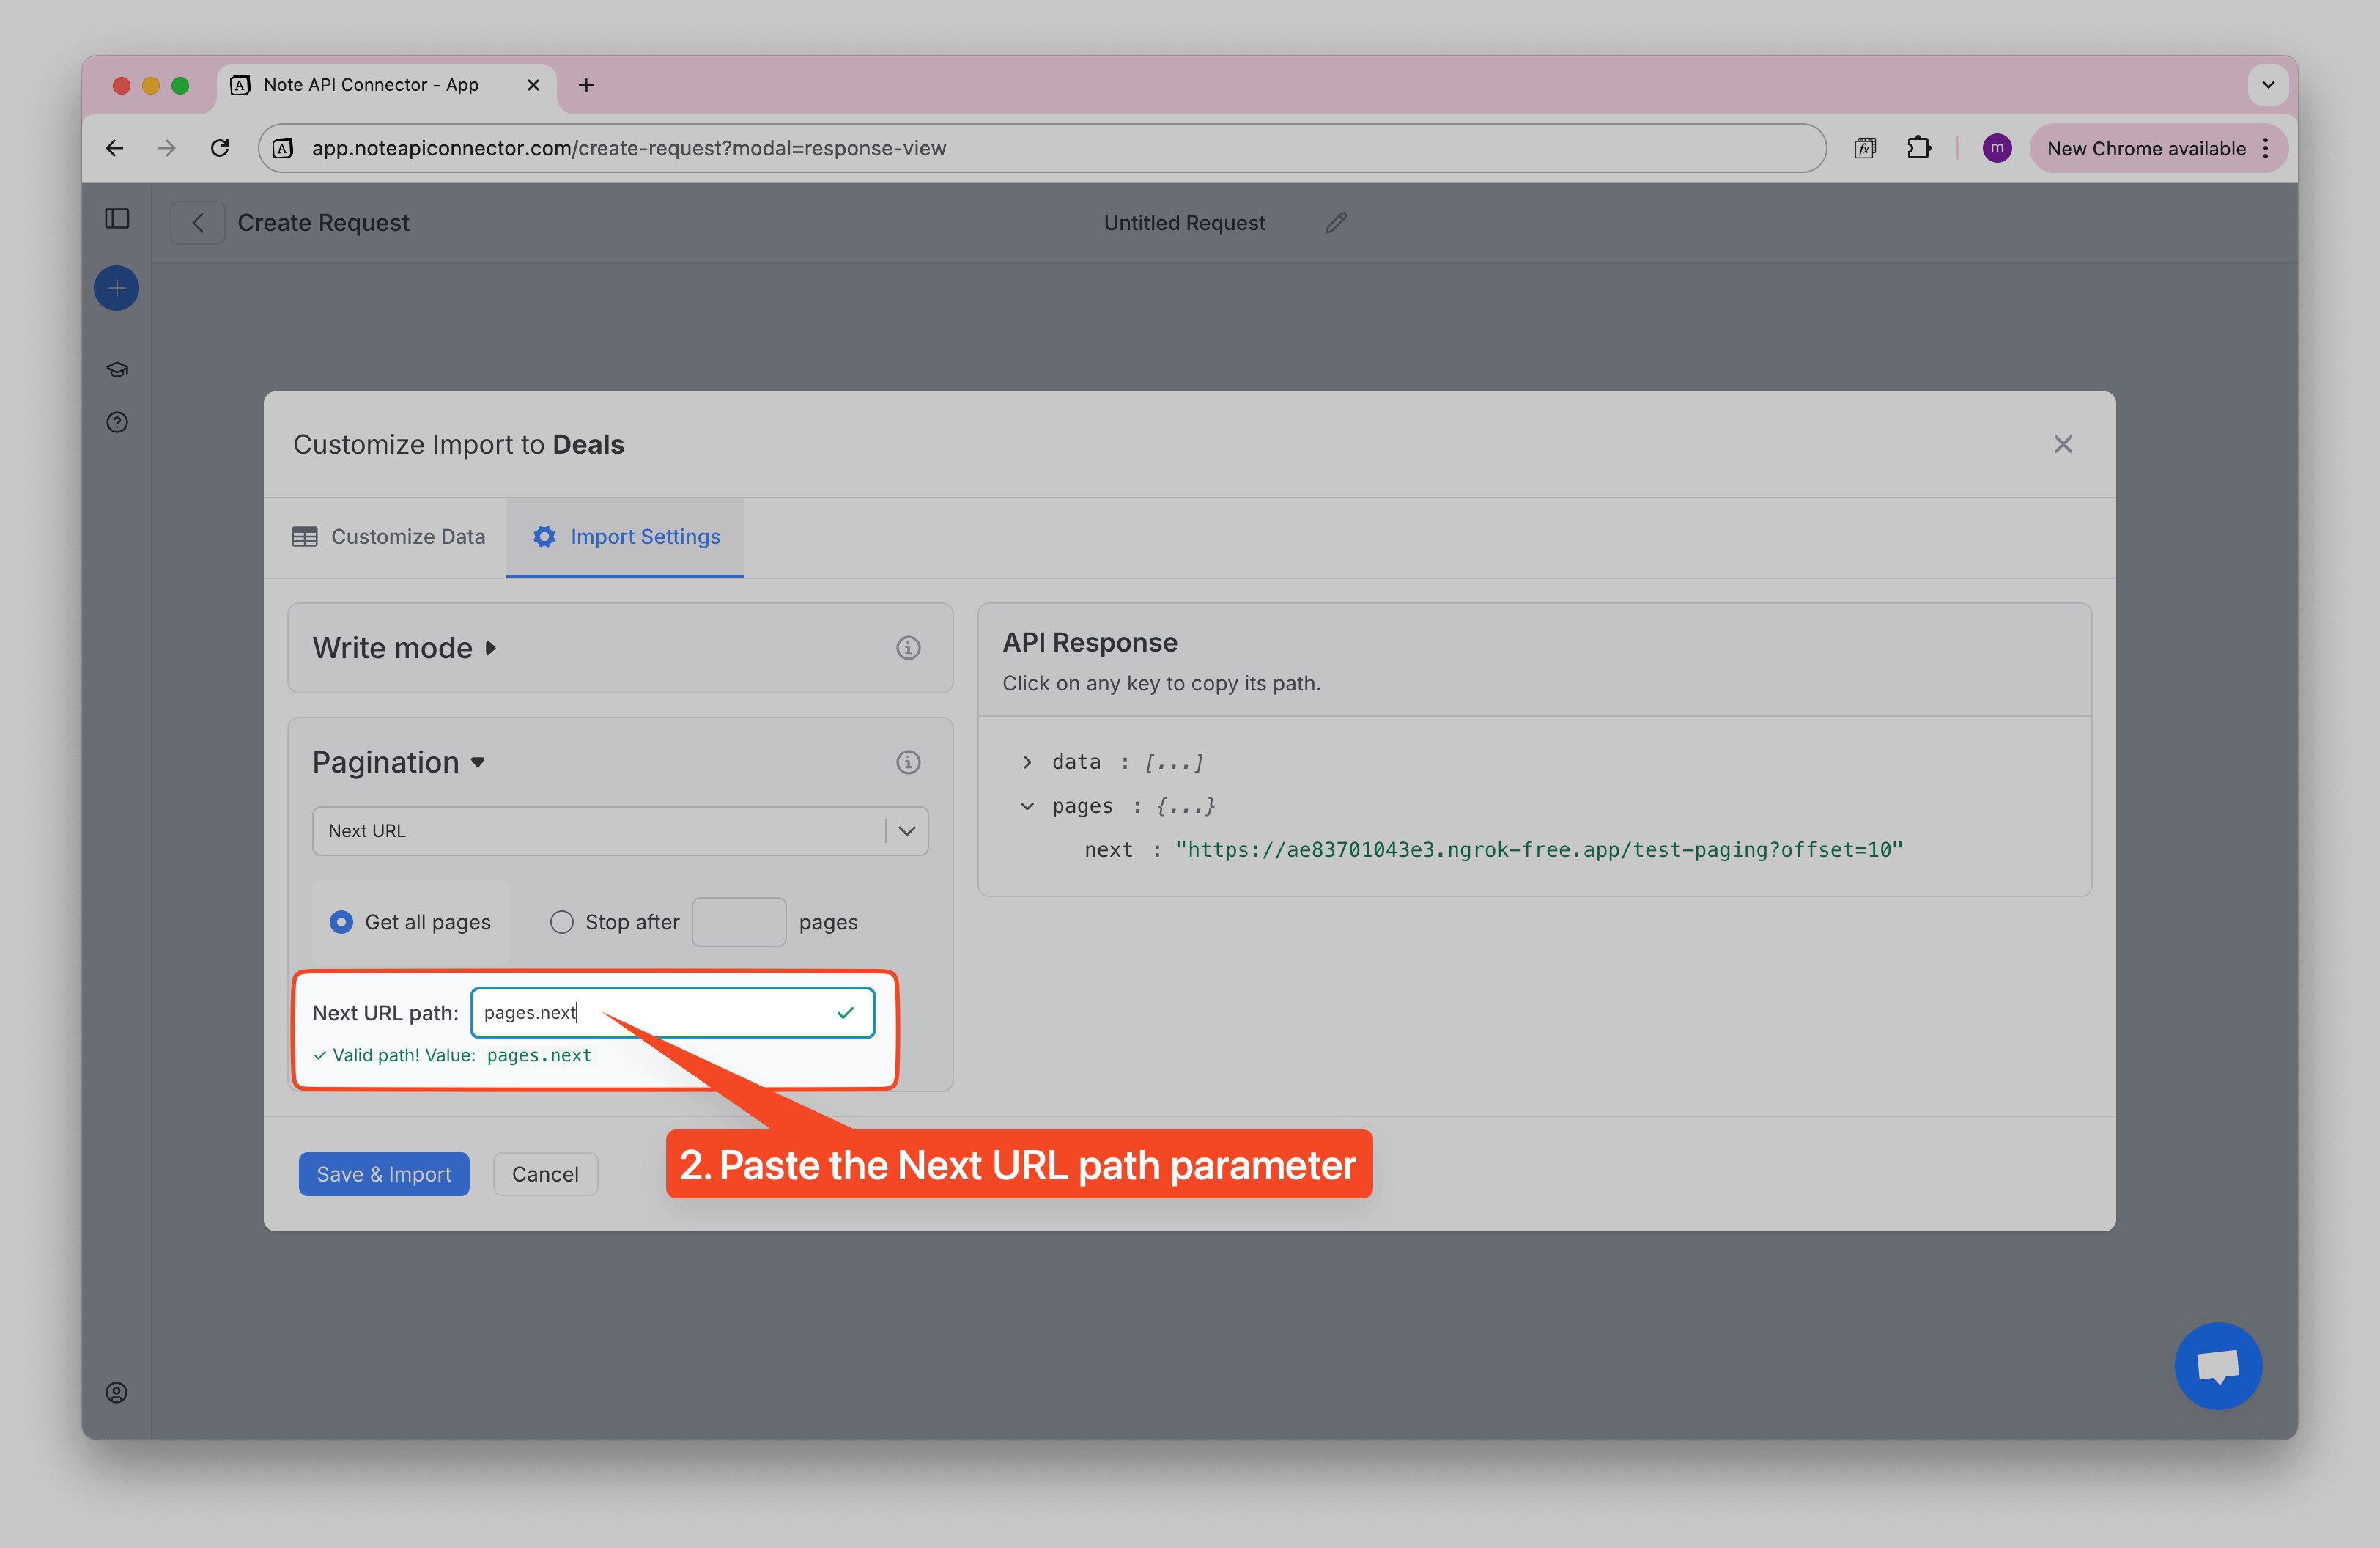
4️⃣ Paste it into the Next URL Path field in the pagination settings.
✅ Once pasted, Note API Connector will validate the path. If the path is correct, you'll see a green checkmark and a message confirming it's a valid path.
The Next URL Path field also supports JMES Path expressions for more complex scenarios. For example, if you need to extract a URL from a nested array or apply conditional logic, you can use JMES syntax like data[0].links.next or paging.next.link.
Examples
Even though APIs may look different, the logic is the same: look for the value that contains a URL to the next page.
Example 1: If the API response looks like this:
{
  "results": [...],
  "pagination": {
    "next": "https://api.example.com/data?page=2"
  }
}
The Next URL Path would be:
pagination.next
Example 2: If the API response looks like this:
{
  "data": [...],
  "meta": {
    "next": "https://api.myapi.com/data?offset=20"
  }
}
The Next URL Path would be:
meta.next
Example 3: If the API response looks like this:
{
  "items": [...],
  "links": {
    "self": "https://...",
    "next_url": "https://api.anotherapi.com/page/3"
  }
}
The Next URL Path would be:
links.next_url
Example 4: Some APIs return
nullor an empty string when there are no more pages to fetch:{
"data": [...],
"nextPage": null
}or
{
  "data": [...],
  "nextPage": ""
}
The Next URL Path would be:
nextPageNote: This usually means you're already on the last (or only) page. Pagination stops when the value is
null, empty, or missing.
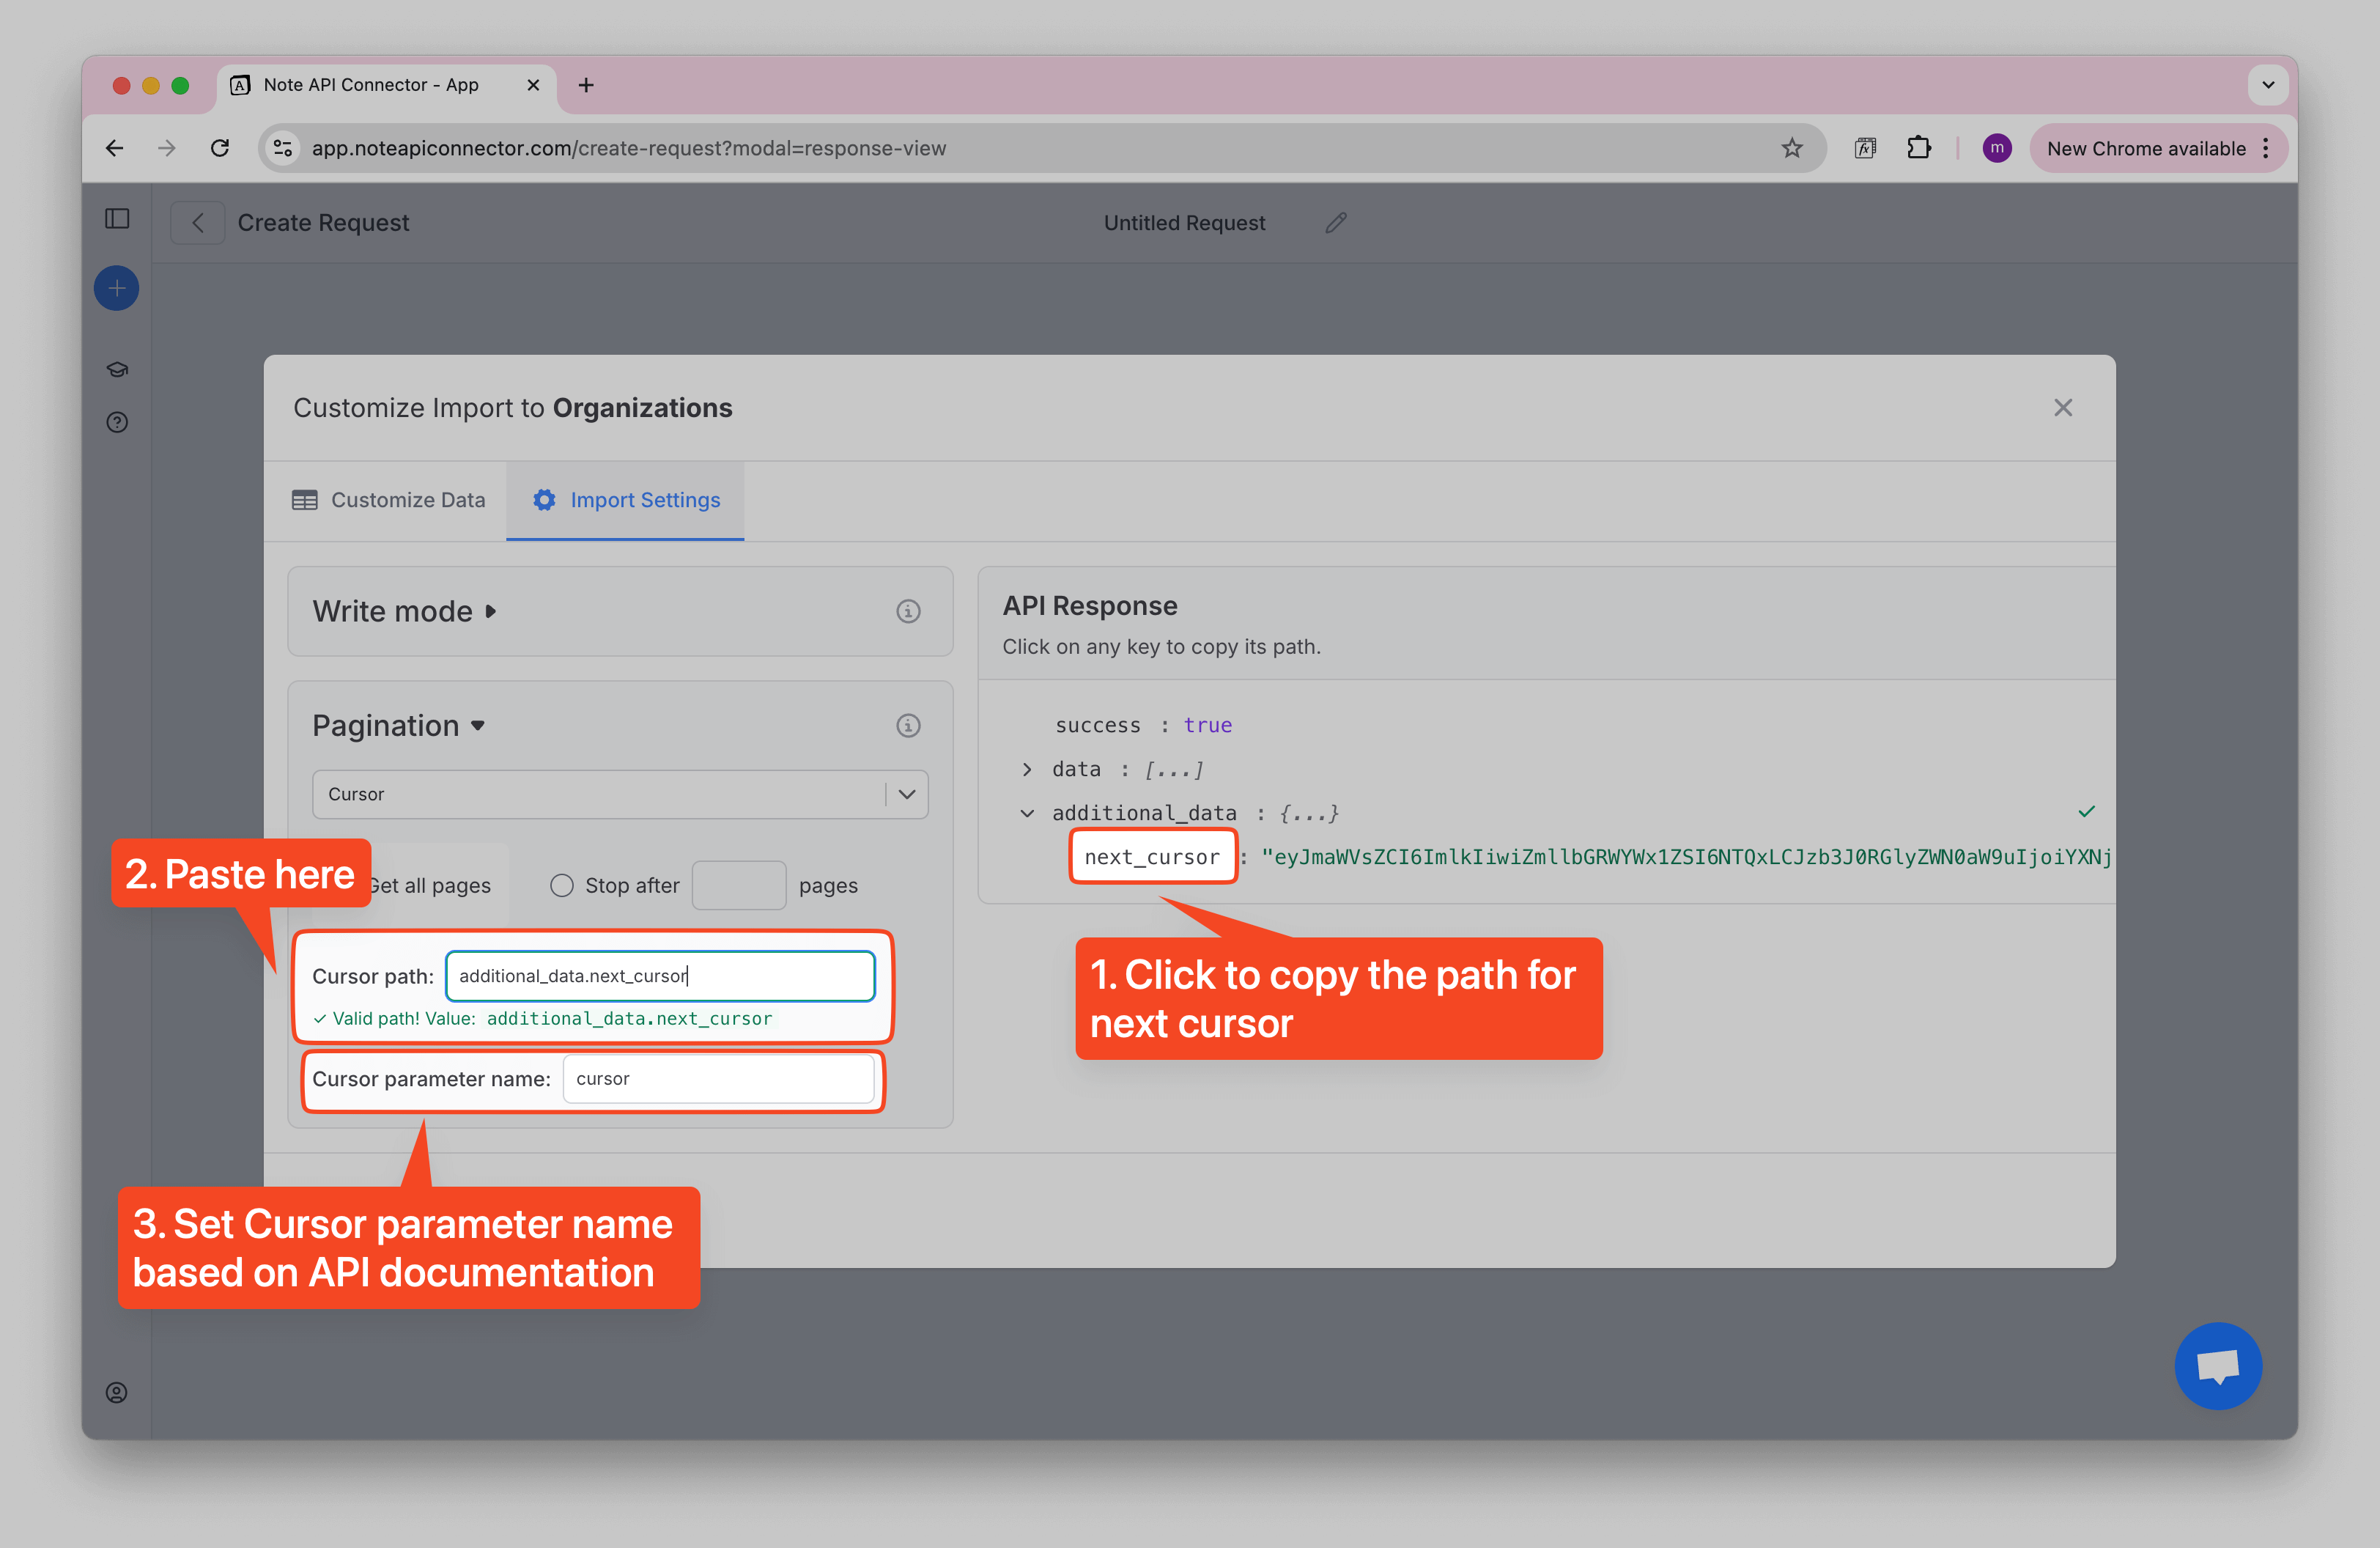
Cursor Pagination
Some APIs don’t give you a link to the next page. Instead, they use something called a cursor.
Think of a cursor like a bookmark. When you fetch data, the API gives you a small “bookmark” (often called next_cursor or similar). You send that bookmark back in your next request, and the API uses it to give you the following set of results. You repeat this process until there are no more bookmarks left.
Setup Steps
- In Response View → Import Settings → Pagination, choose Cursor as the pagination method.
- Choose Fetch all pages or Fetch a limited number of pages.
- In the Cursor Path field, enter where the cursor value appears in your API response (e.g.,
data.next_cursor). - In the Cursor Parameter Name field, enter the name of the parameter the API expects when you send the cursor back (e.g.,
cursor).
How to Find the Cursor Path and Parameter
- Use the API Response Tree View on the right to locate the field with the cursor value (it might be called
next_cursor,endCursor, or something similar). - Click to copy the path and paste it into the Cursor Path field.
- Then check your API docs (or the response) to see the name of the parameter that carries the cursor when requesting the next page (for example,
"cursor": "abc123"). Enter that into the Cursor Parameter Name field.
The Cursor Path field also supports JMES Path expressions for extracting cursor values from complex response structures. For example, you can use data[-1].id to get the ID of the last item in an array, or results[*].cursor | [0] for conditional cursor extraction.
Example
If the API response looks like this:
{
  "data": [...],
  "paging": {
    "next_cursor": "abc123"
  }
}
- Cursor Path:
paging.next_cursor - Cursor Parameter Name:
cursor
✅ With this setup, Note API Connector will keep following the cursor until all the data is imported (or until you stop it after a set number of pages).
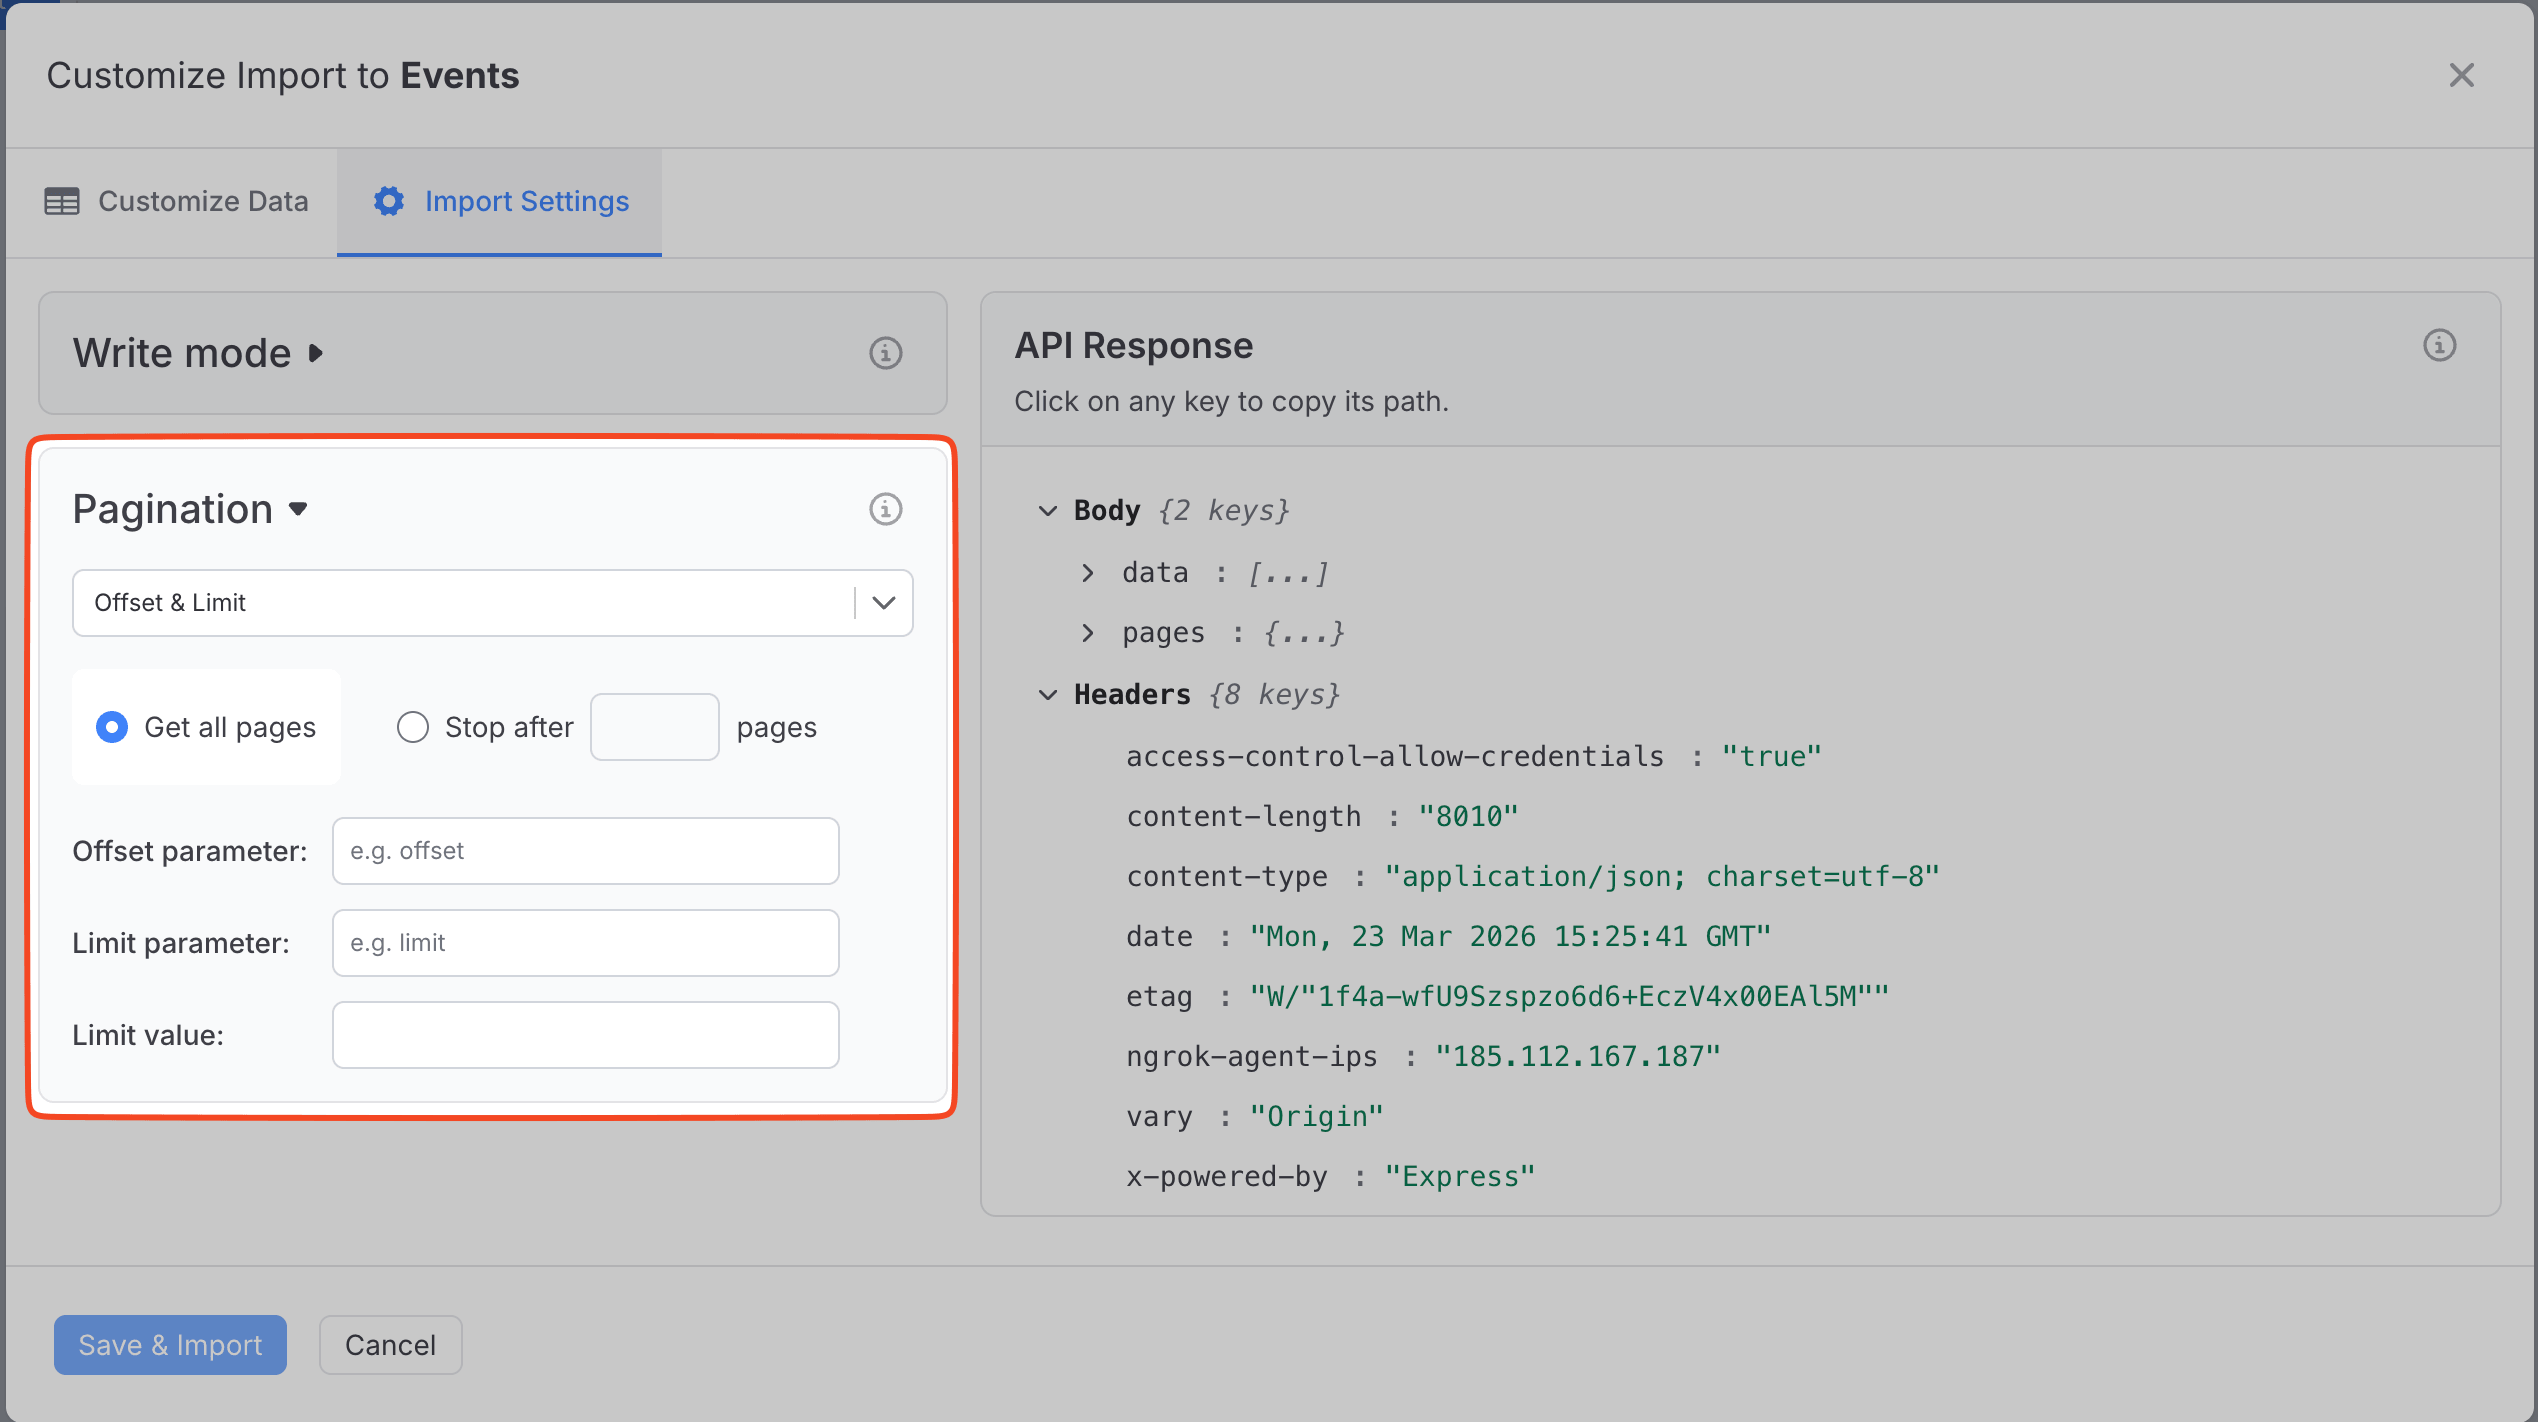
Offset & Limit Pagination
Some APIs don't use page numbers or cursors. Instead, they let you control results by specifying:
- Offset — how many records to skip (e.g.
0,50,100) - Limit parameter — the query parameter name the API expects for page size (e.g.
limit,take,count) - Limit value — how many records to return per request (e.g.
50)
For example, to get records 51–100 you would send offset=50&limit=50. Note API Connector handles this automatically by incrementing the offset after each request.
Setup Steps
- In Response View → Import Settings → Pagination, choose Offset & Limit as the pagination method.
- Choose Fetch all pages or Fetch a limited number of pages.
- In the Offset parameter field, enter the query parameter name your API uses for the offset (e.g.
offset,skip,from). - In the Limit parameter field, enter the query parameter name your API uses for the page size (e.g.
limit,take,count). - In the Limit value field, enter the number of records to request per page (e.g.
50,100).
How It Works
Note API Connector automatically:
- Starts with an offset of
0. - Makes the first request using
?offset=0&limit={your limit value}. - Checks if the response contains data.
- If data is found, increments the offset by the limit value and repeats.
- Stops when the response returns fewer records than the limit, or returns no records at all.
Example
Your API endpoint:
GET https://api.example.com/events
Setup:
- Offset parameter:
offset - Limit parameter:
limit - Limit value:
50
Requests sent by the connector (Get all pages):
GET https://api.example.com/events?offset=0&limit=50
GET https://api.example.com/events?offset=50&limit=50
GET https://api.example.com/events?offset=100&limit=50
...
Pagination stops automatically when a response returns fewer than 50 records, signalling the last page has been reached.
Offset & Limit and Page Parameter both use query parameters, but work differently. Page Parameter increments a page number (page=1, page=2), while Offset & Limit increments a record count (offset=0, offset=50). Check your API docs to see which approach it expects.
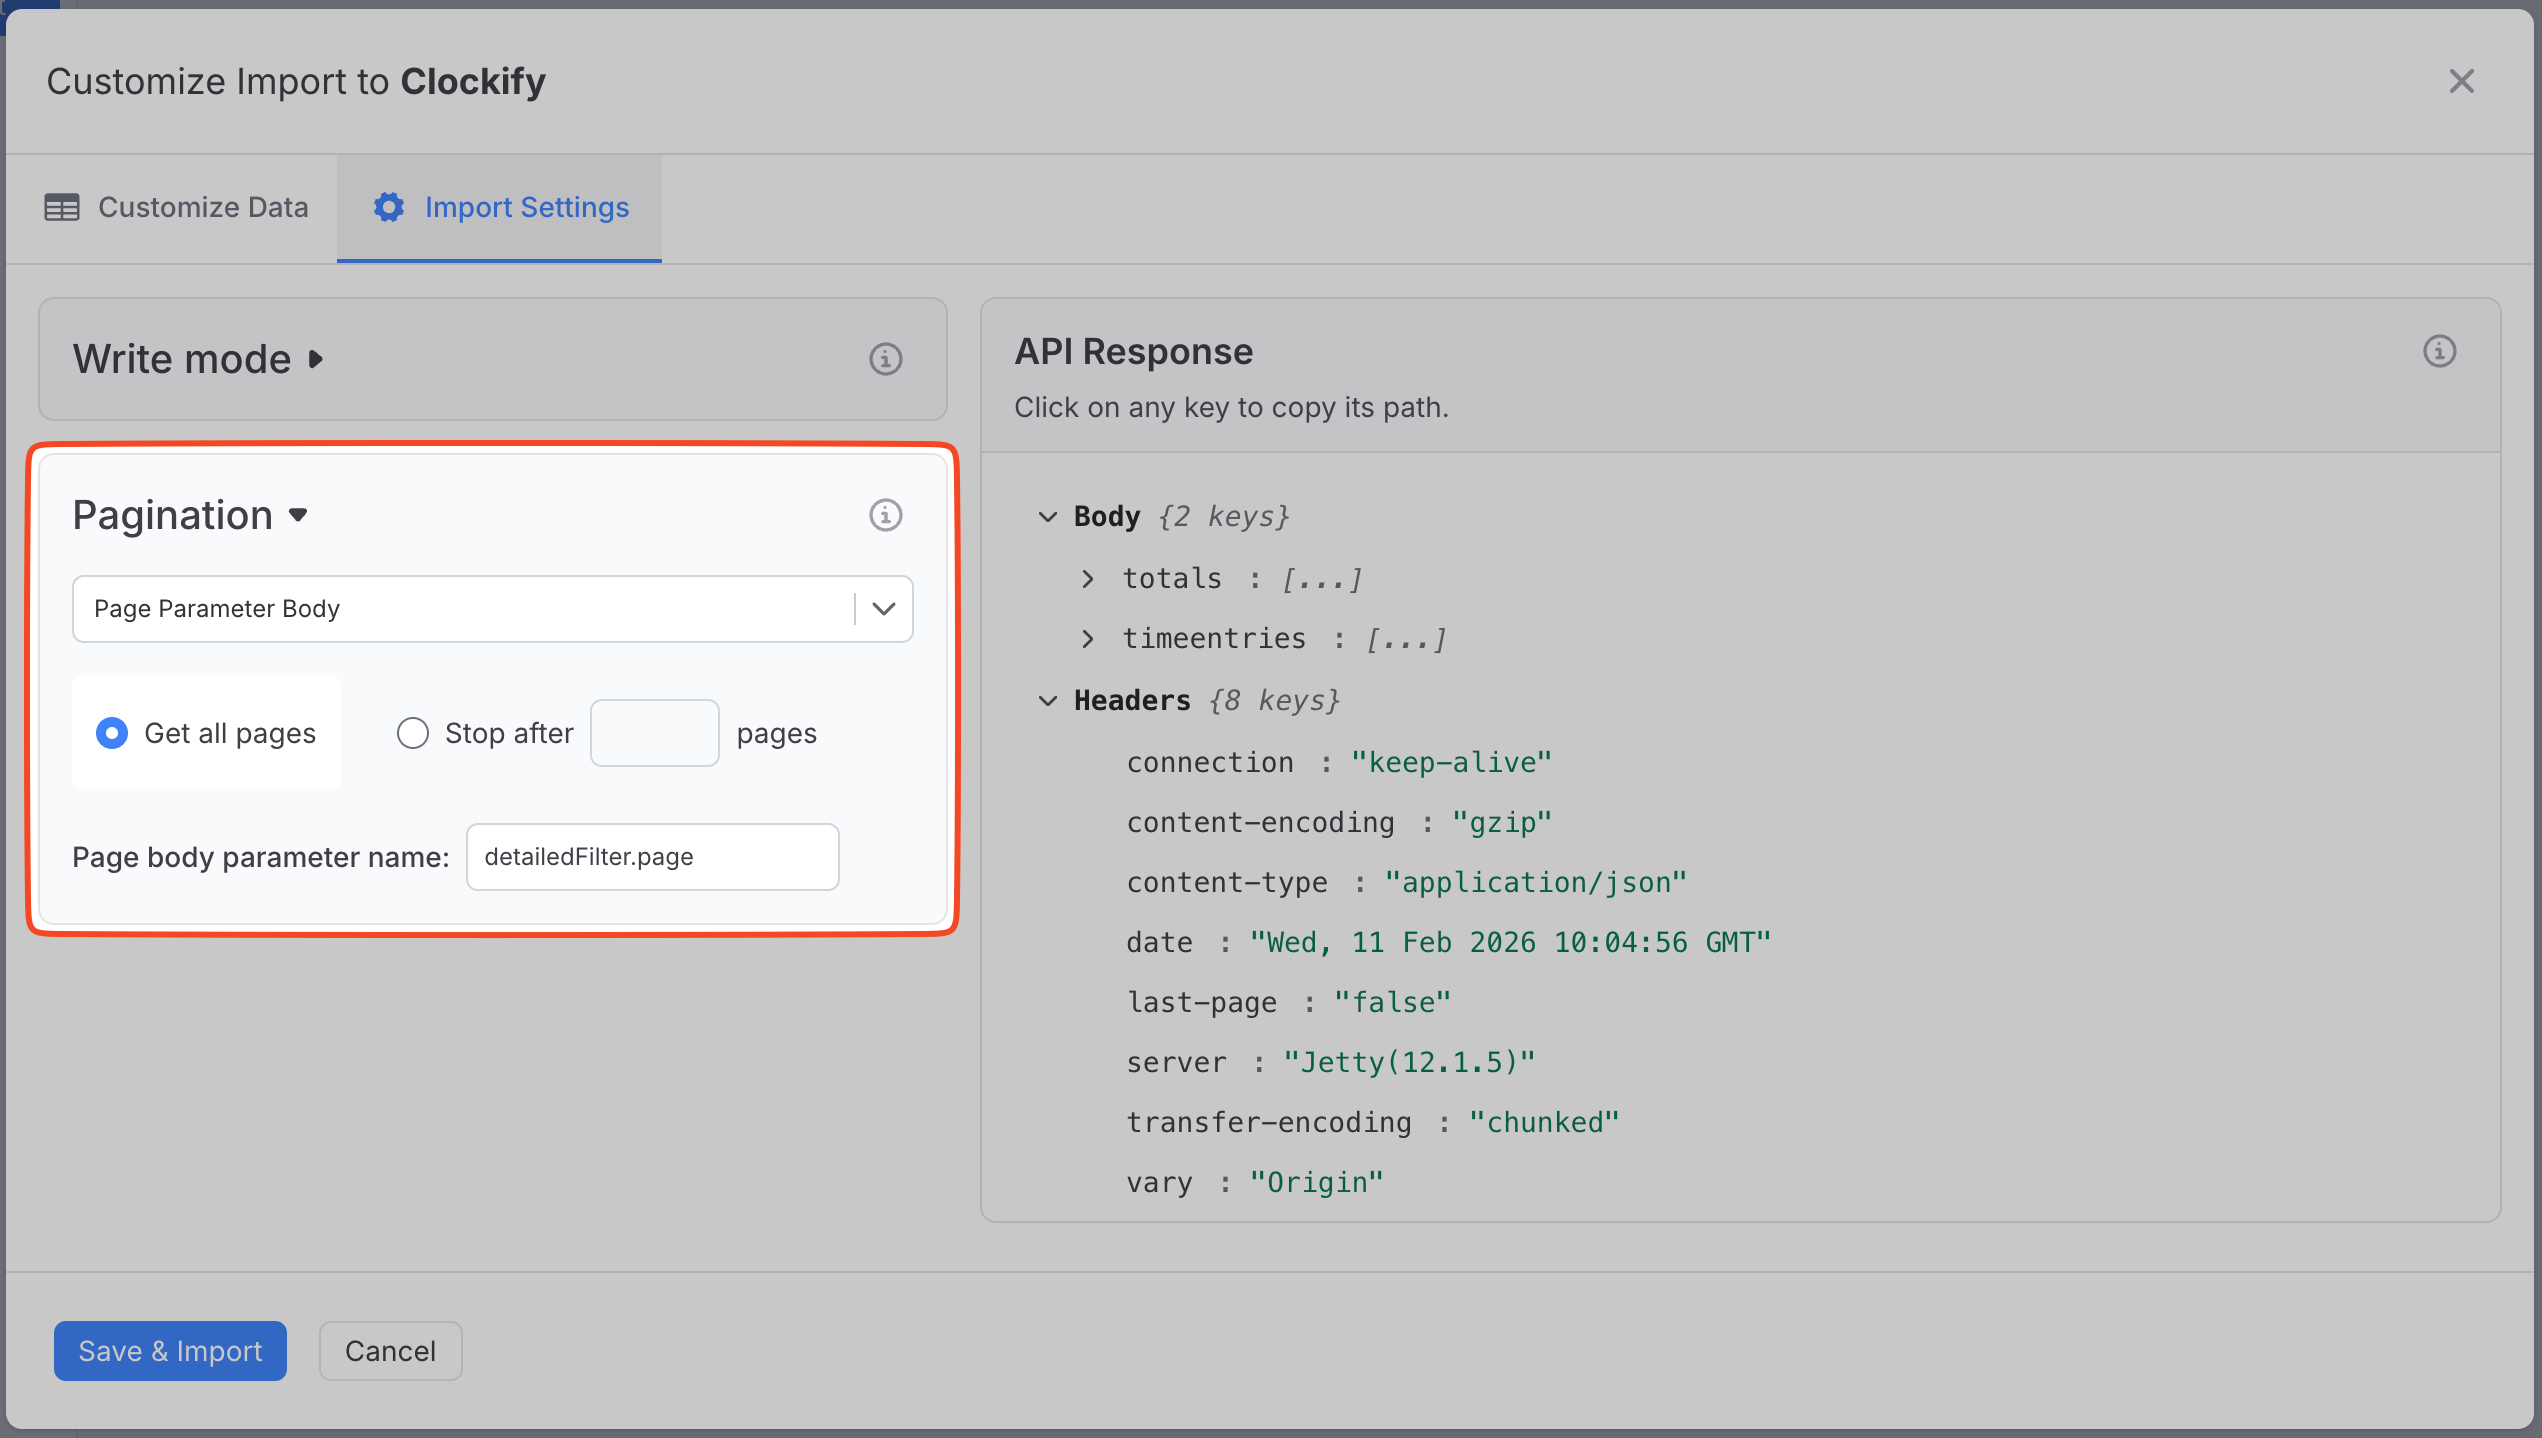
Page Parameter Body Pagination
Some APIs don't accept pagination parameters in the URL. Instead, they require you to send the page number in the request body as part of a JSON payload. This is common with APIs that use POST requests for data retrieval.
How to Set It Up
- In Response View → Import Settings → Pagination, choose Page Parameter Body as the pagination method.
- Choose Fetch all pages or Fetch a limited number of pages.
- In the Page body parameter name field, enter the path where the page number should be placed in your request body (e.g.,
page,pagination.page,detailedFilter.page).
How It Works
Note API Connector automatically:
- Takes your existing request body.
- Injects or updates the page number at the specified path.
- Sends the first request with page 1.
- Increments the page number in the body for each subsequent request.
- Stops when the response is empty or contains no more results.
Examples
Example 1: Simple Body Pagination
Your API requires a POST request to:
POST https://api.example.com/search
Your request body template:
{
  page: 1,
  limit: 50,
  filters: {
    status: active
  }
}
Setup:
- Page body parameter name:
page
What Note API Connector does:
Request 1 body:
{
  page: 1,
  limit: 50,
  filters: {status: active}
}
Request 2 body:
{
  page: 2,
  limit: 50,
  filters: {status: active}
}
Request 3 body:
{
  page: 3,
  limit: 50,
  filters: {status: active}
}
All other parameters remain unchanged.
Example 2: Nested Pagination Object
API endpoint:
POST https://api.service.com/data
Your request body template:
{
  query: sales report,
  pagination: {
    page: 1,
    perPage: 100
  },
  sortBy: date
}
Setup:
- Page body parameter name:
pagination.page
What Note API Connector does:
Request 1 body:
{
  query: sales report,
  pagination: {
    page: 1,
    perPage: 100
  },
  sortBy: date
}
Request 2 body:
{
  query: sales report,
  pagination: {
    page: 2,
    perPage: 100
  },
  sortBy: date
}
Example 3: Clockify Detailed Reports
The Clockify API's detailed report endpoint requires:
POST https://reports.api.clockify.me/v1/workspaces/{workspaceId}/reports/detailed
Your request body template:
{
  dateRangeStart: 2024-01-01T00:00:00.000Z,
  dateRangeEnd: 2024-01-31T23:59:59.000Z,
  detailedFilter: {
    page: 1,
    pageSize: 50
  },
  users: {
    ids: [user123]
  }
}
Setup:
- Page body parameter name:
detailedFilter.page
What Note API Connector does:
Request 1 body:
{
  dateRangeStart: 2024-01-01T00:00:00.000Z,
  dateRangeEnd: 2024-01-31T23:59:59.000Z,
  detailedFilter: {
    page: 1,
    pageSize: 50
  },
  users: {ids: [user123]}
}
Request 2 body:
{
  dateRangeStart: 2024-01-01T00:00:00.000Z,
  dateRangeEnd: 2024-01-31T23:59:59.000Z,
  detailedFilter: {
    page: 2,
    pageSize: 50
  },
  users: {ids: [user123]}
}
Only detailedFilter.page changes; all other fields (date range, users, pageSize) remain exactly as configured.
Example 4: Deeply Nested Path
Some APIs have deeply nested structures:
{
  "request": {
    "filters": {
      "advanced": {
        "pagination": {
          "currentPage": 1,
          "itemsPerPage": 25
        }
      }
    }
  }
}
Setup:
- Page body parameter name:
request.filters.advanced.pagination.currentPage
Note API Connector will update only the currentPage value while preserving the entire nested structure.
Real-World Pagination Examples
For complete step-by-step pagination setups in popular APIs, see these tutorials:
- Stripe Cursor Pagination - Excellent example using cursor pagination with JMES expressions (
data[-1].id) andstarting_afterparameter - HubSpot Next URL Pagination - Next URL pagination using
paging.next.link - Freshdesk Next URL Pagination - Next URL pagination using
linkAPI response header - Pipedrive Cursor Pagination - Cursor pagination for large datasets with
next_cursor - Clockify Pagination - Page parameter body pagination for report endpoints (
detailedFilter.page) and page parameter pagination for time entries
How Paginated Requests Run
When you run a request with pagination enabled, the import happens in two sequential phases:
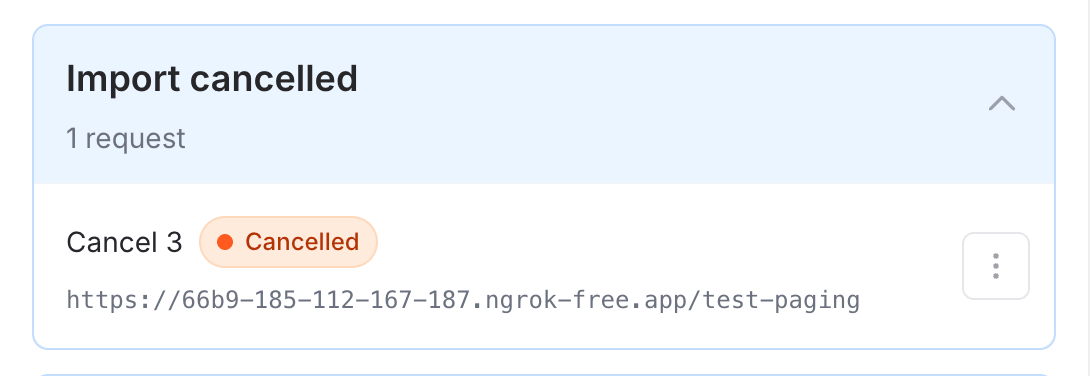
Phase 1 — Fetching Note API Connector collects all pages of data from the API before writing anything to Notion. You'll see the request status show Fetching... along with a progress percentage. During this phase, you can cancel the request — the job will stop and no data will be written to Notion. You can re-run it at any time.
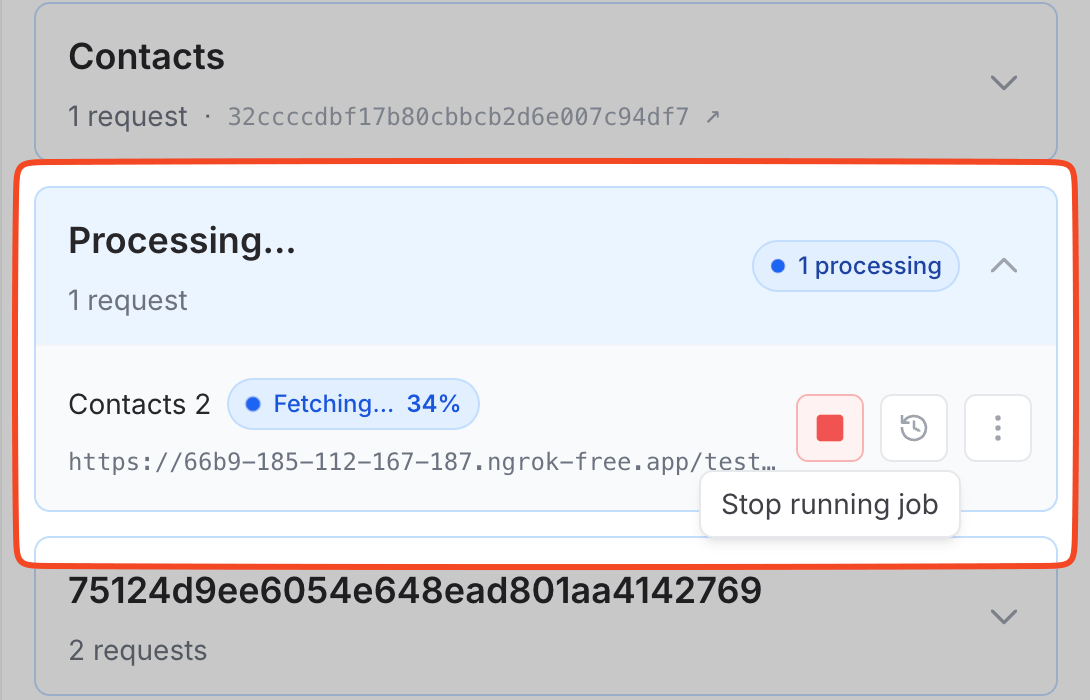
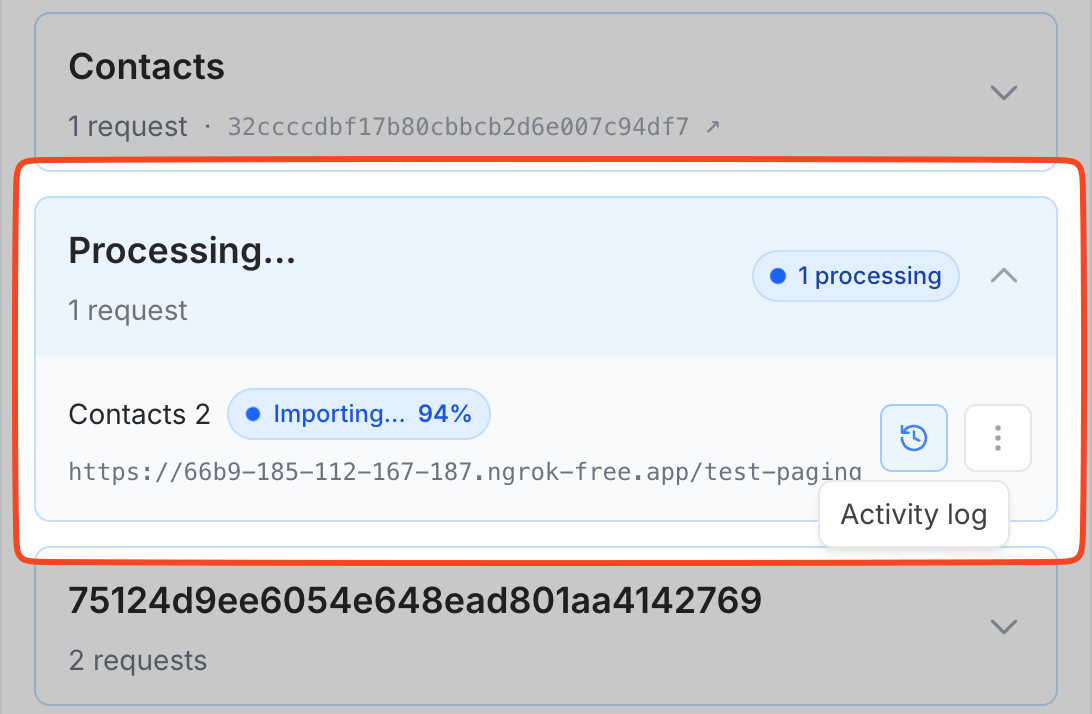
Phase 2 — Importing Once all pages have been fetched, Note API Connector starts writing the collected rows into Notion. The status changes to Importing... with a progress percentage. During this phase the request cannot be cancelled. You can follow the progress in the Run History.
The larger the dataset, the longer each phase may take. Fetching time depends on how many API pages need to be retrieved; importing time depends on the total number of rows being written to Notion.