Connect Google APIs
Before you start
Use the Available Presets for Google in most cases. You typically do not need to create your own Google OAuth client. See Connect to a preset OAuth.
If you need a Google API that isn’t covered by presets, follow this guide to create a custom Google OAuth connection. If something is missing, contact support and we’re happy to add it to the presets.
Tokens for custom Google OAuth connections expire after 1 week. Your OAuth configuration (client ID, client secret, URLs, scopes, and the saved connection record) is stored, so reconnecting is only a few clicks:
- Open Authorization → OAuth in Note API Connector
- Select your saved Google custom connection
- Click Configure → Connect and finish Google sign-in
To avoid periodic manual reconnects, prefer the Available Presets whenever possible.
Create a Google Cloud account (free)
Visit Google Cloud Console and click Try for free to create a free account.
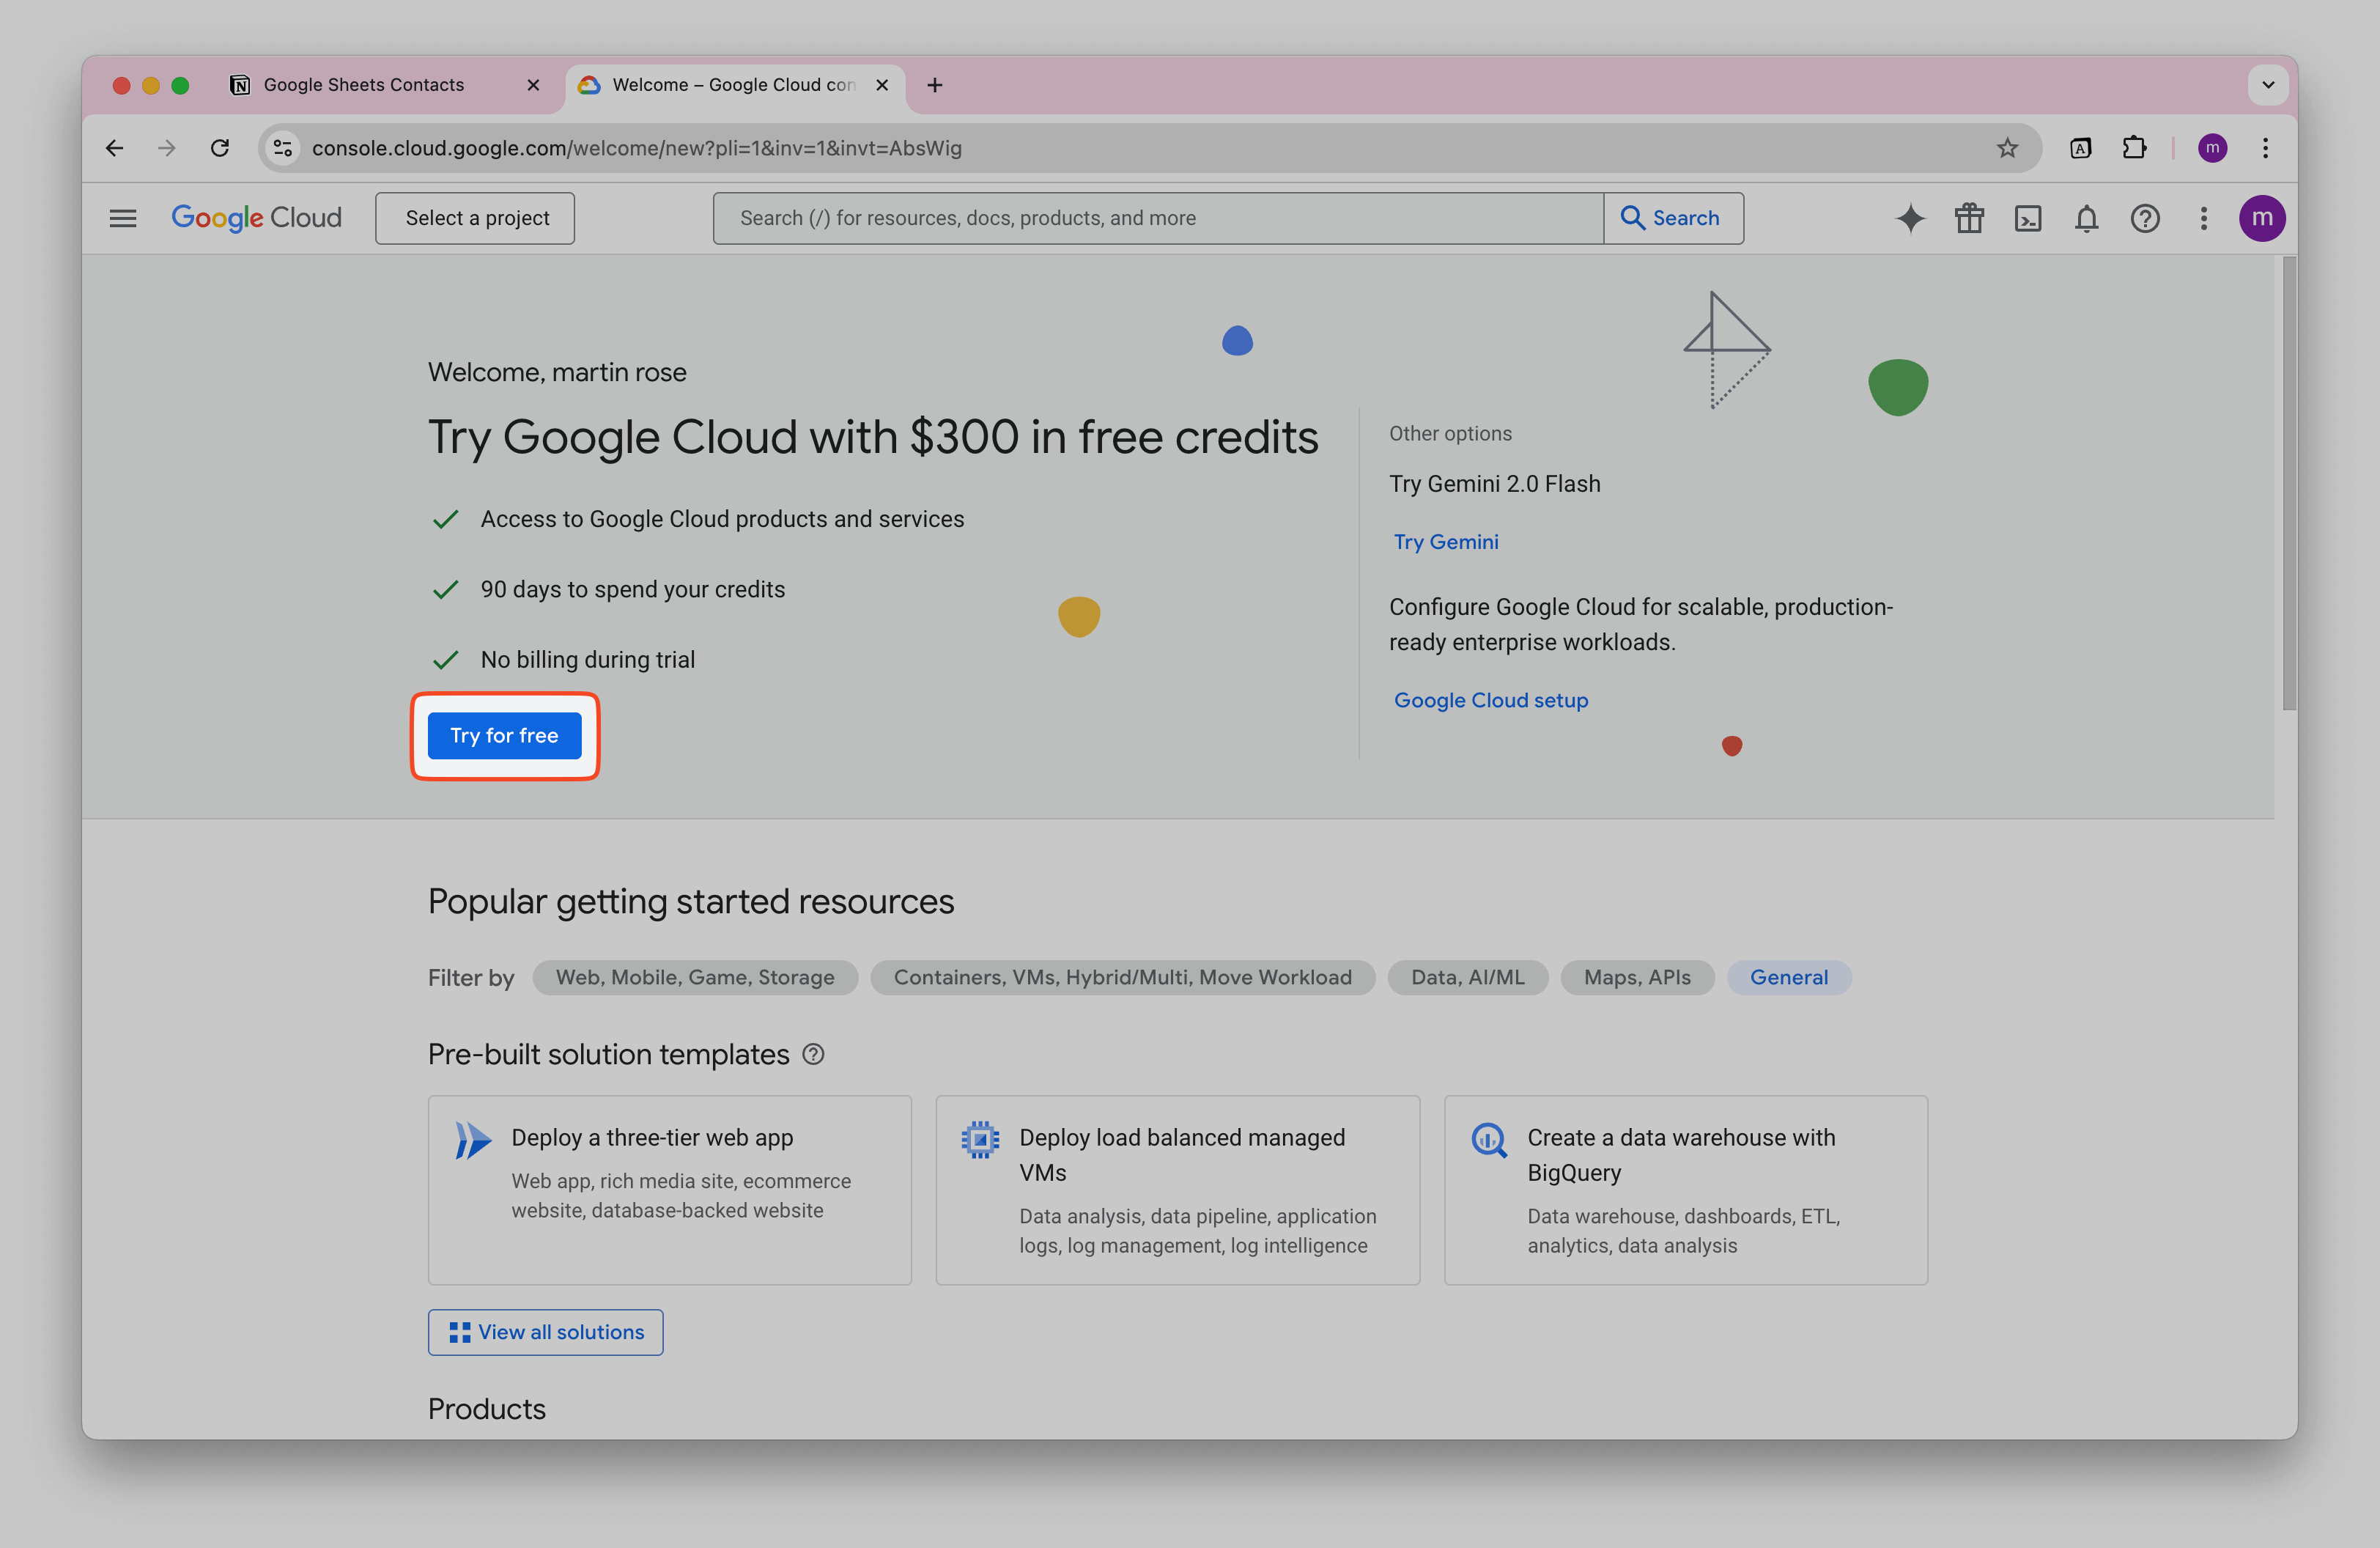
Google may ask for a payment card to complete verification. You won’t be charged.
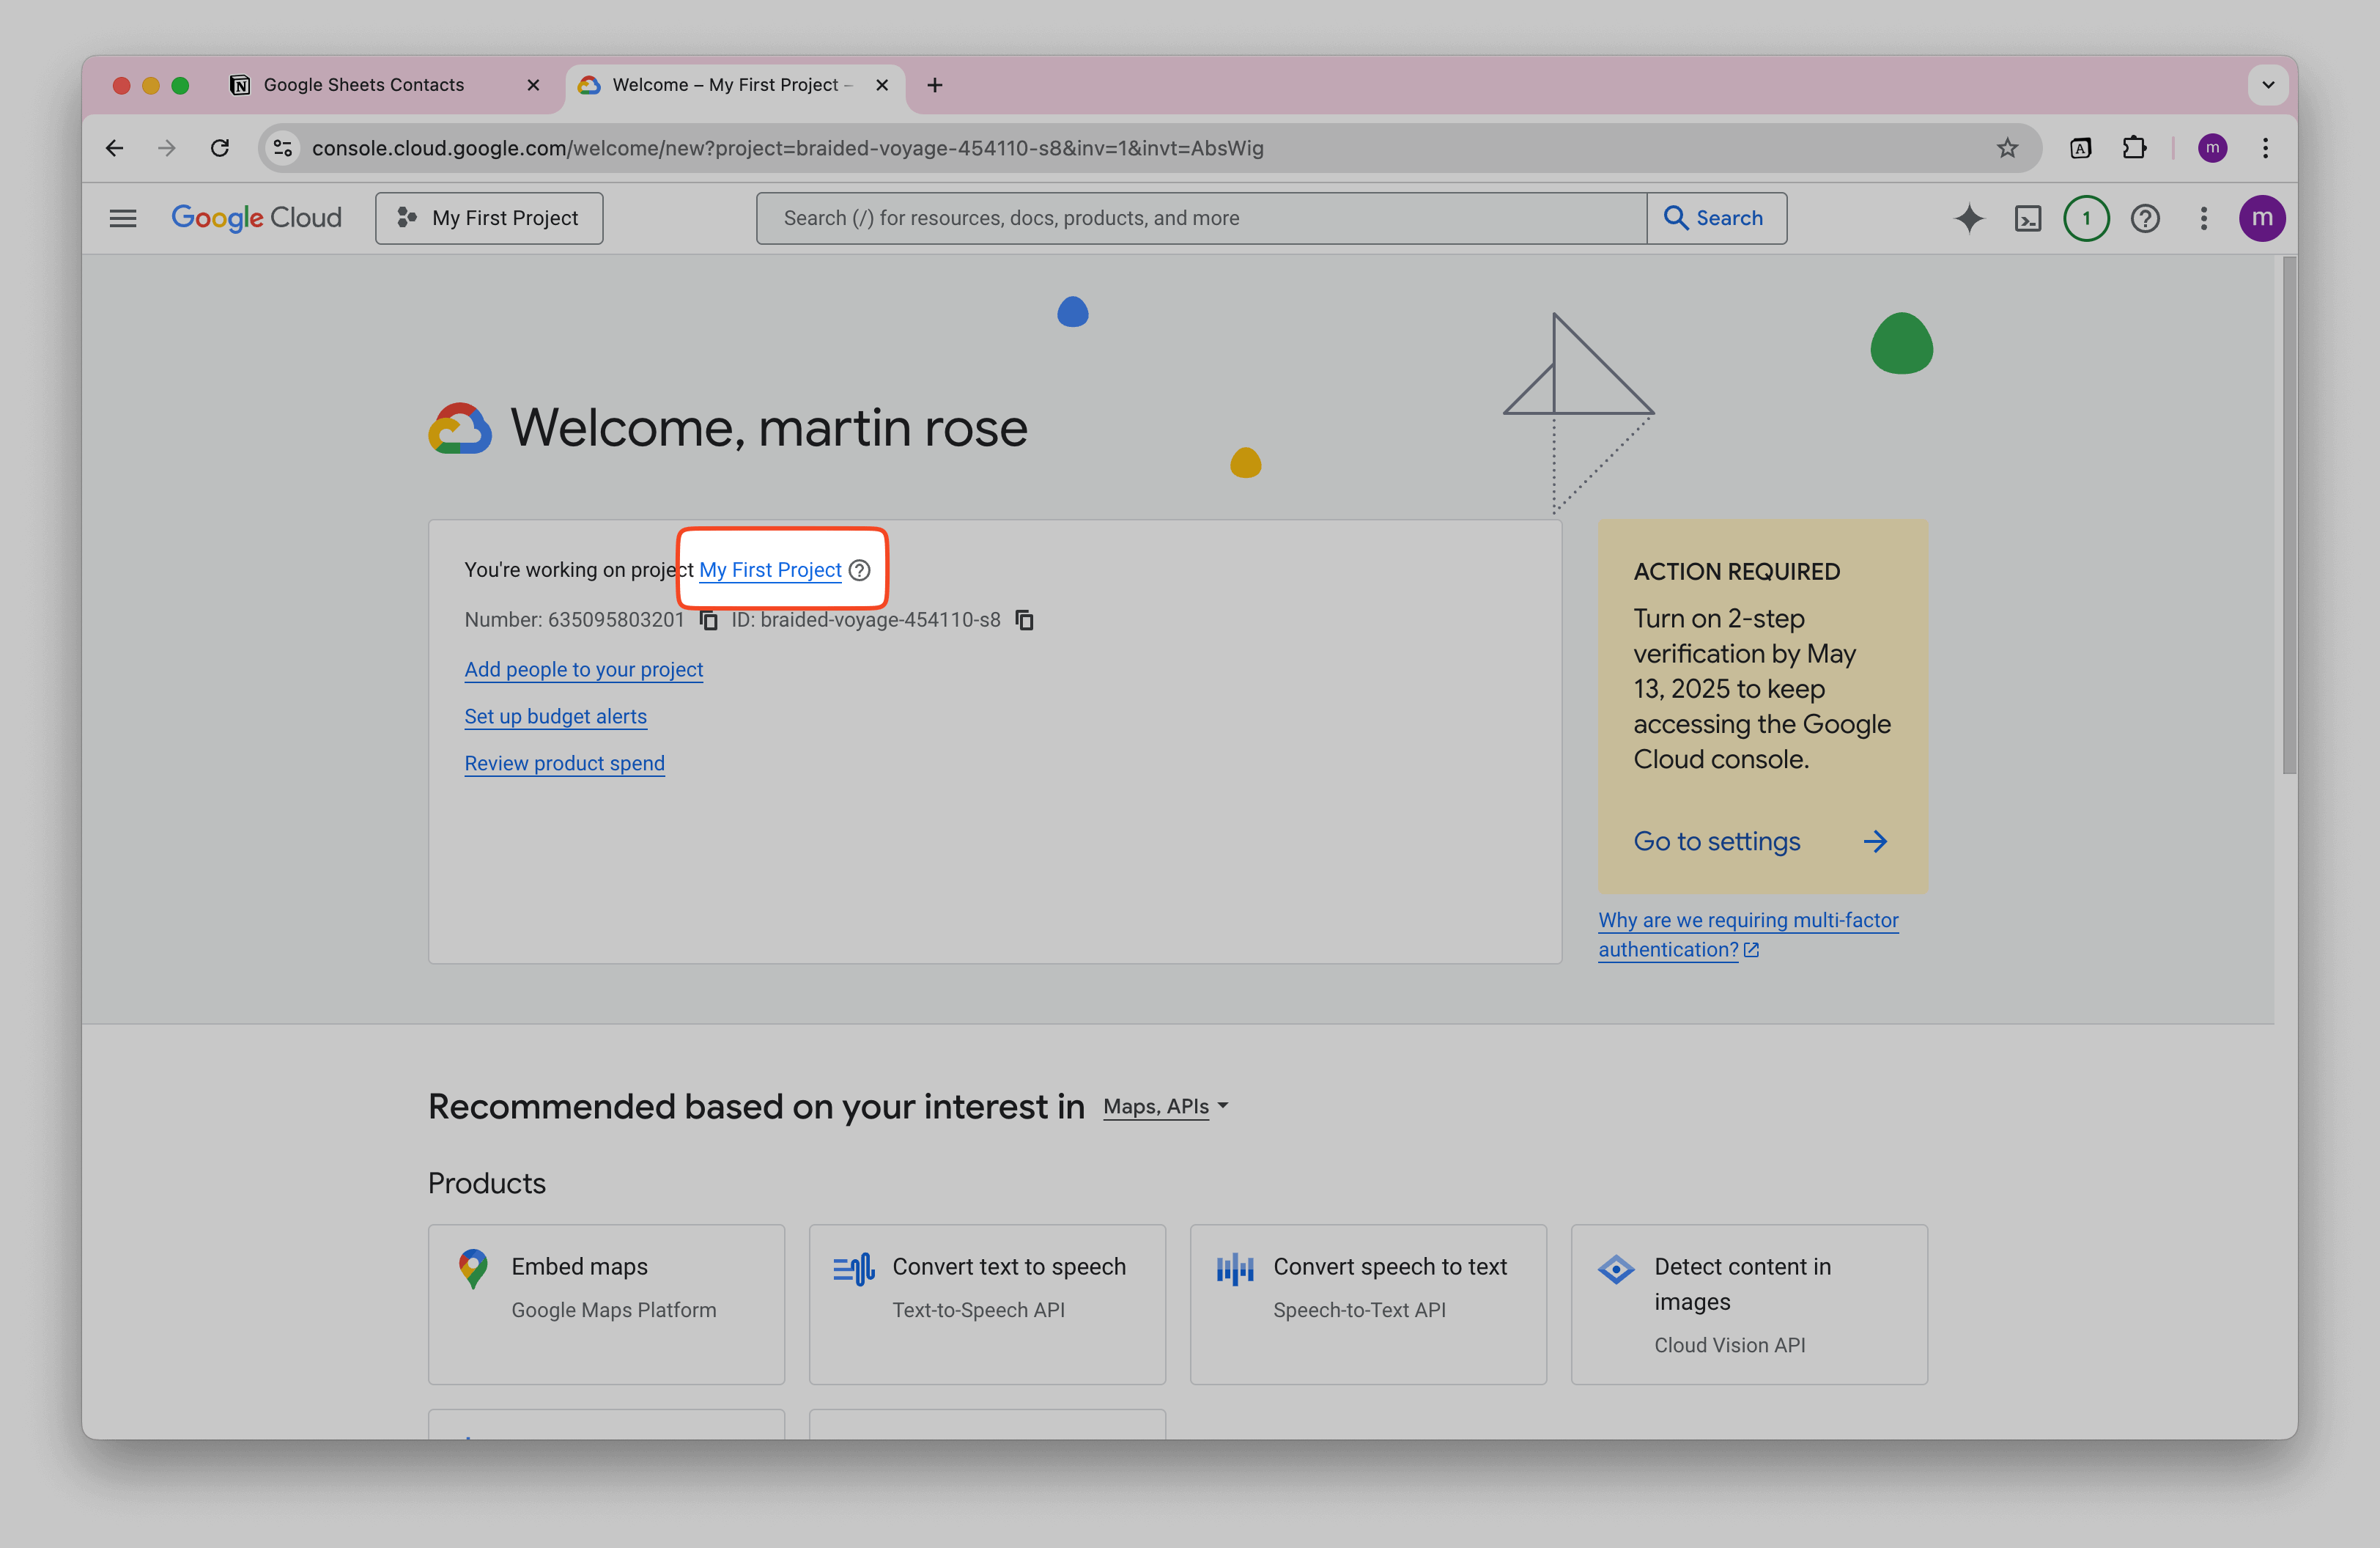
After setting up your account, Google Cloud Console automatically create a new project called My first project, which you can use to access all Google APIs for free.
Configure the OAuth consent screen
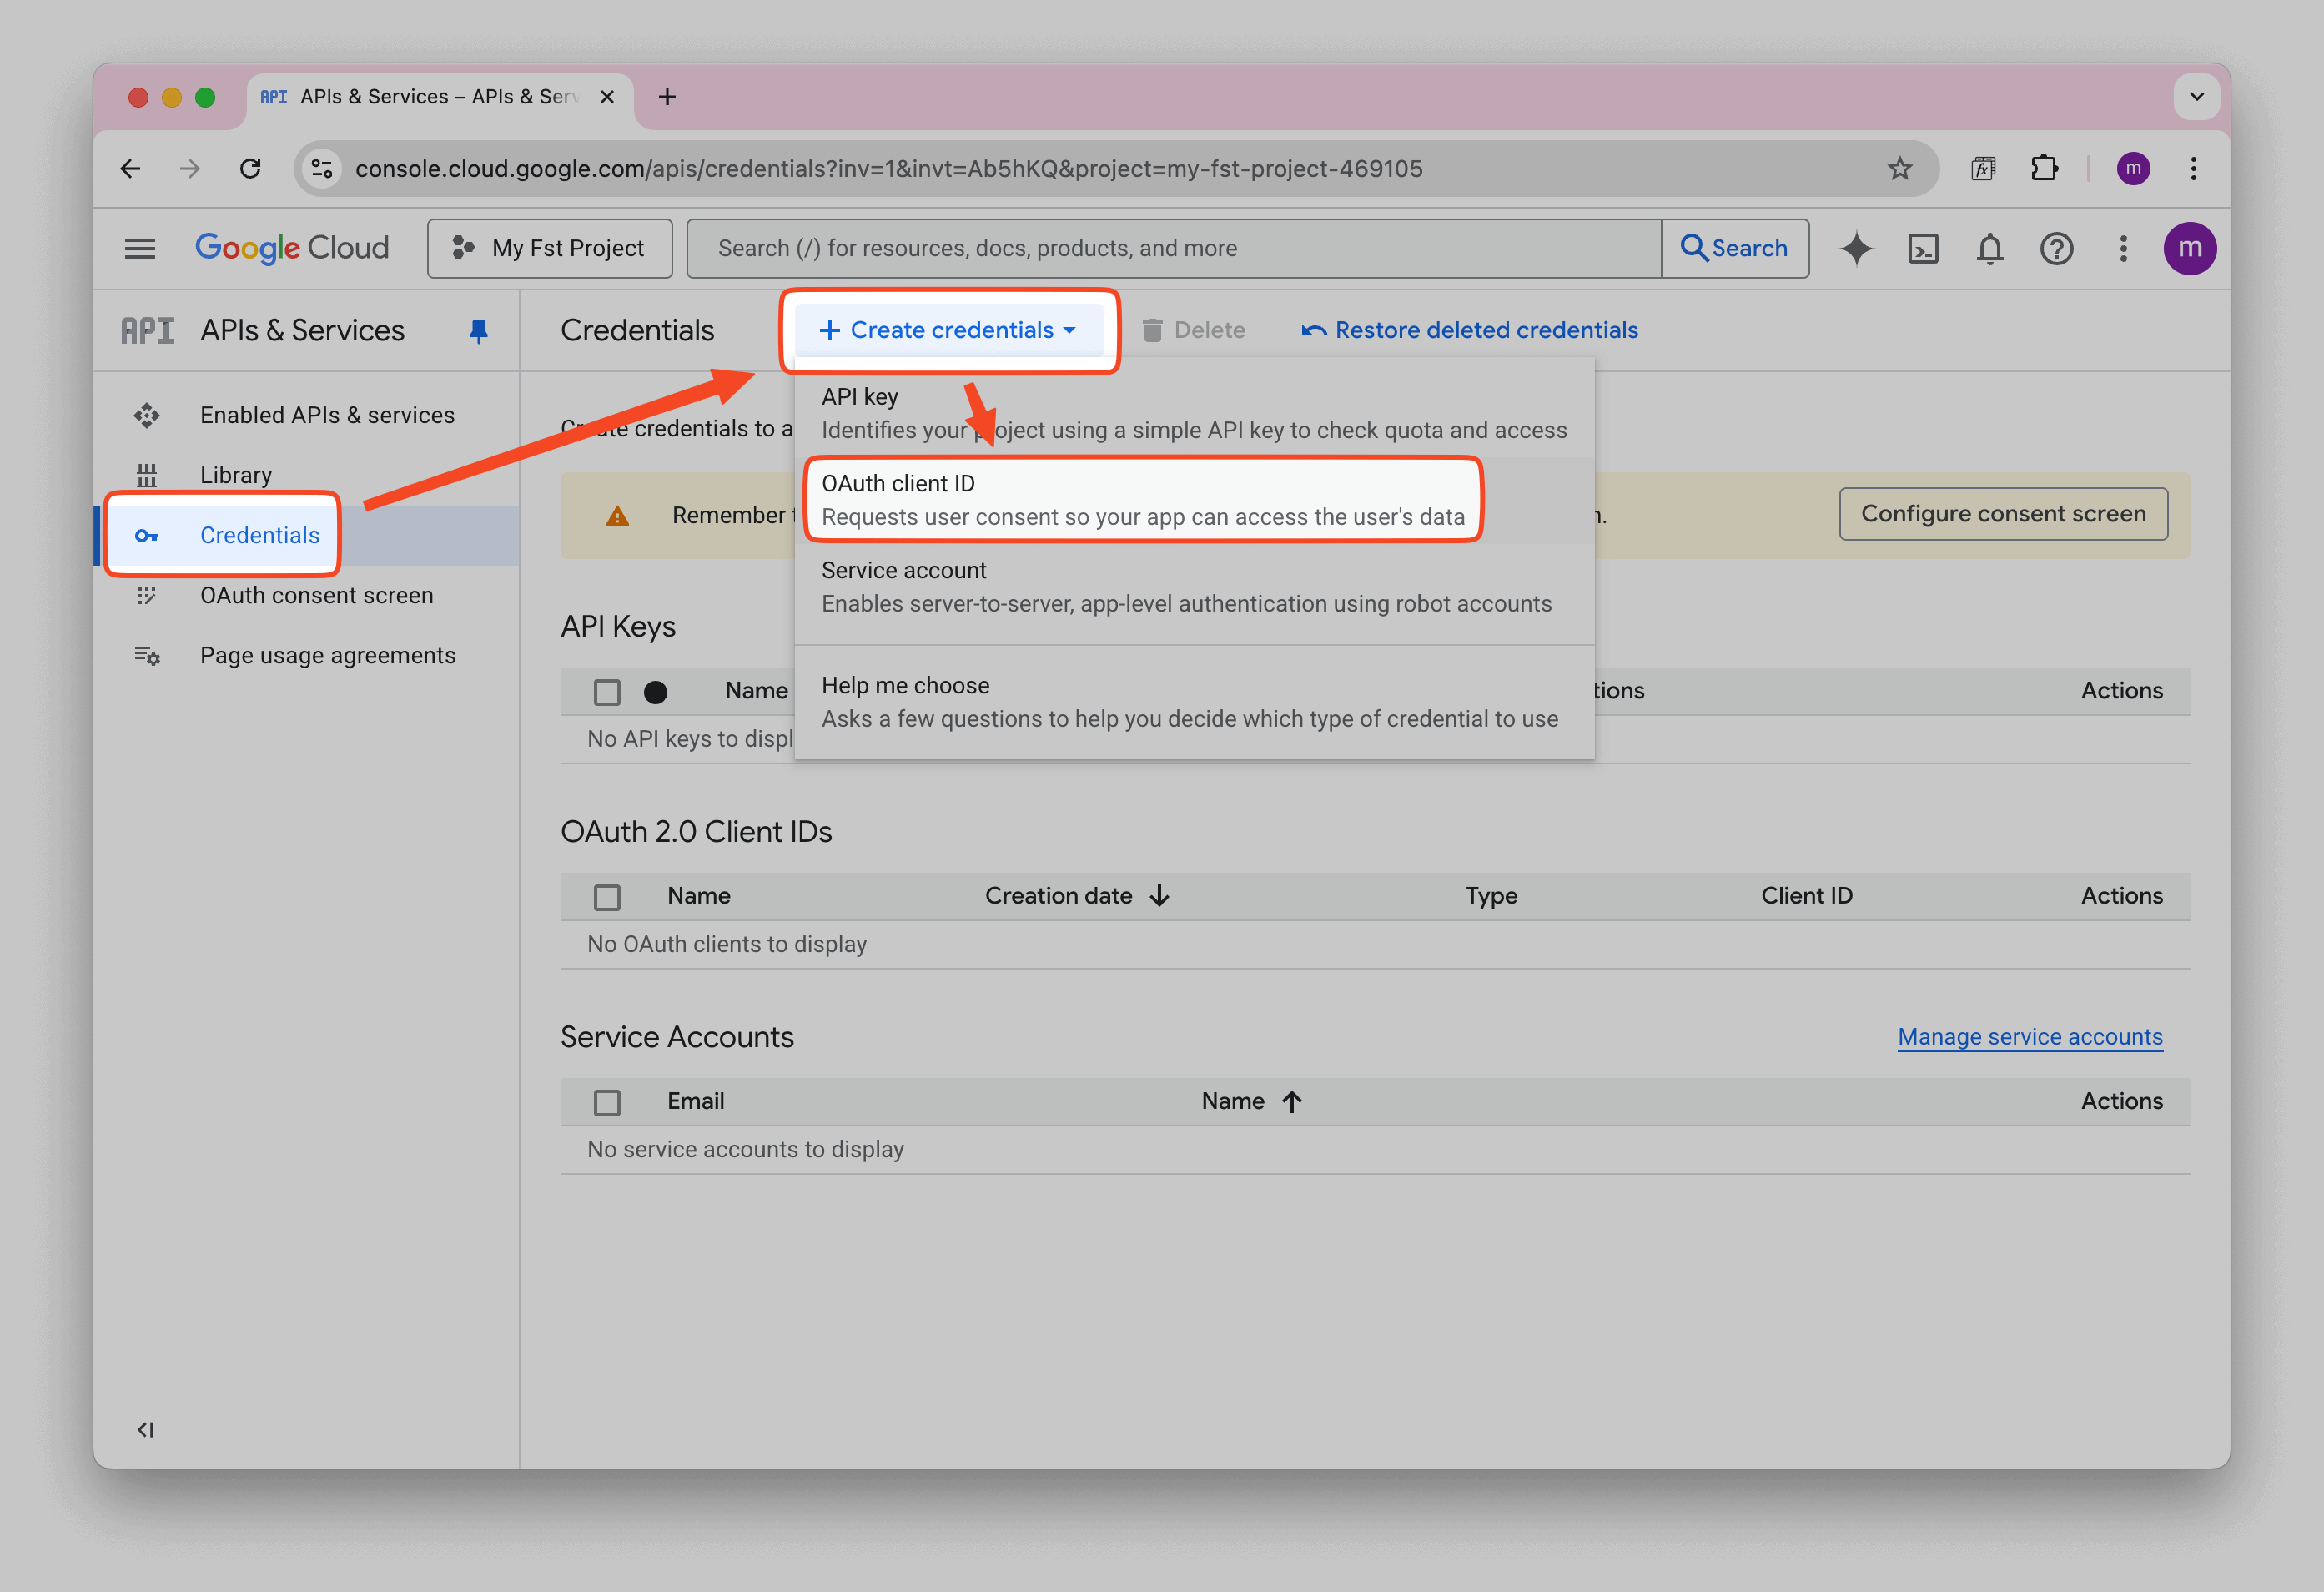
Go to APIs & Services → Credentials, click CREATE CREDENTIALS and select OAuth client ID.
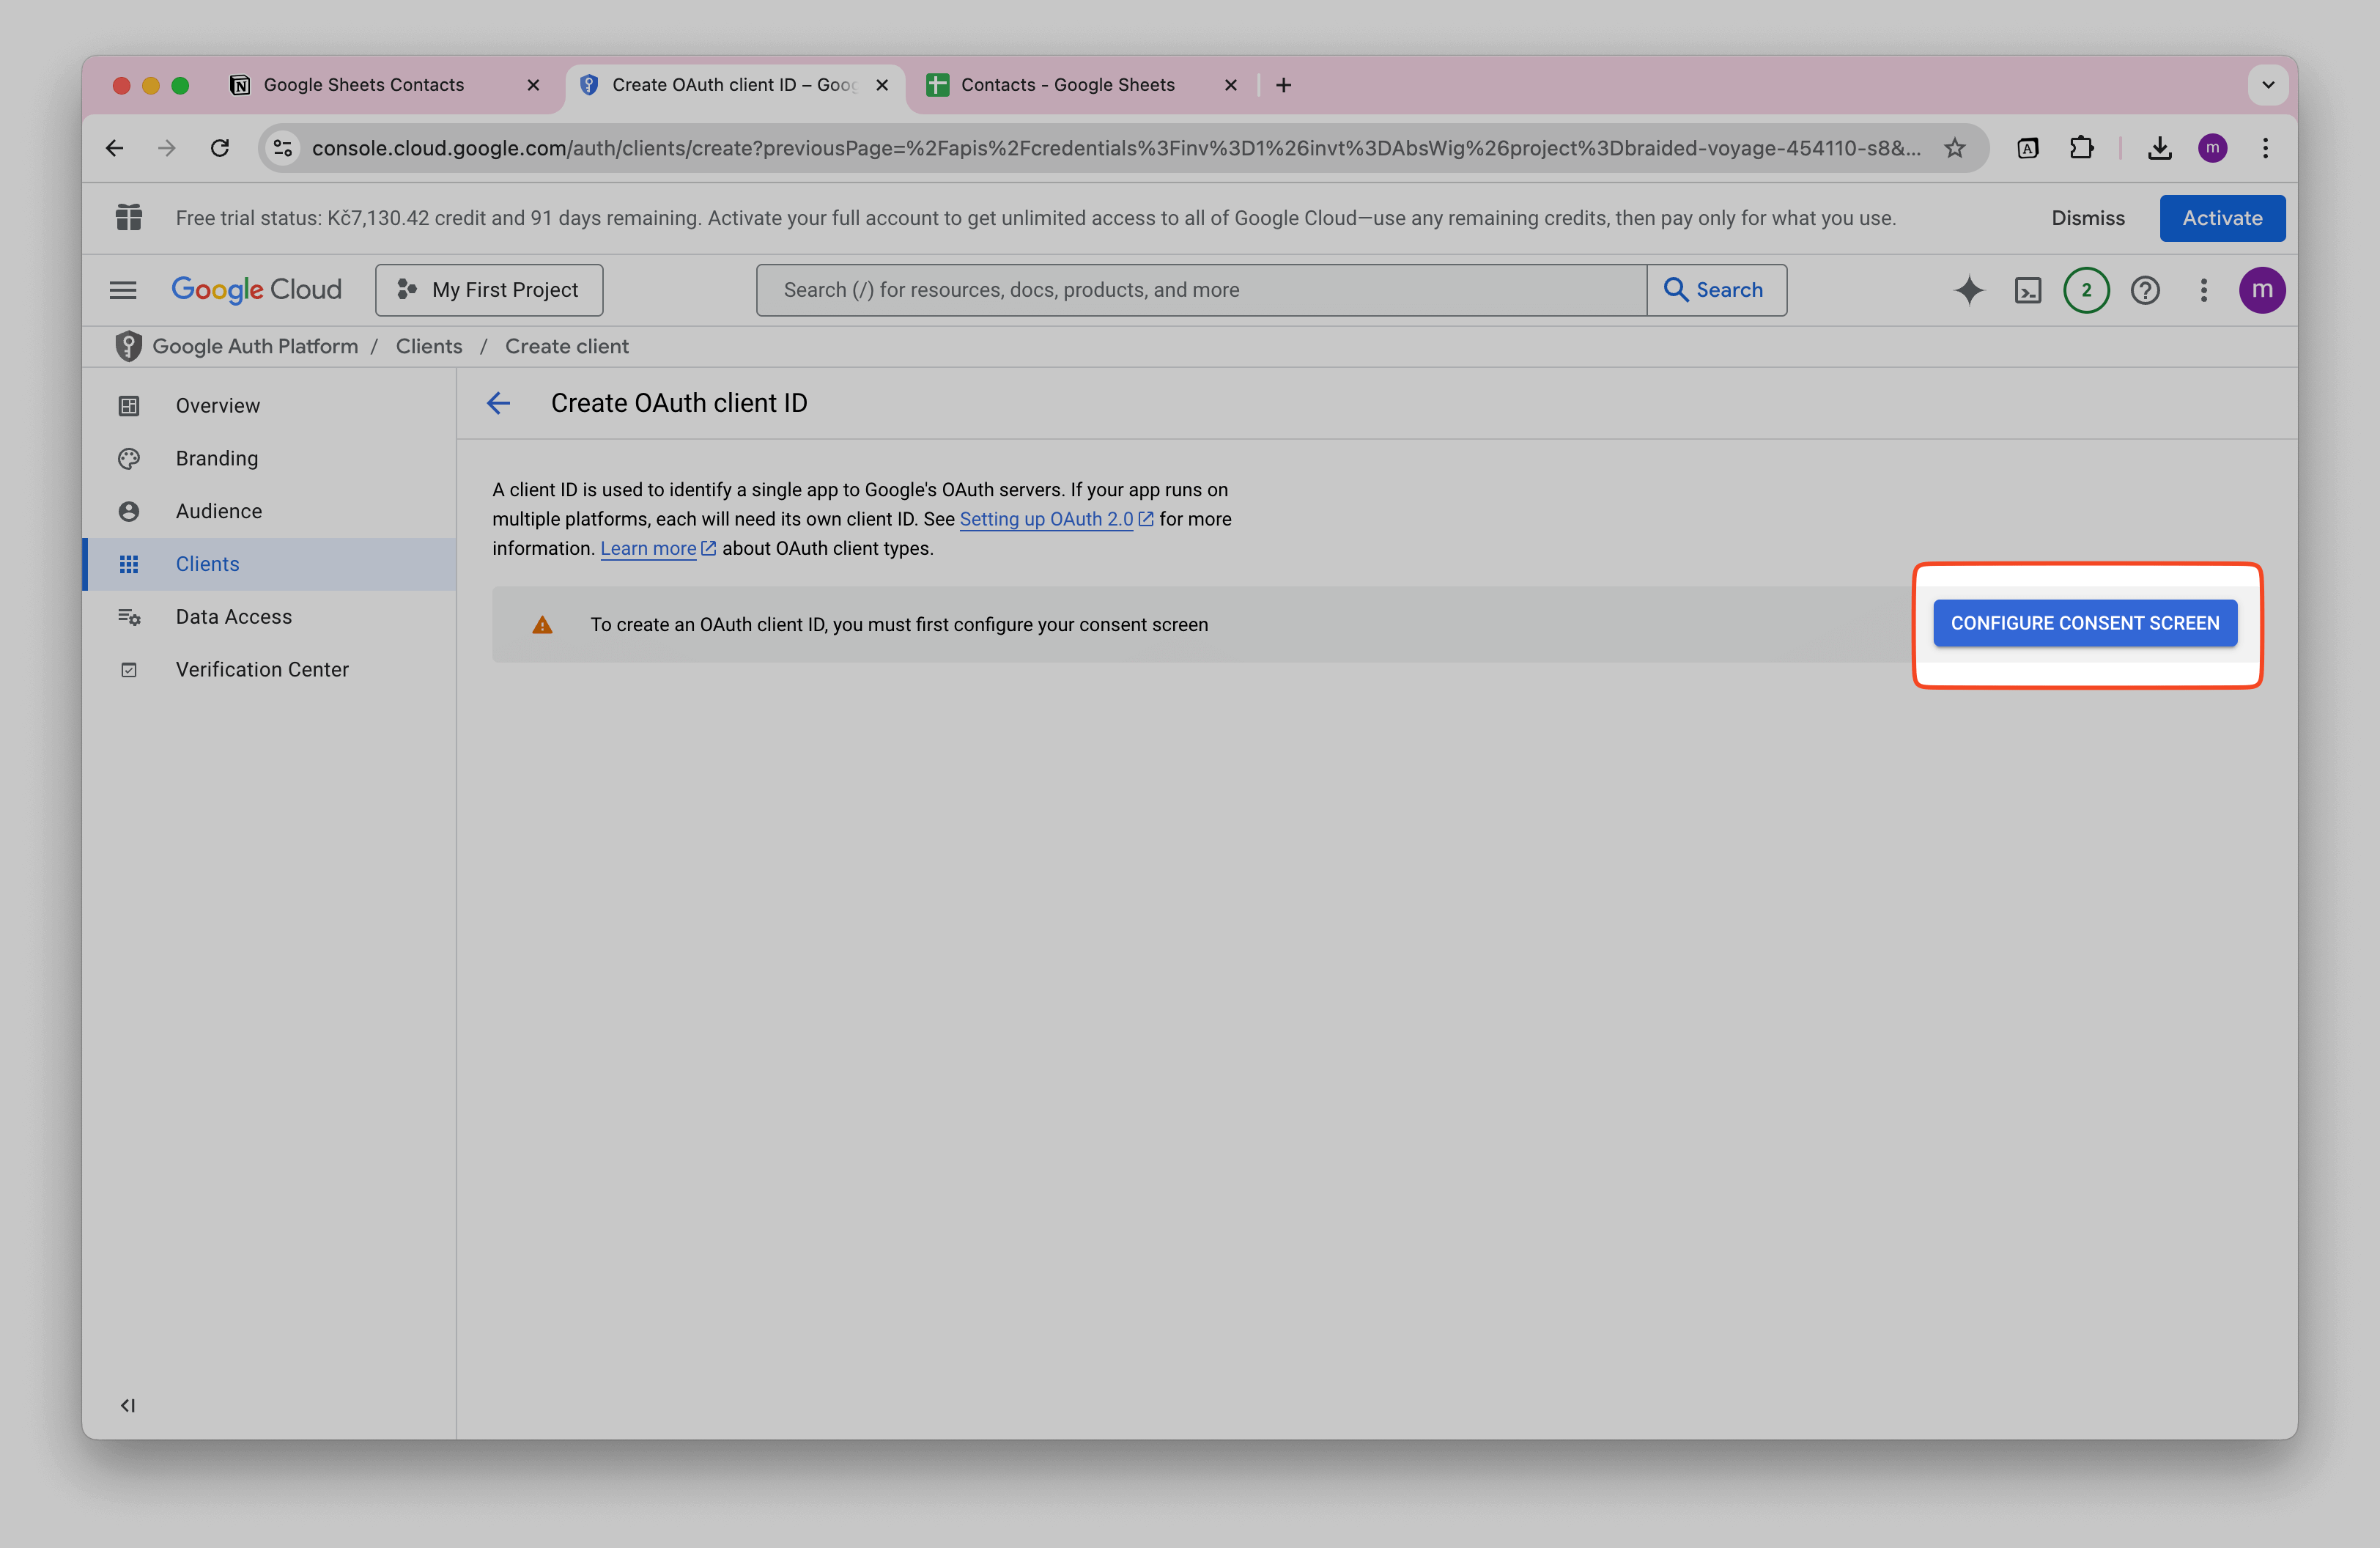
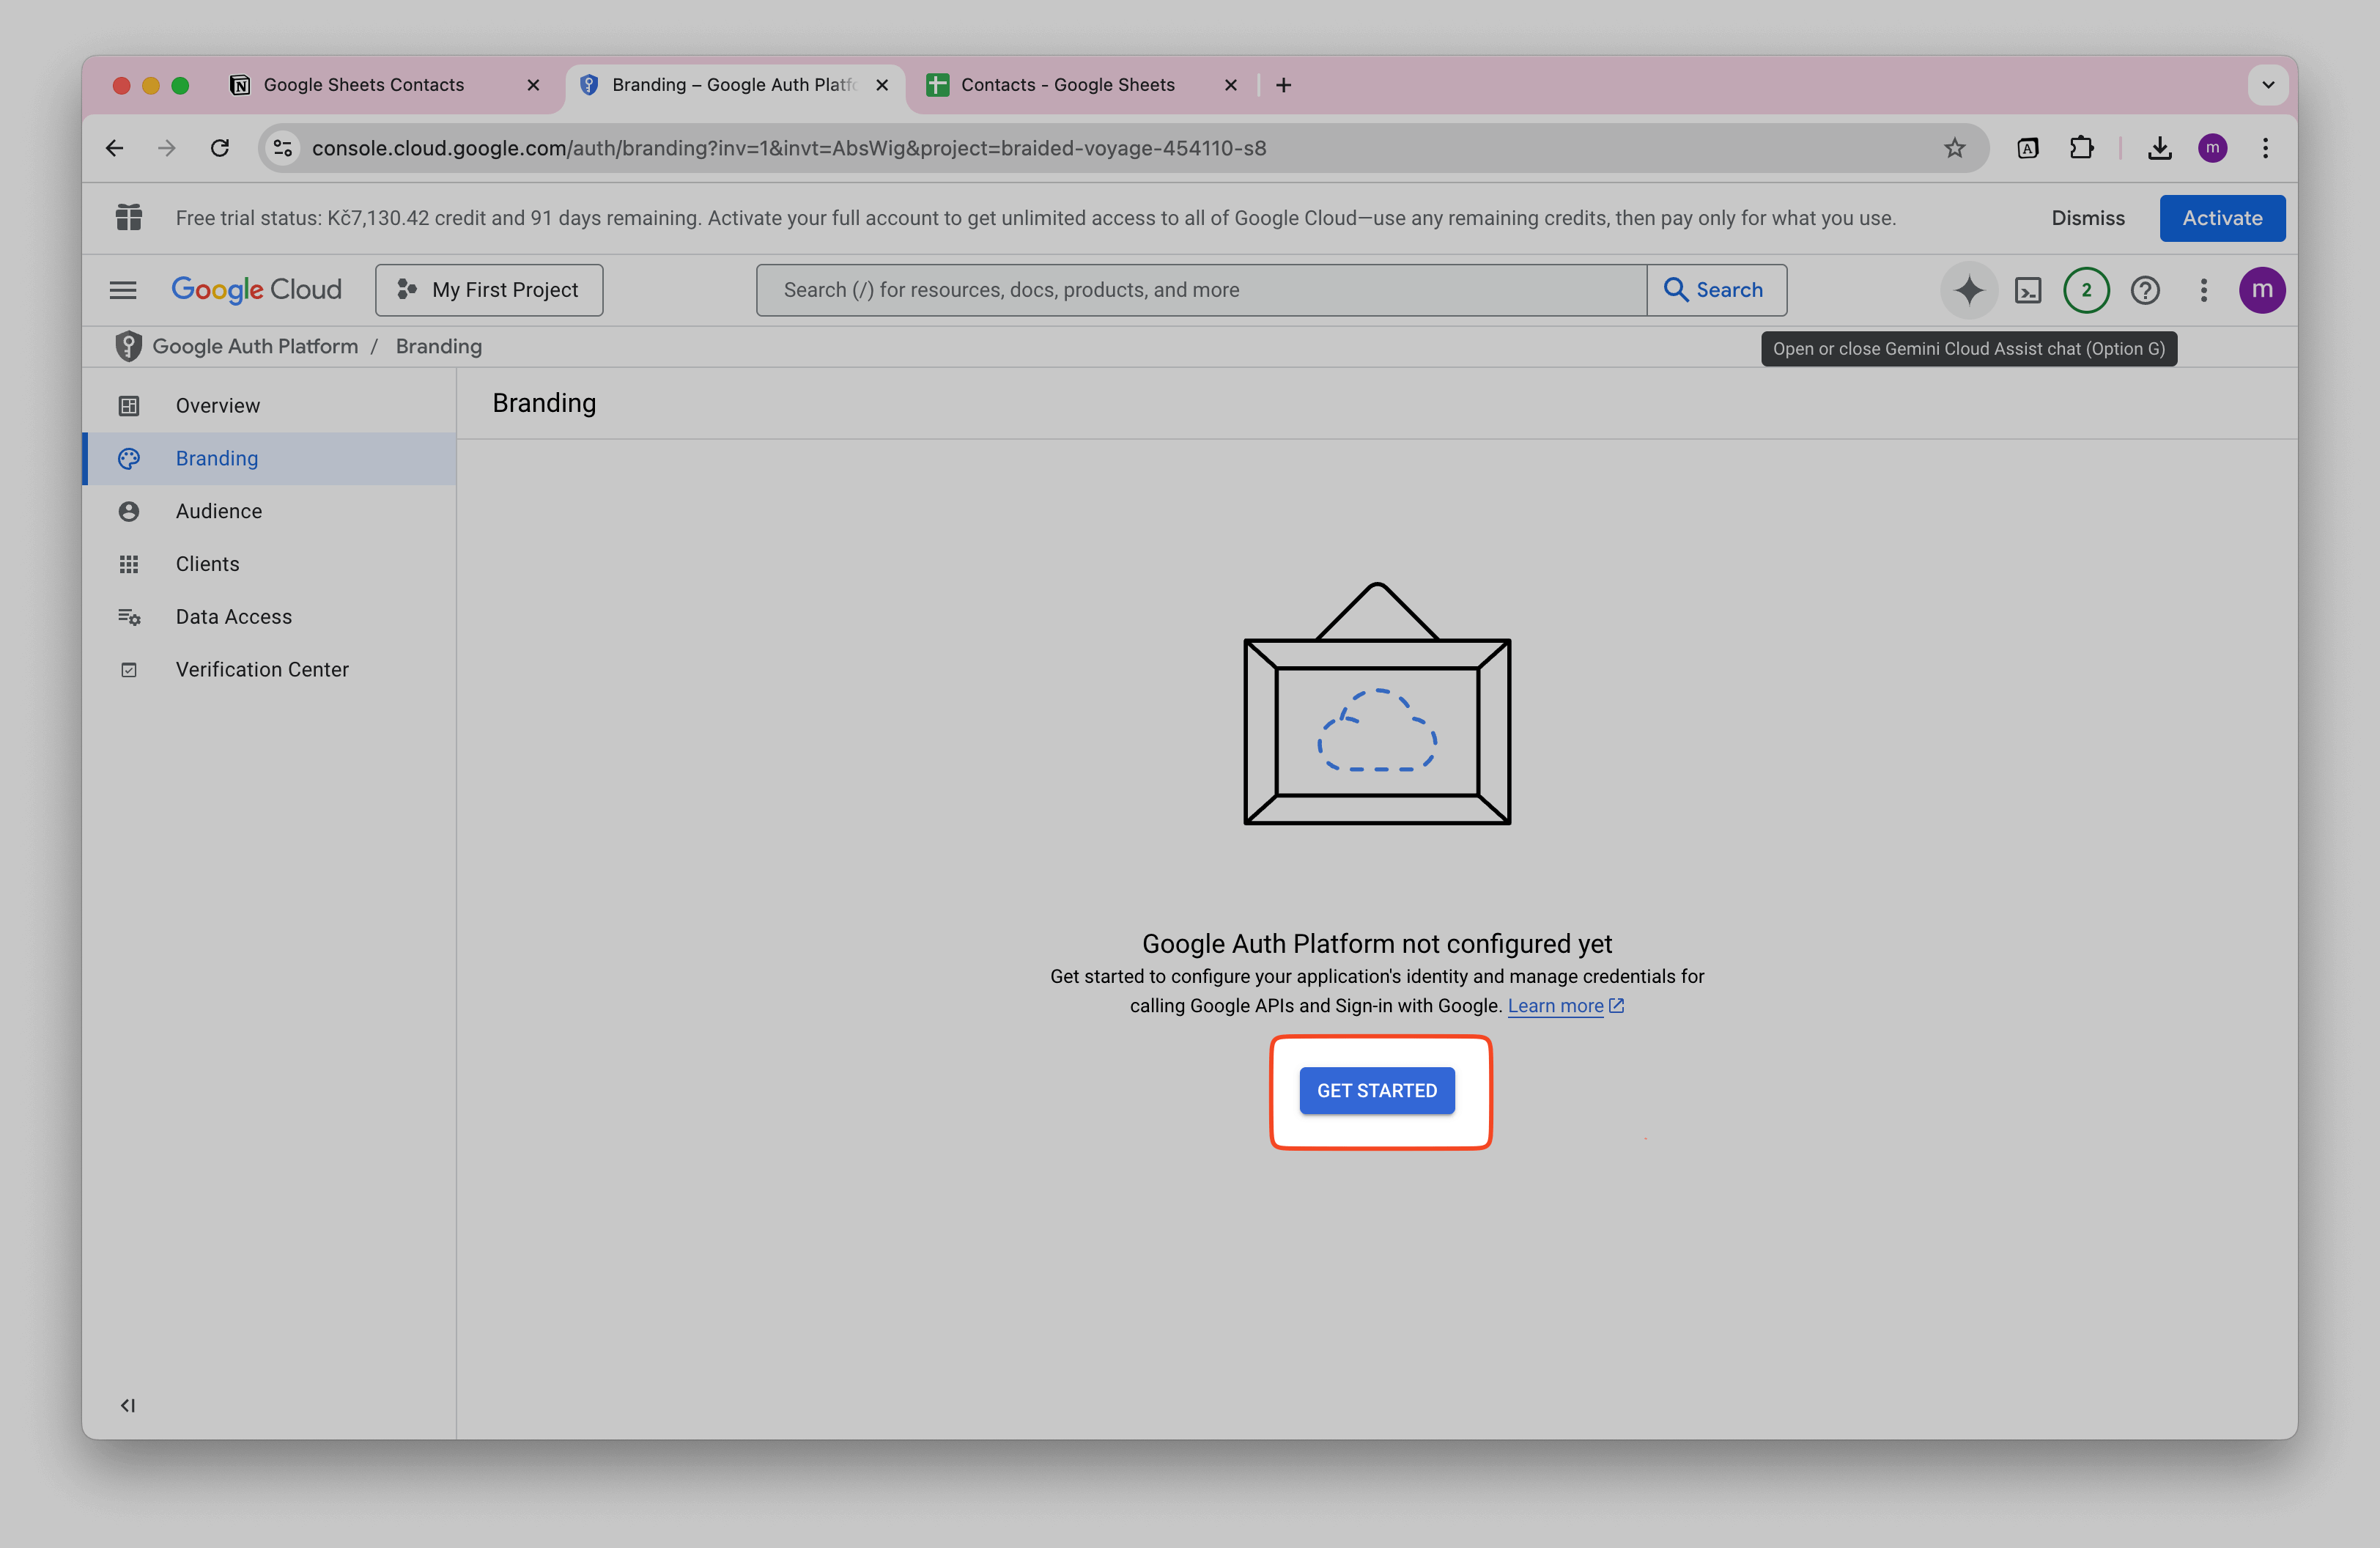
Click CONFIGURE CONSENT SCREEN.
On the next screen, click GET STARTED.
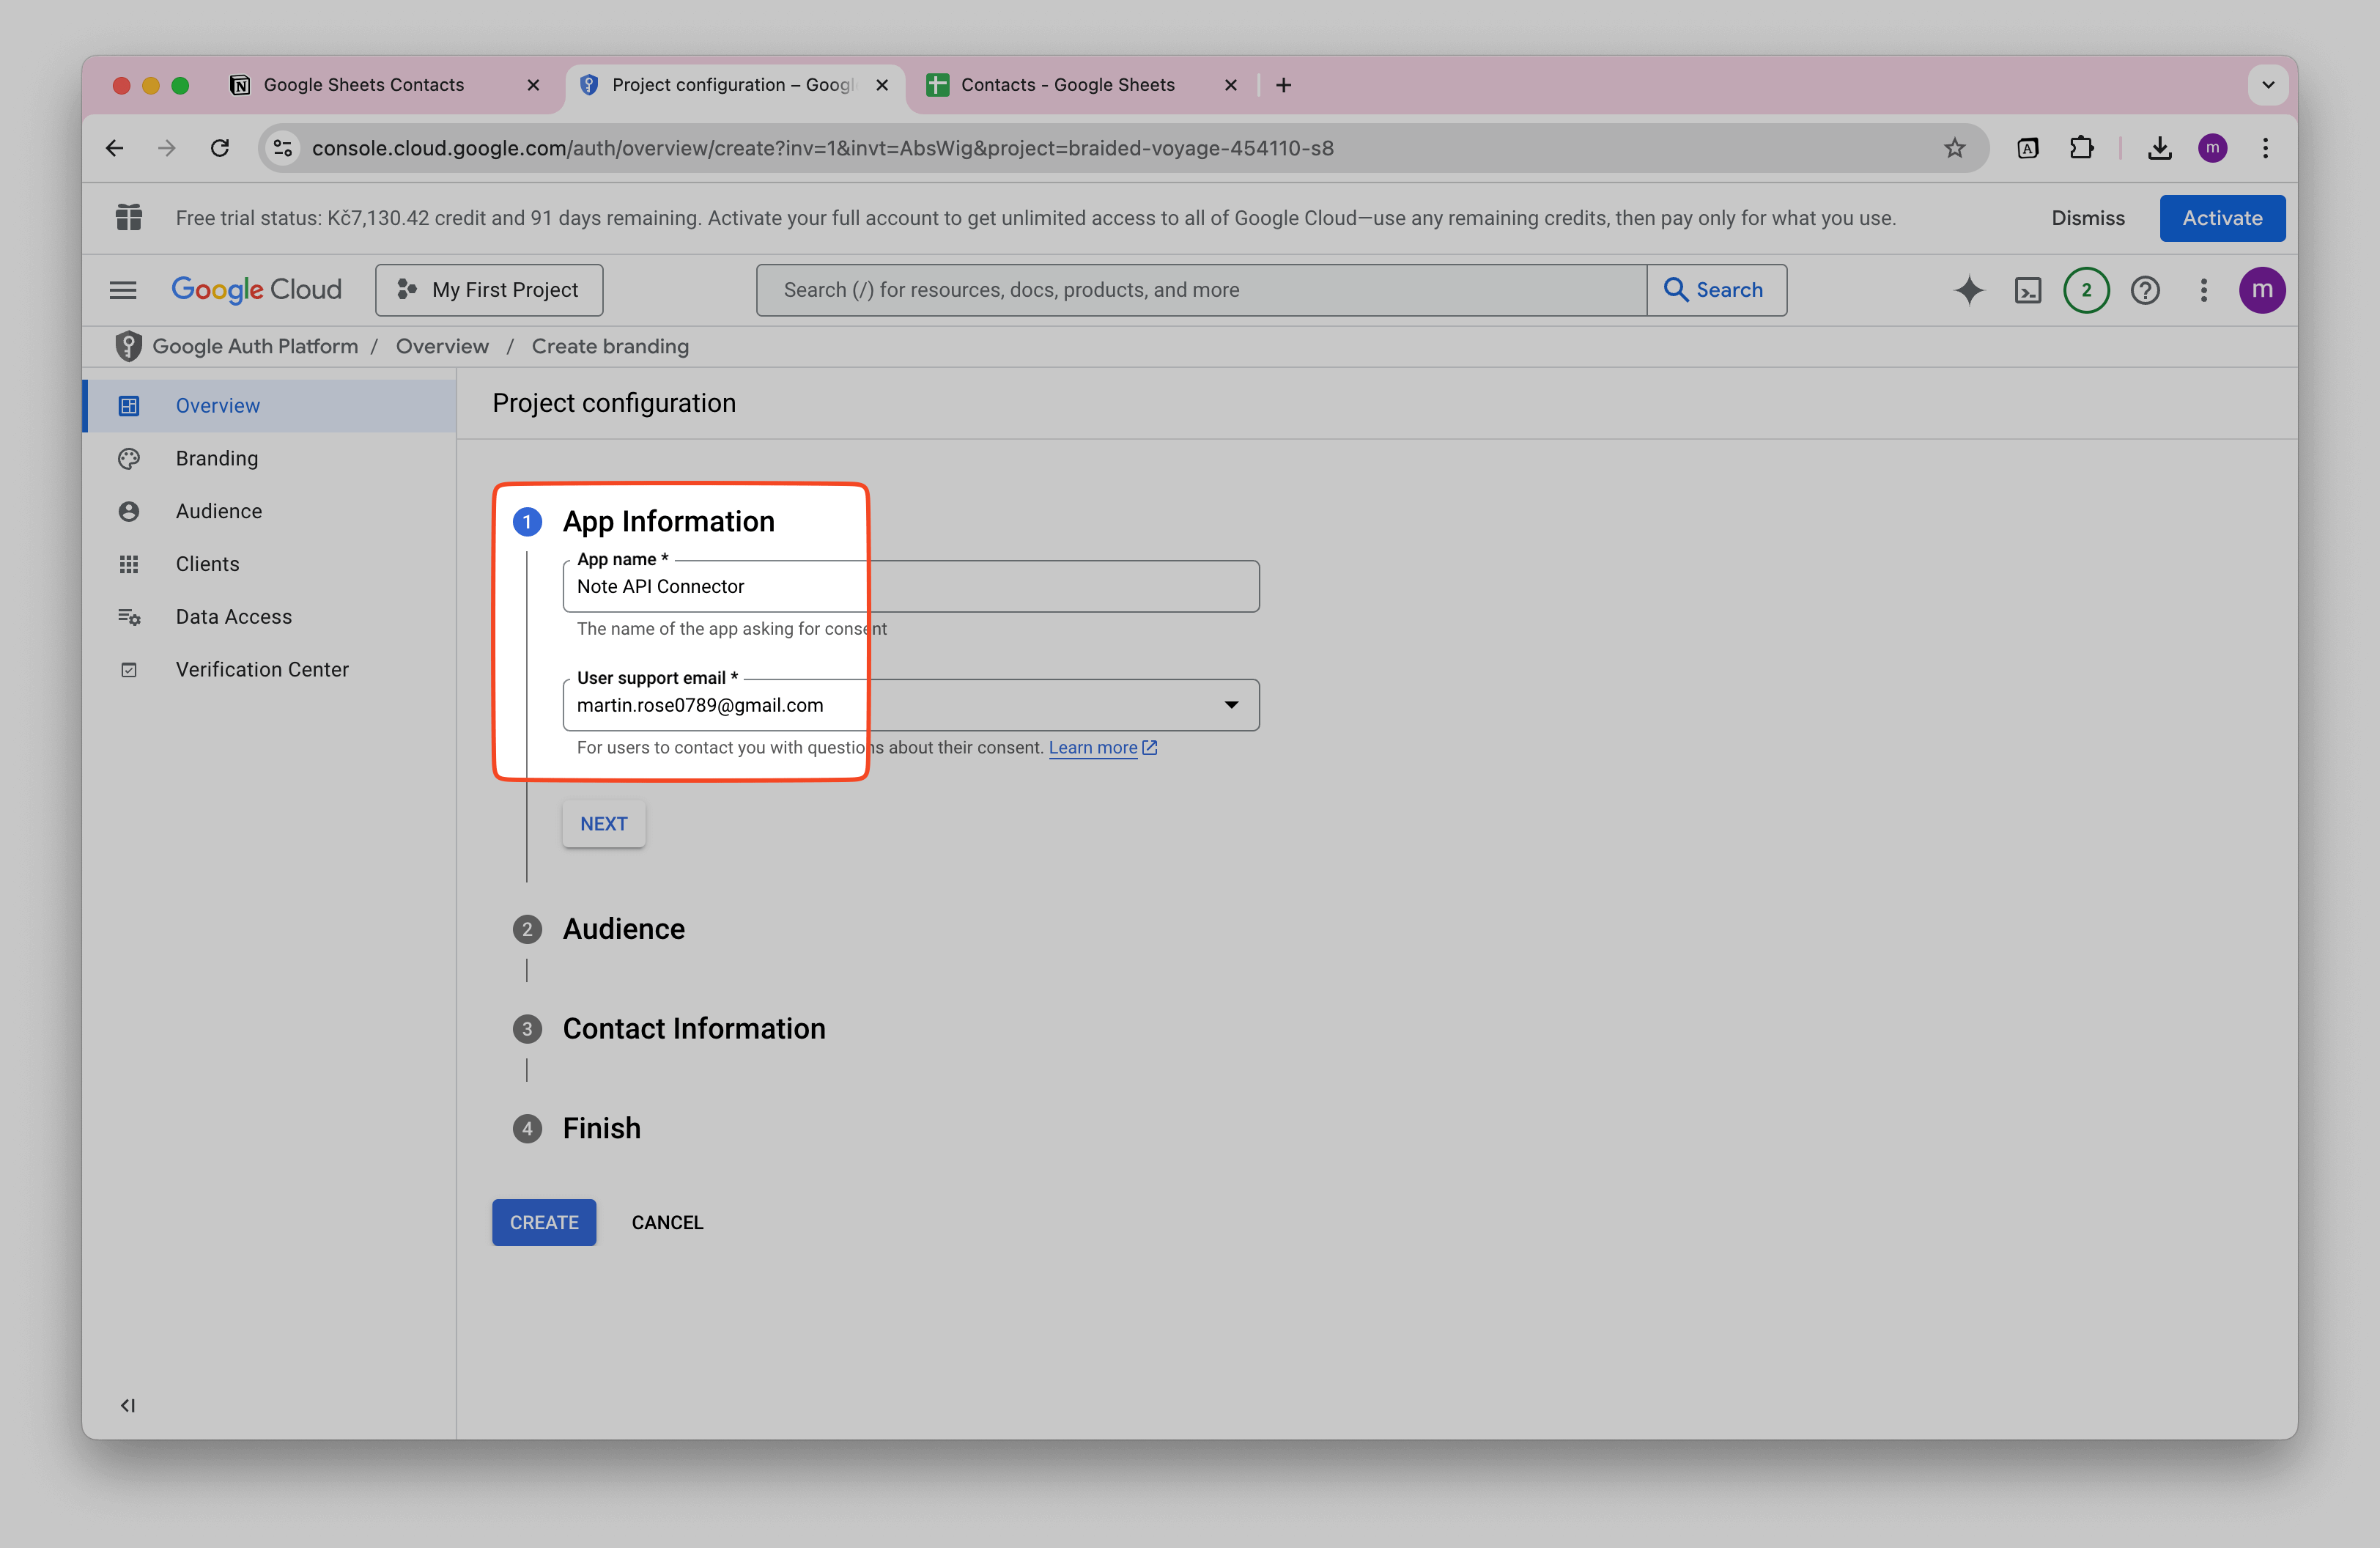
Name your OAuth client (for example, "Note API Connector") and enter your email address.
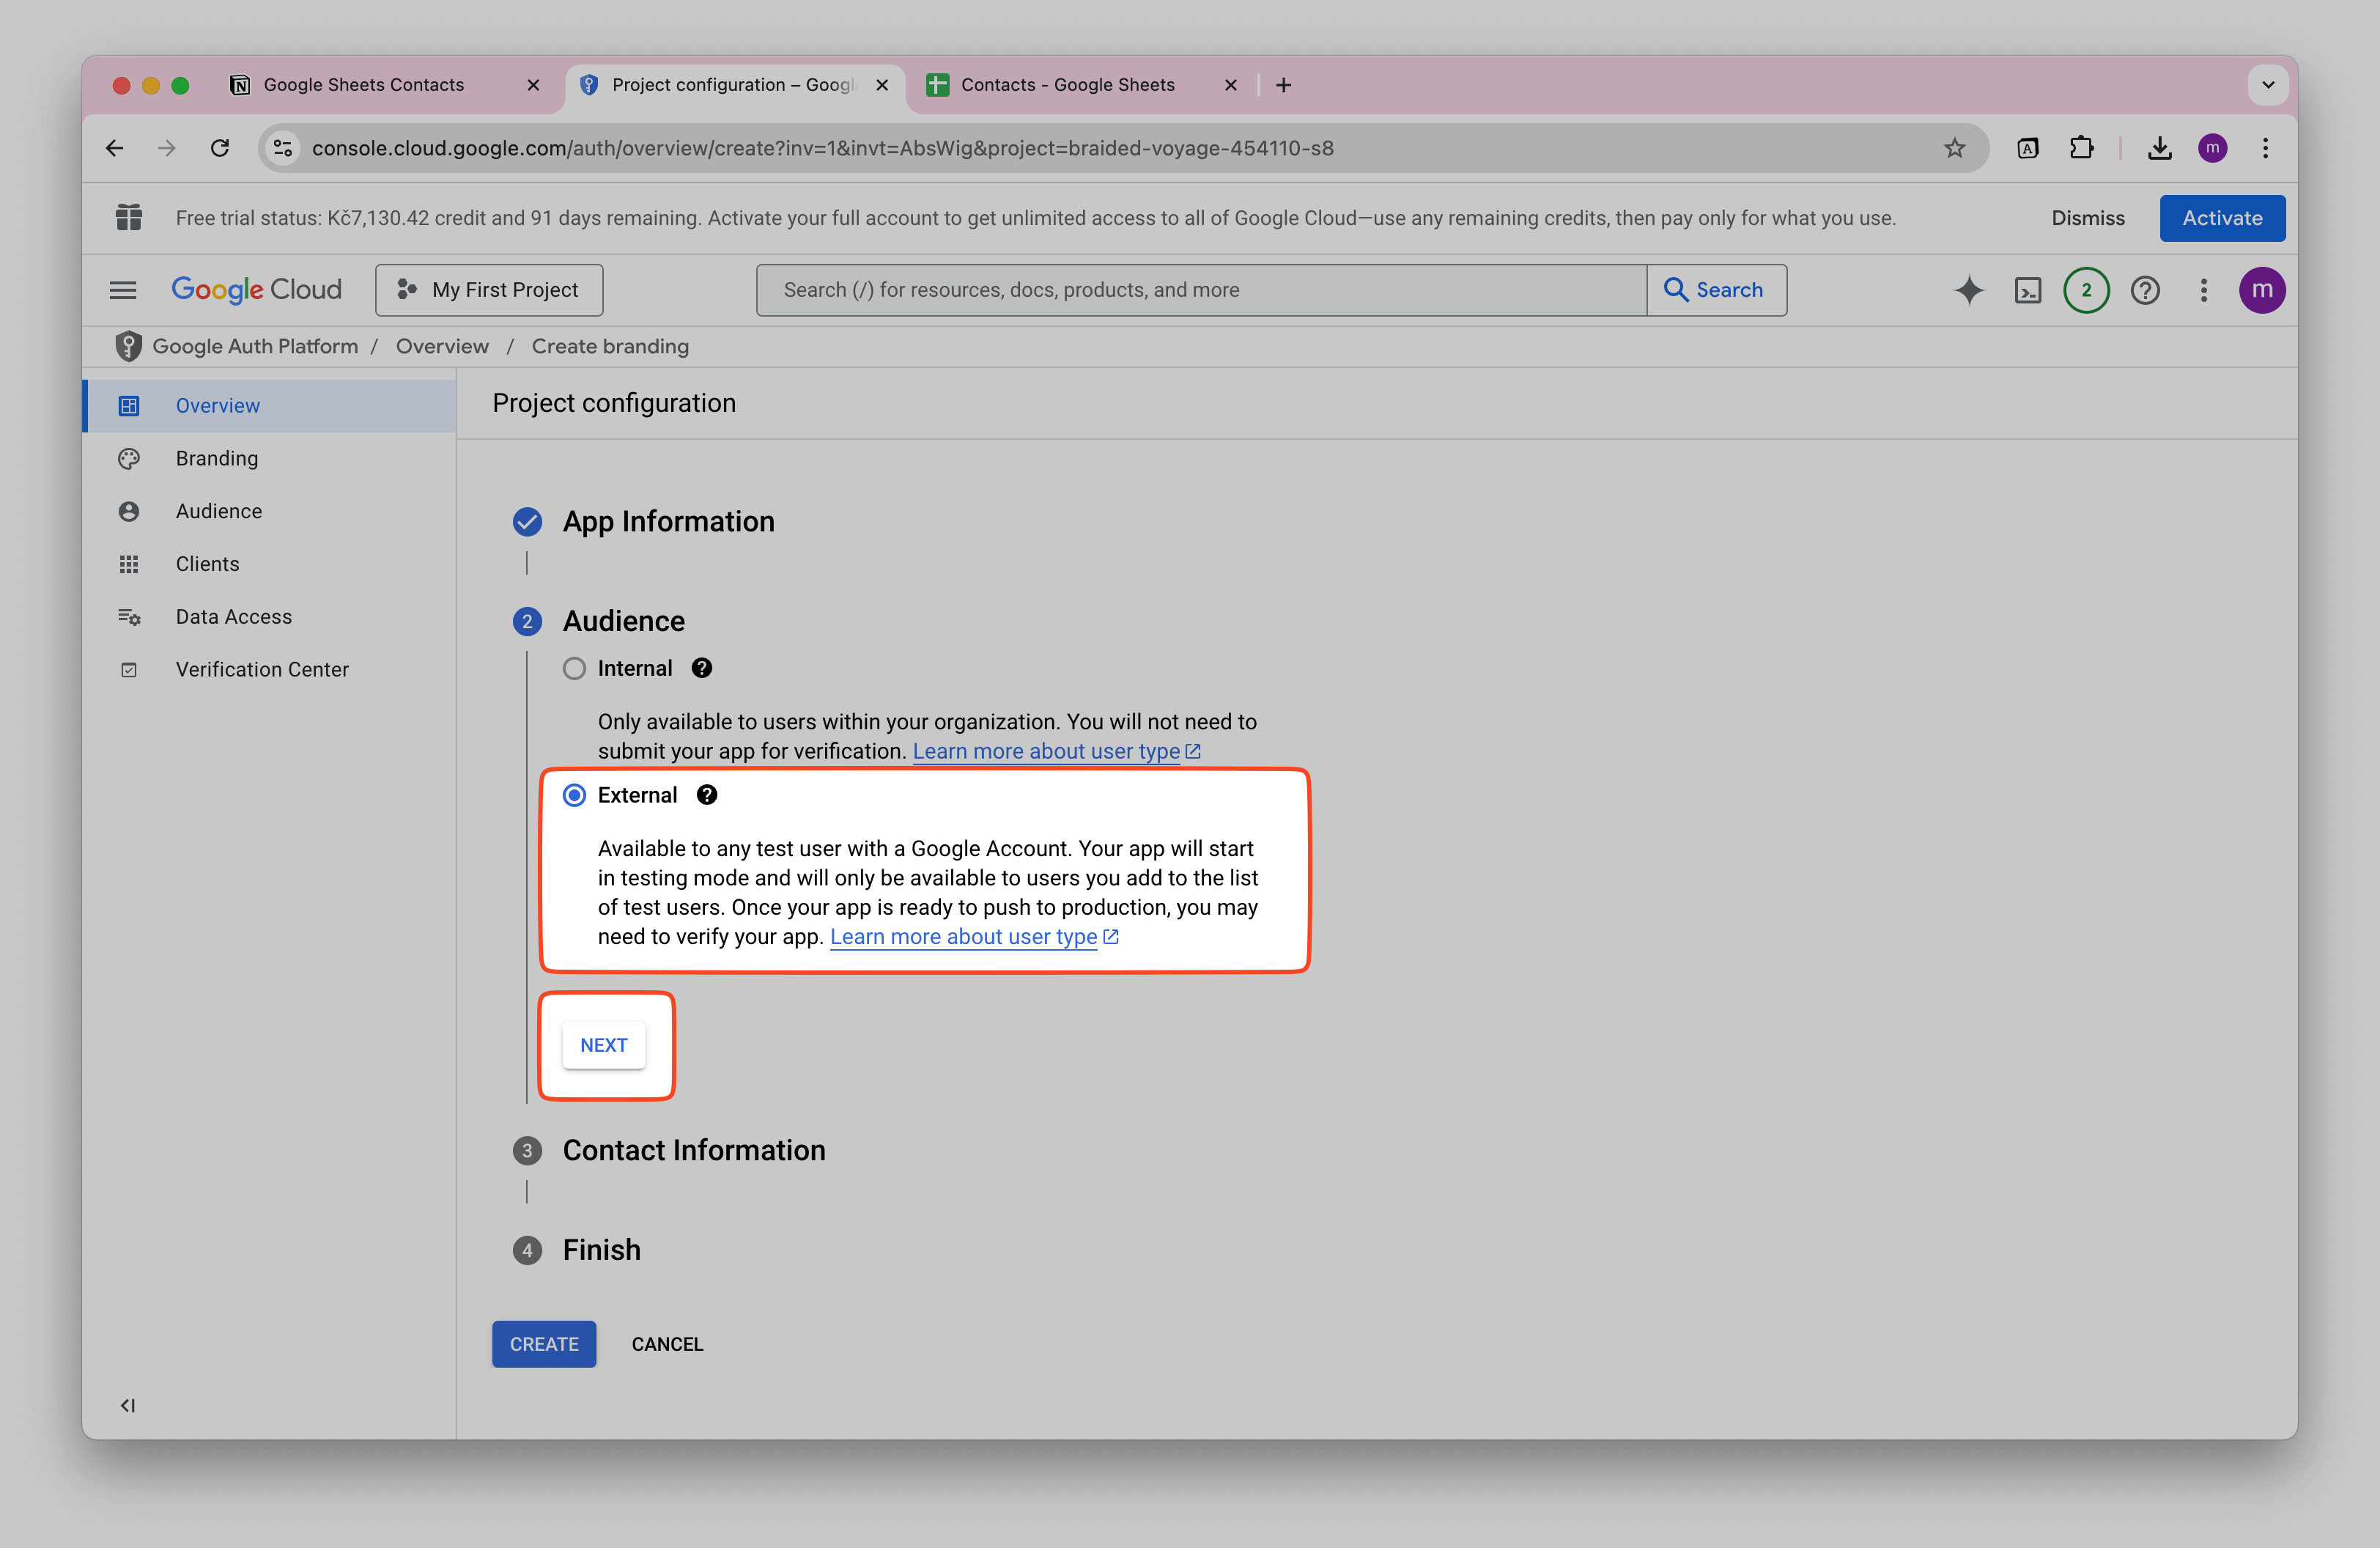
Choose External and click NEXT.
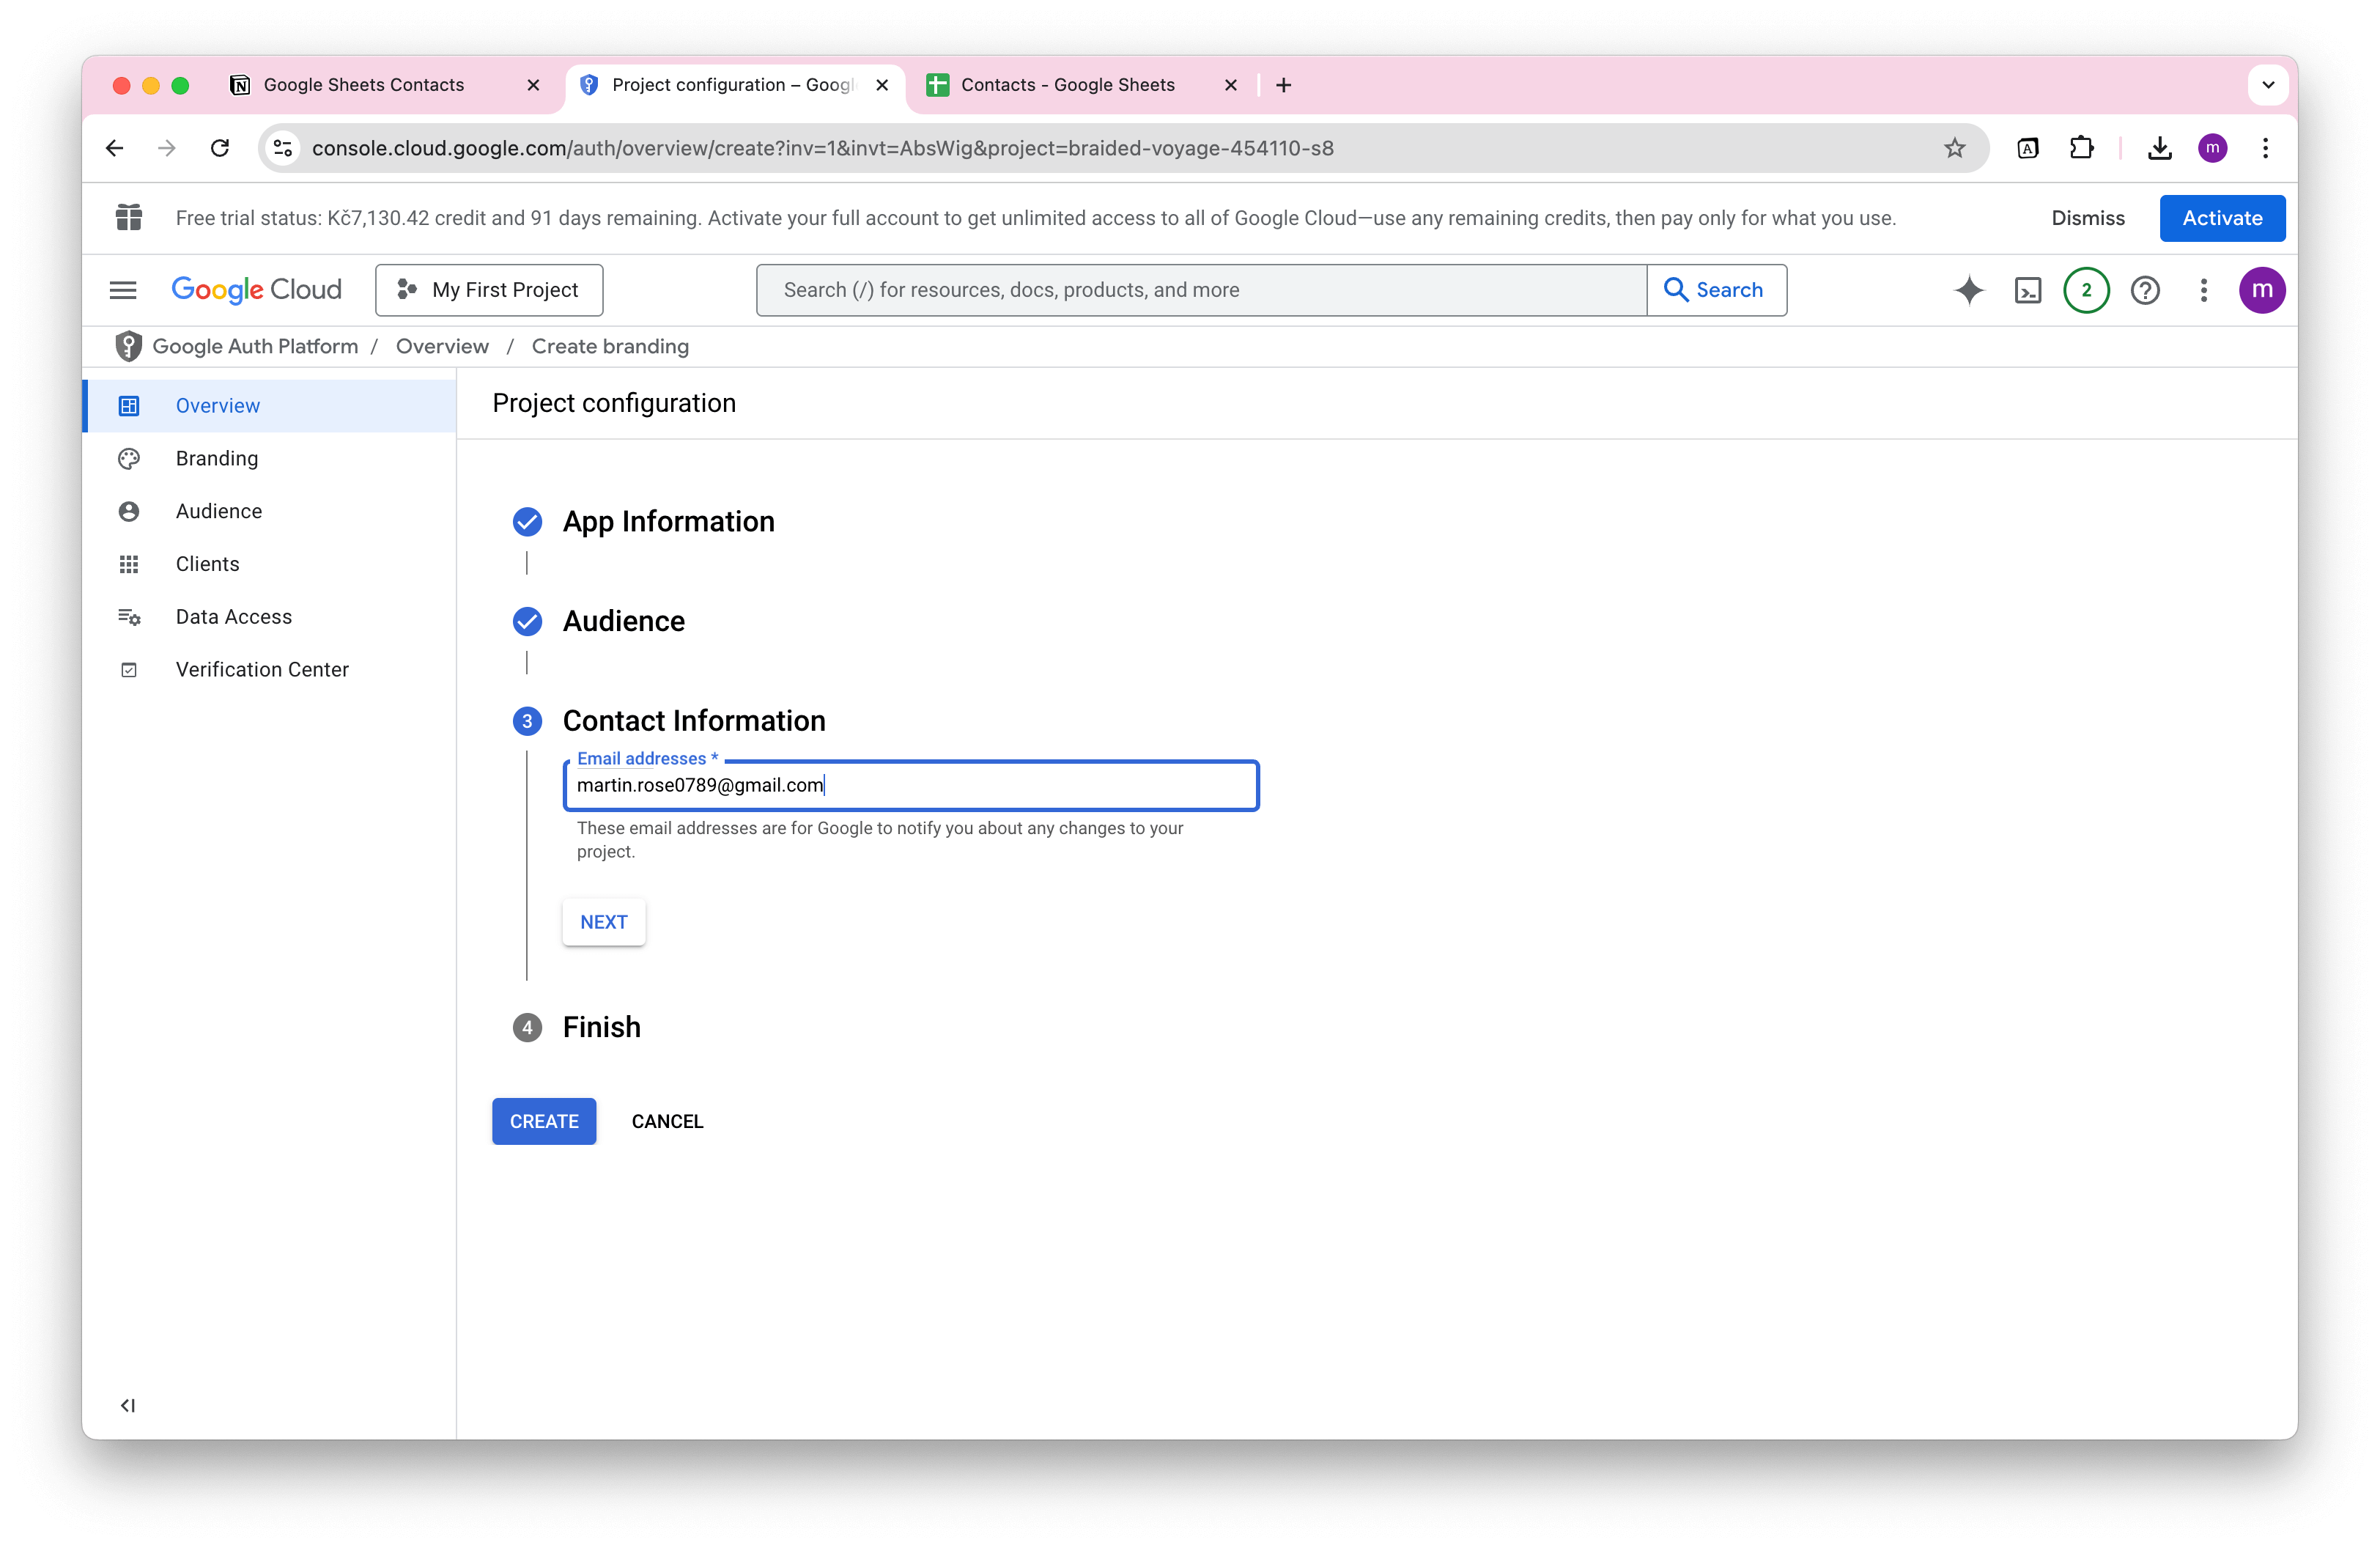
Enter your Google email address for authentication and click NEXT.
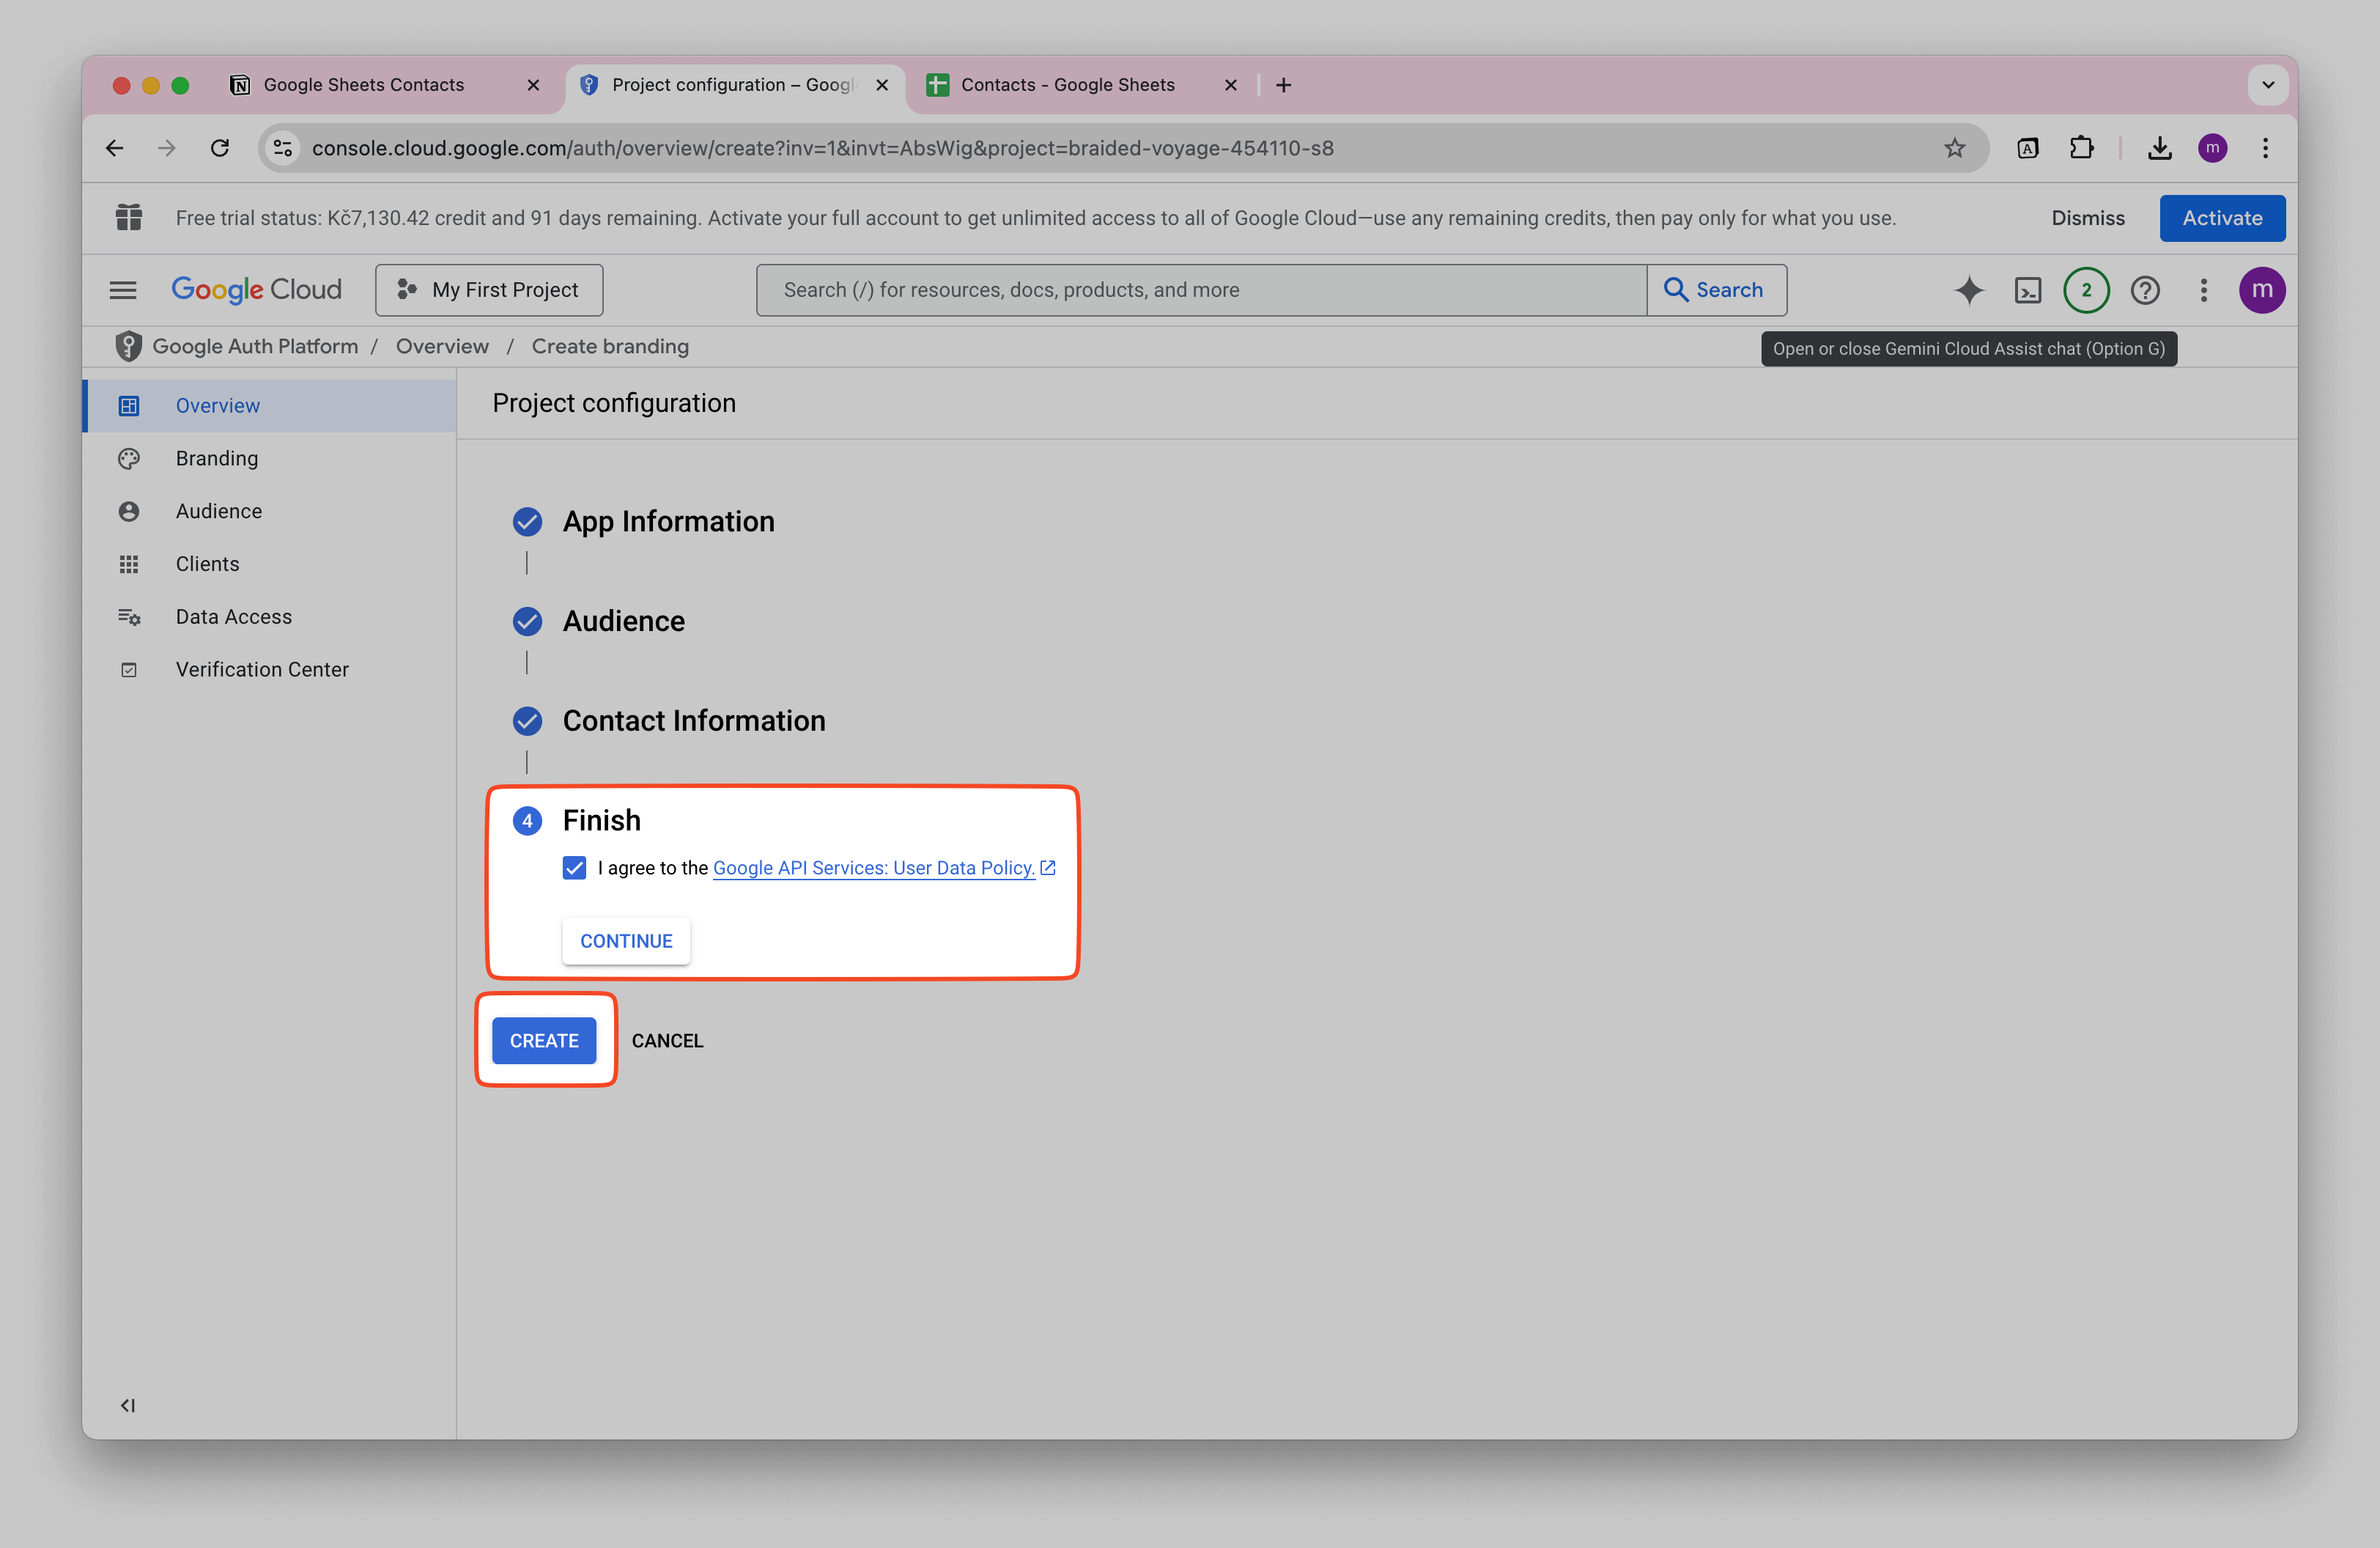
Accept the data policy by checking the "I agree..." box, then click CREATE.
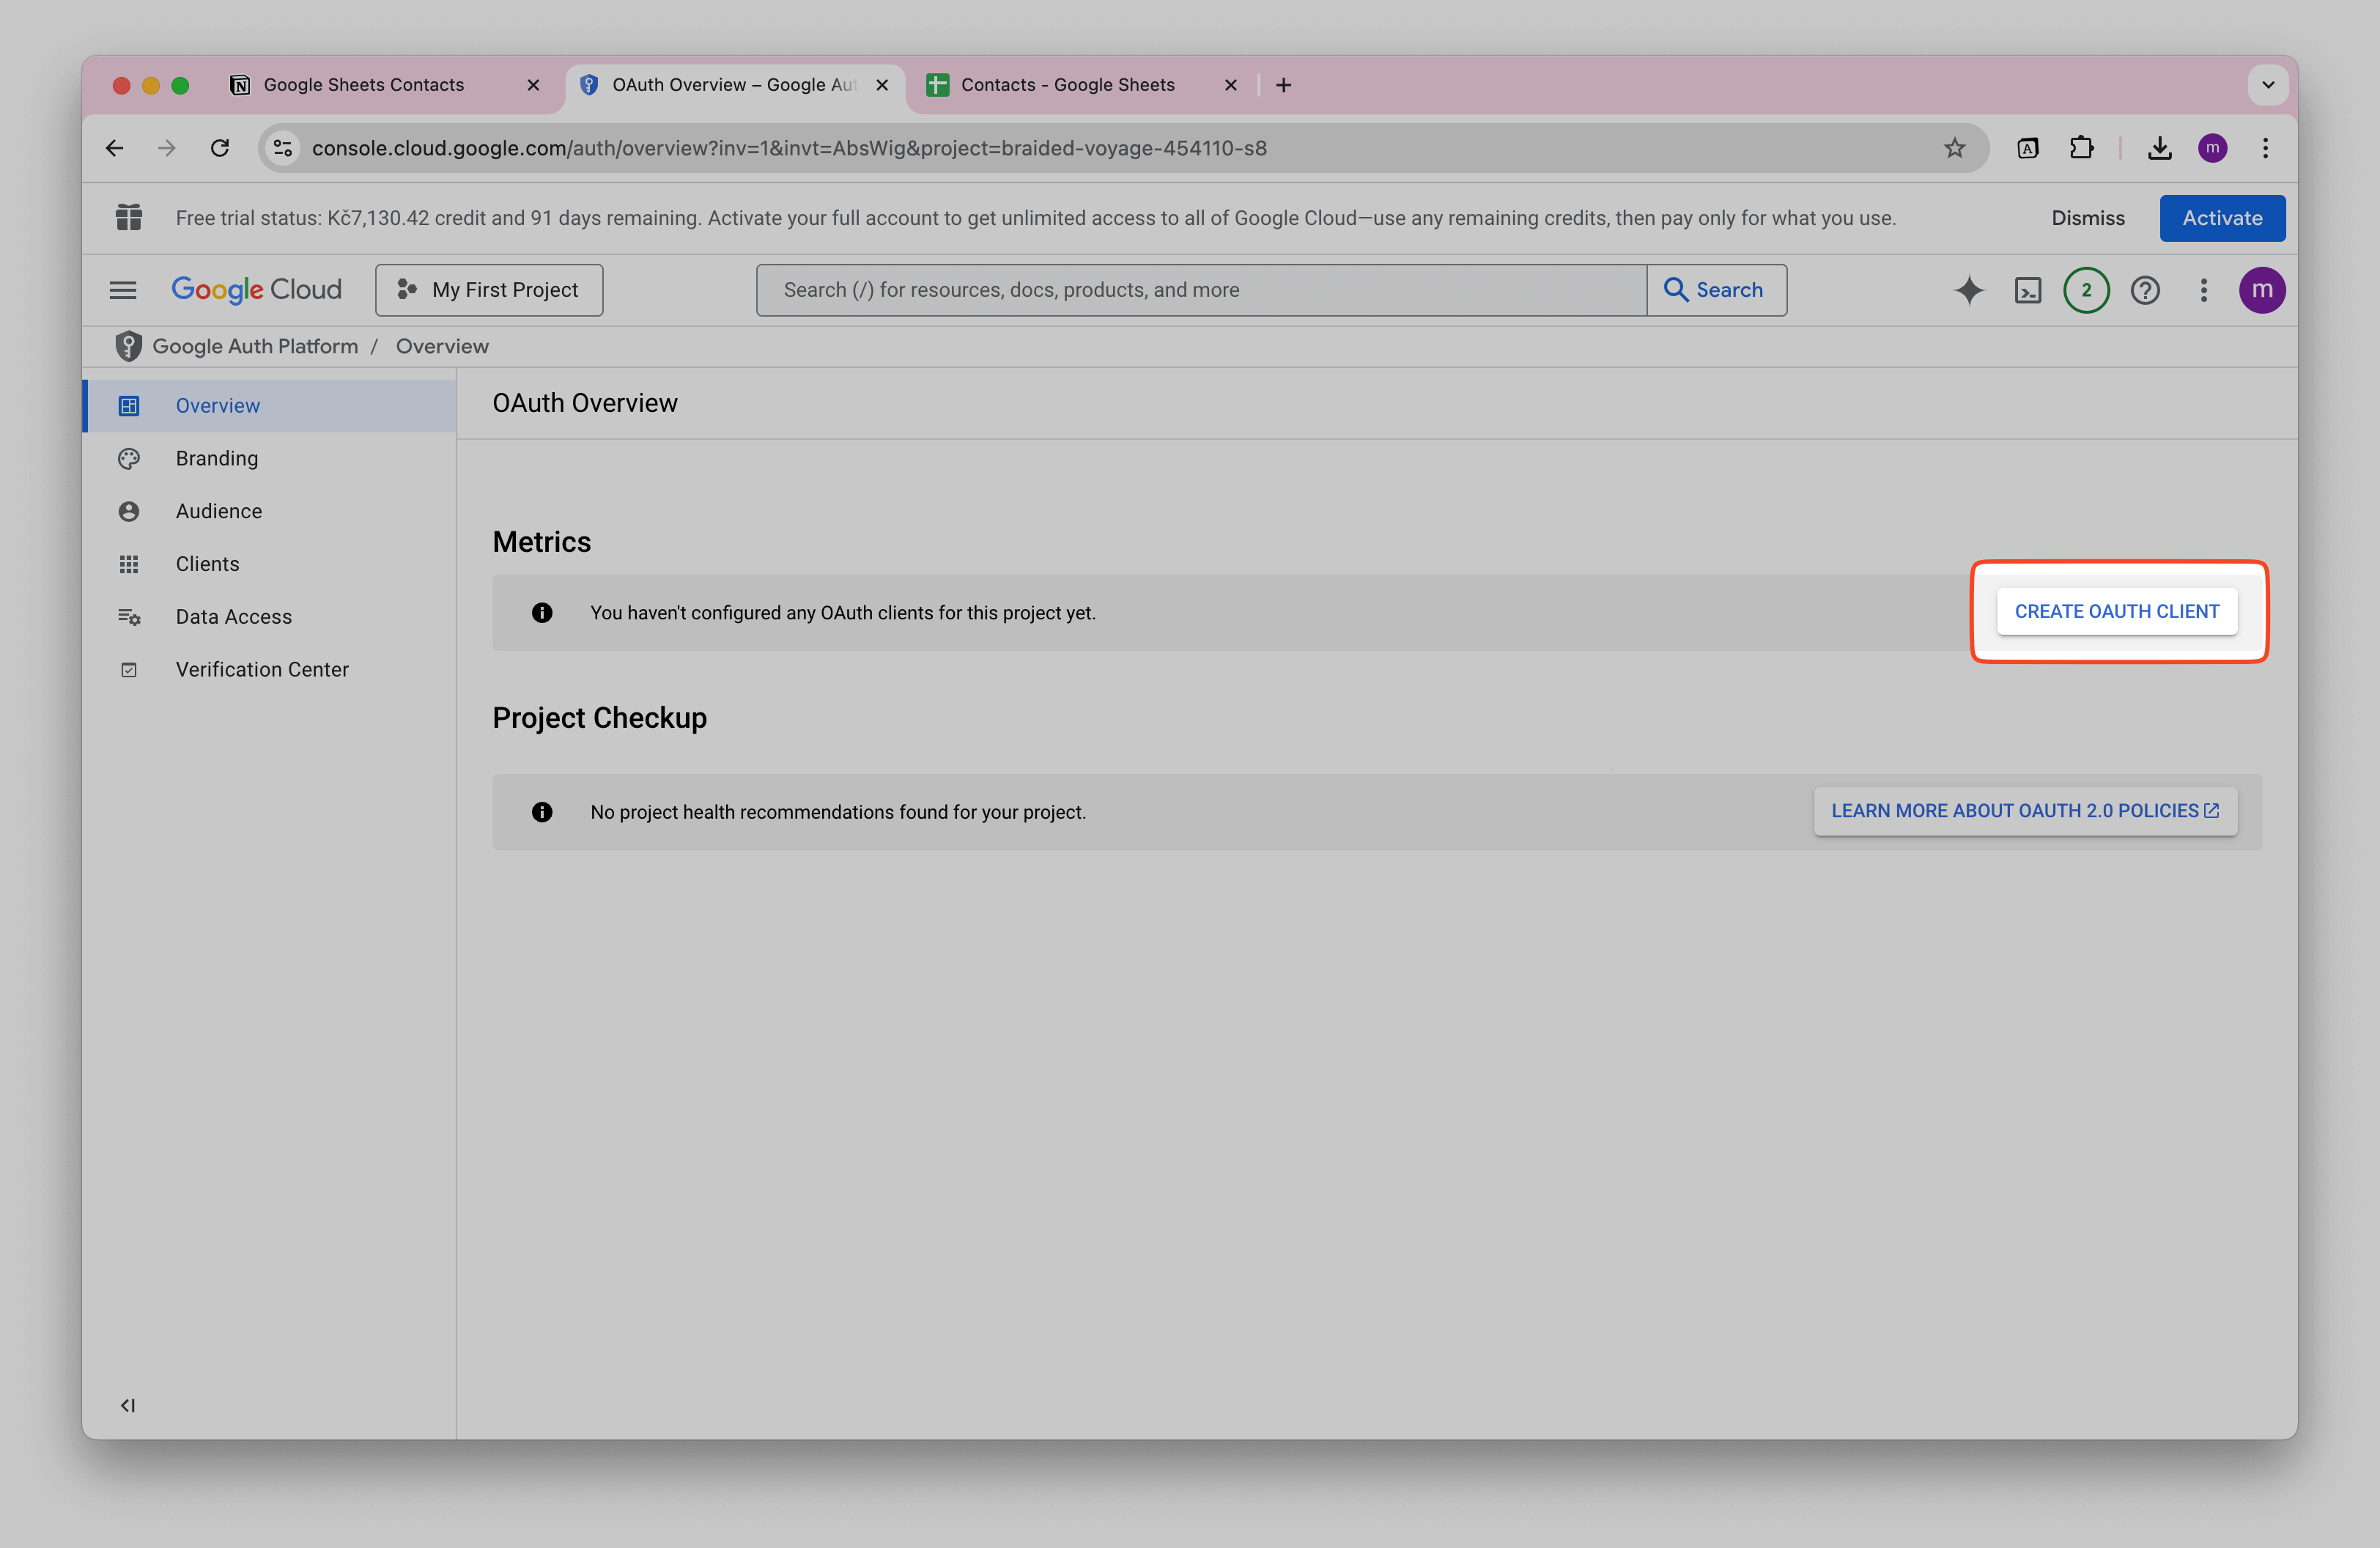
Create the OAuth client (Web application)
Now, that the Google Oauth consent screen is configured, you can set up Google Oauth Client.
In the overview of you Google Console project, you can click CREATE OAUTH CLIENT.
Alternatively, you can enter APIs & Services → Credentials, click CREATE CREDENTIALS and select OAuth client ID.
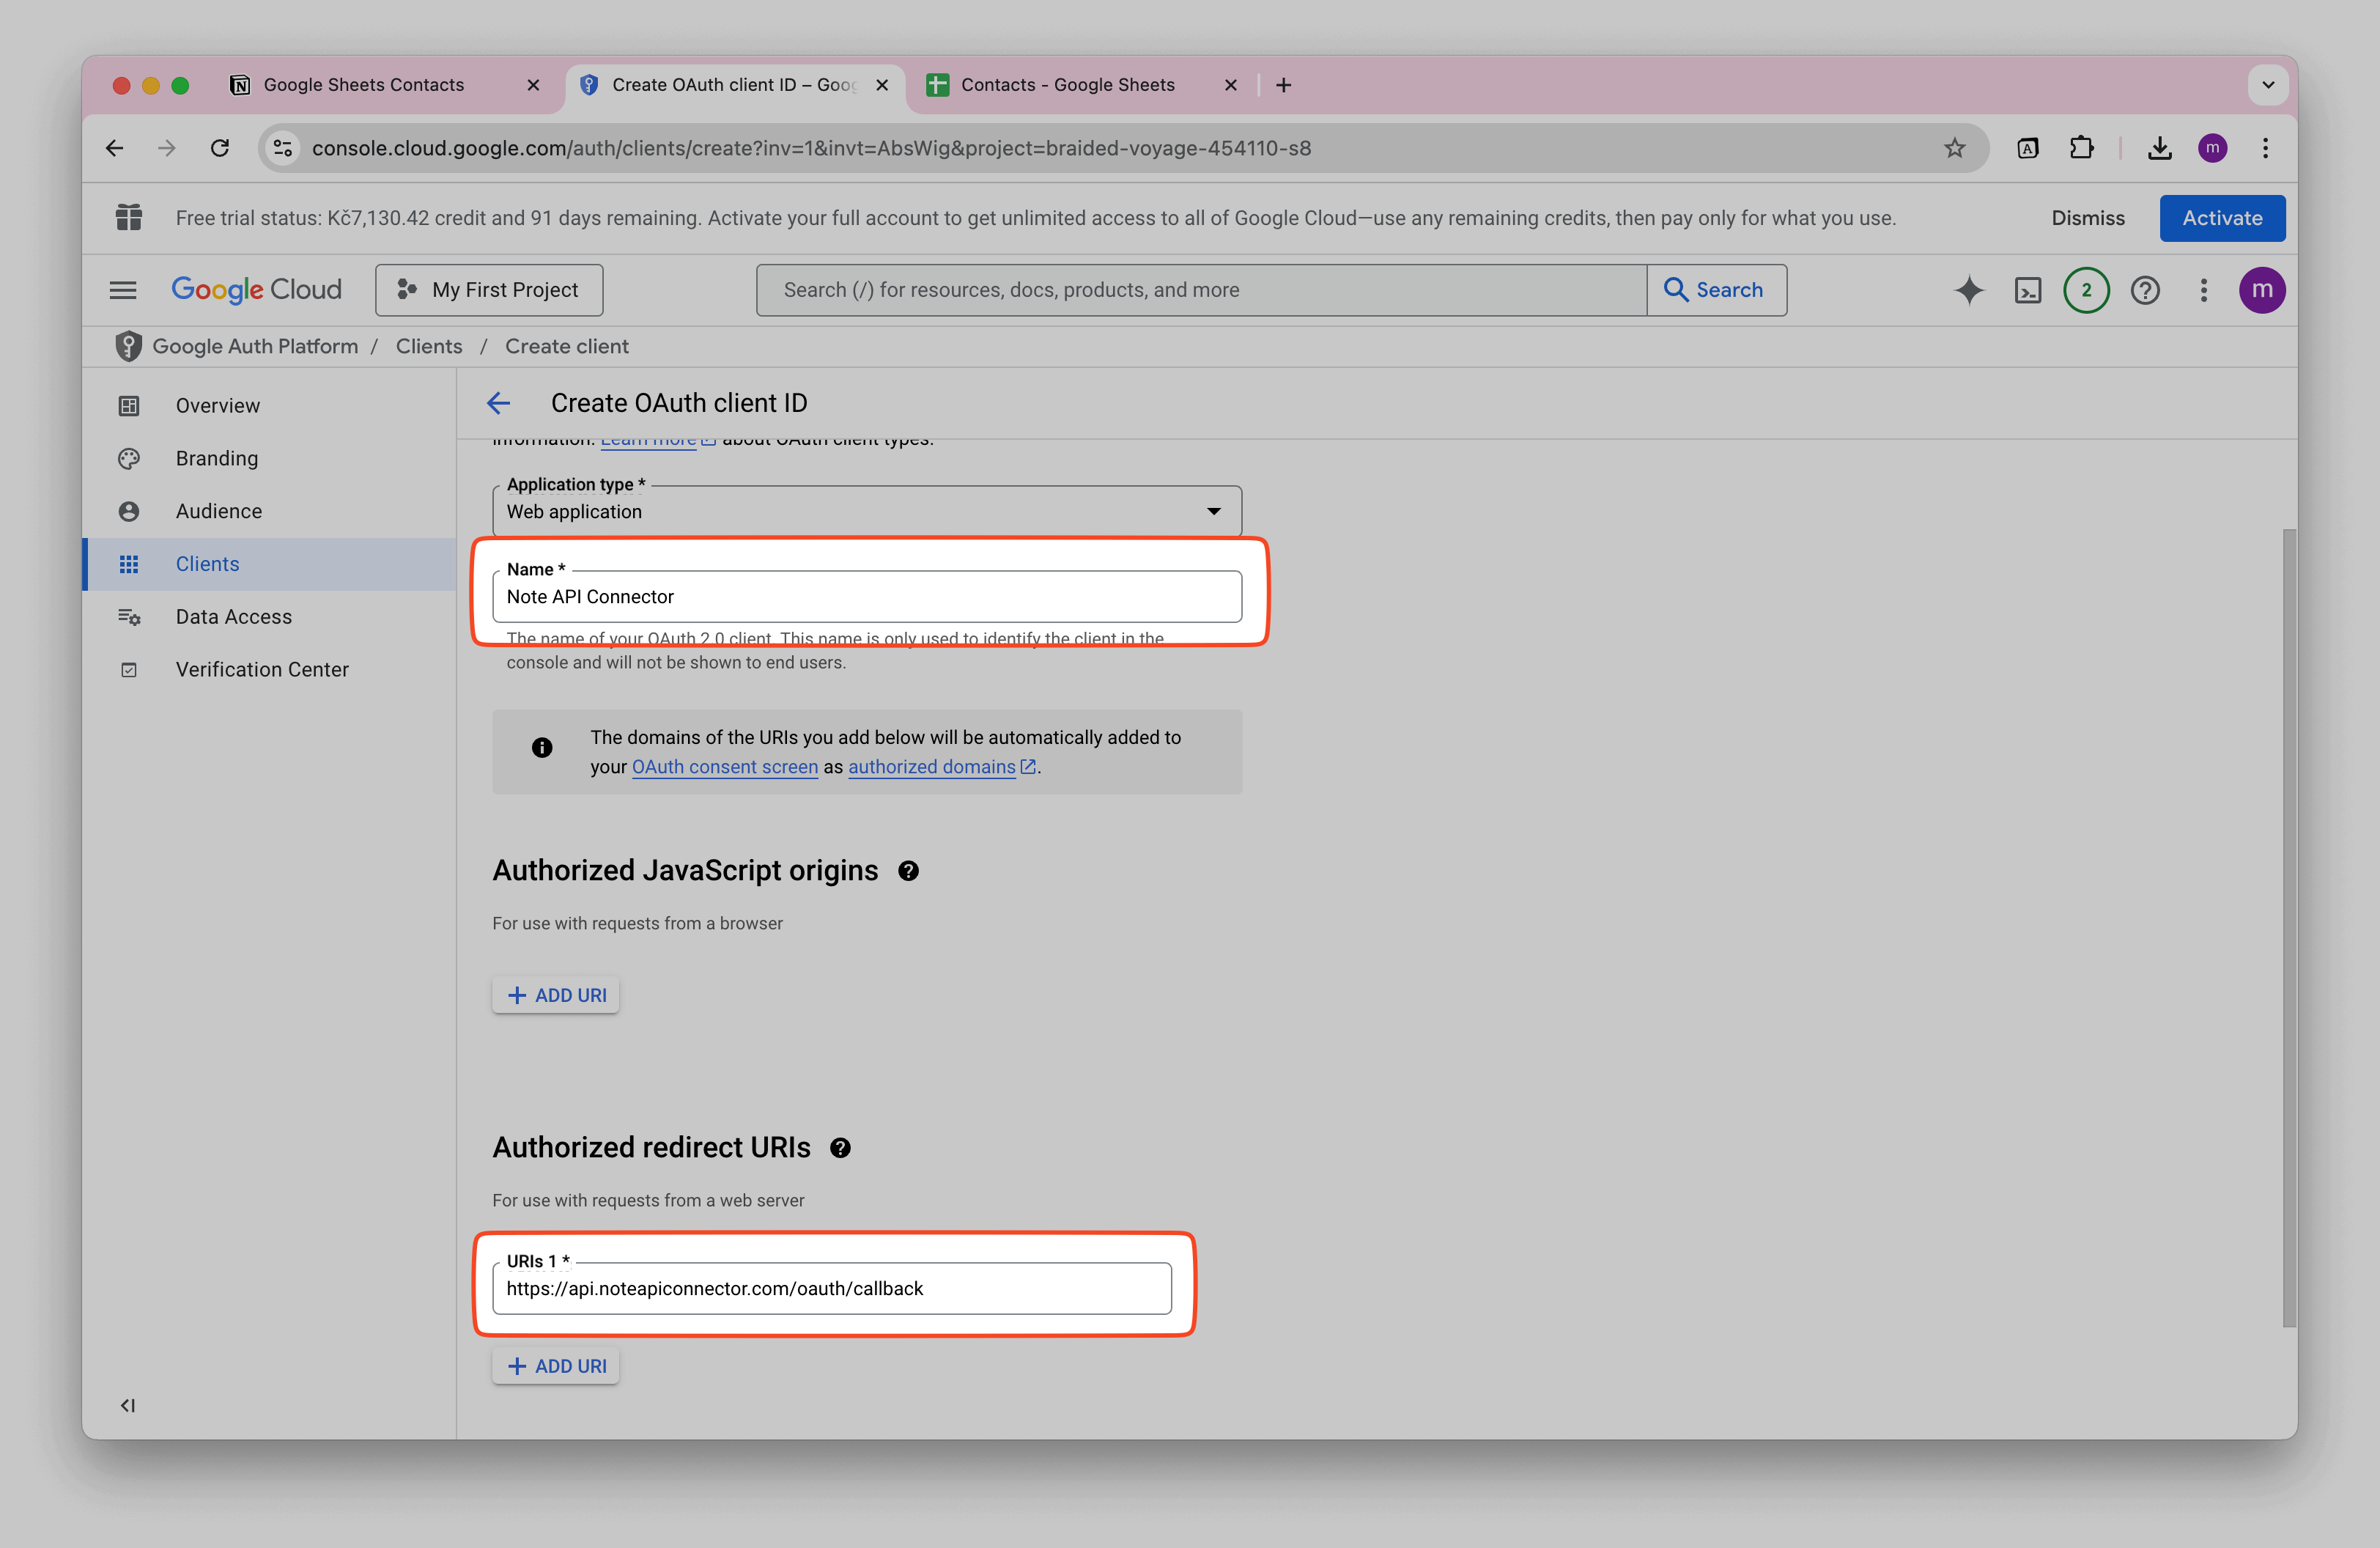
As Application type choose Web Application.
Name your app (e.g., "Note API Connector") and add the following Authorized redirect URIs:
https://api.noteapiconnector.com/oauth/callback
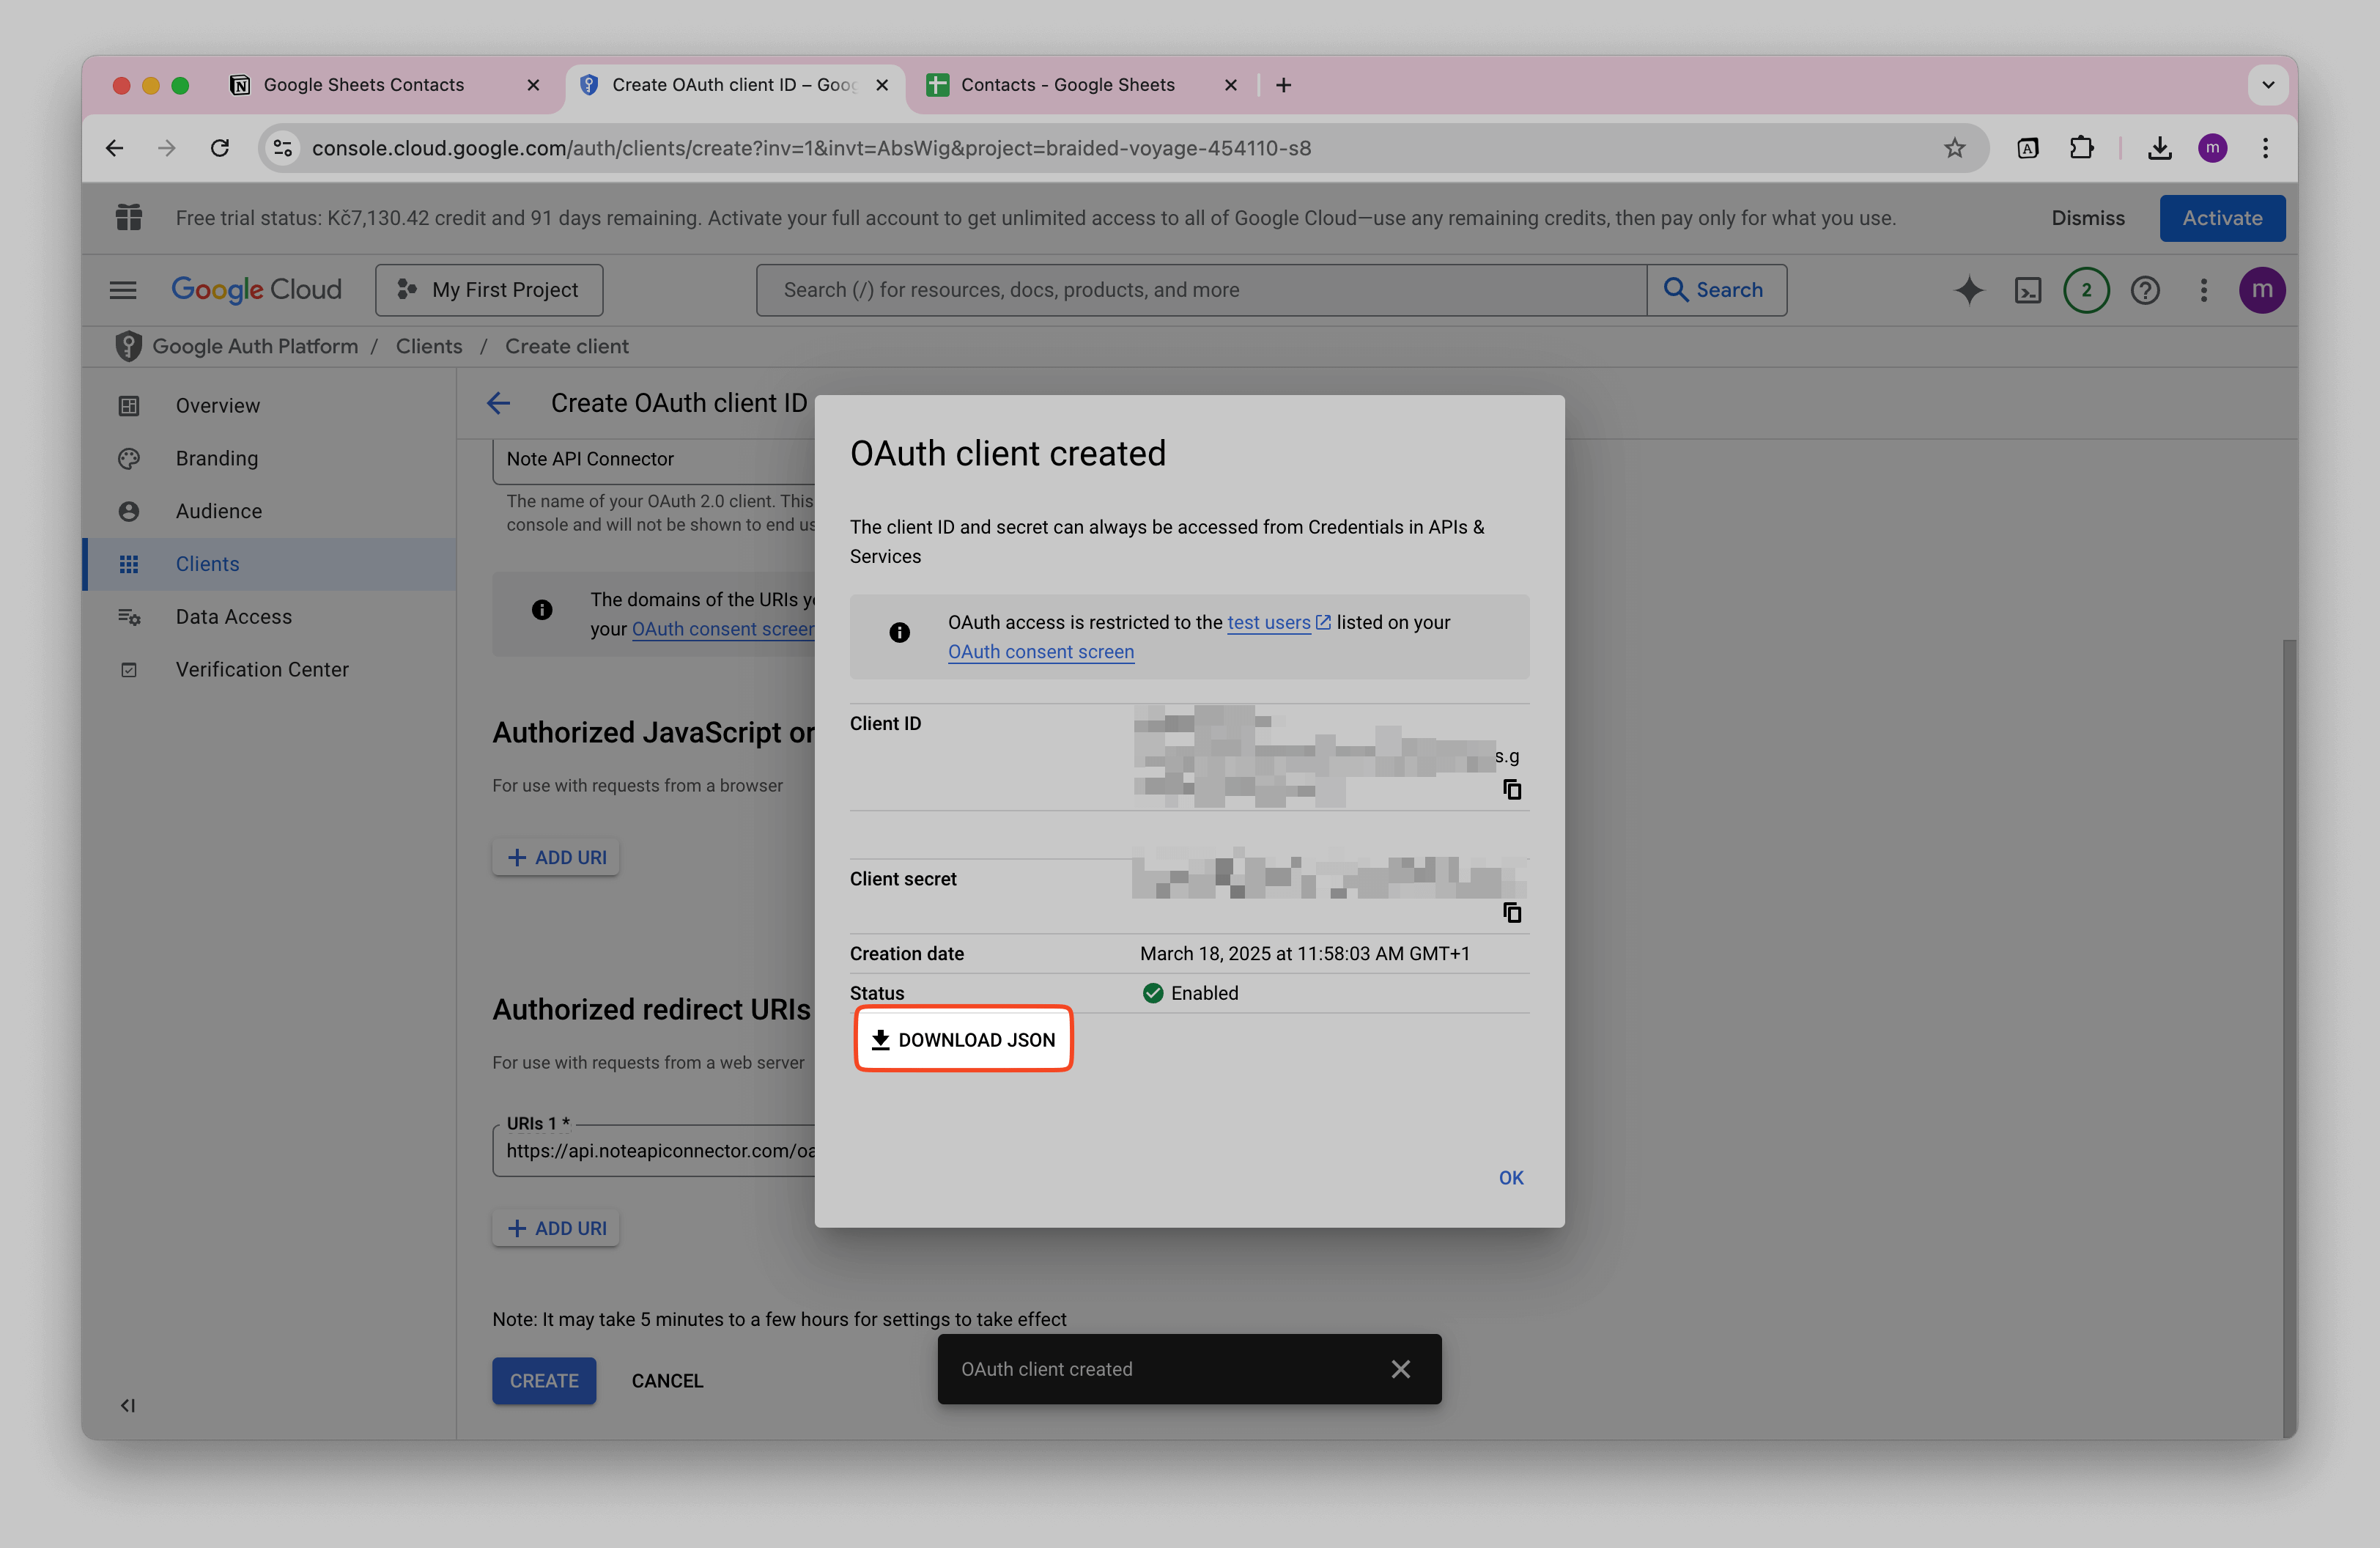
A dialog will appear showing your Client ID and Client secret. Click DOWNLOAD JSON to download the credentials file, as you will need it later.
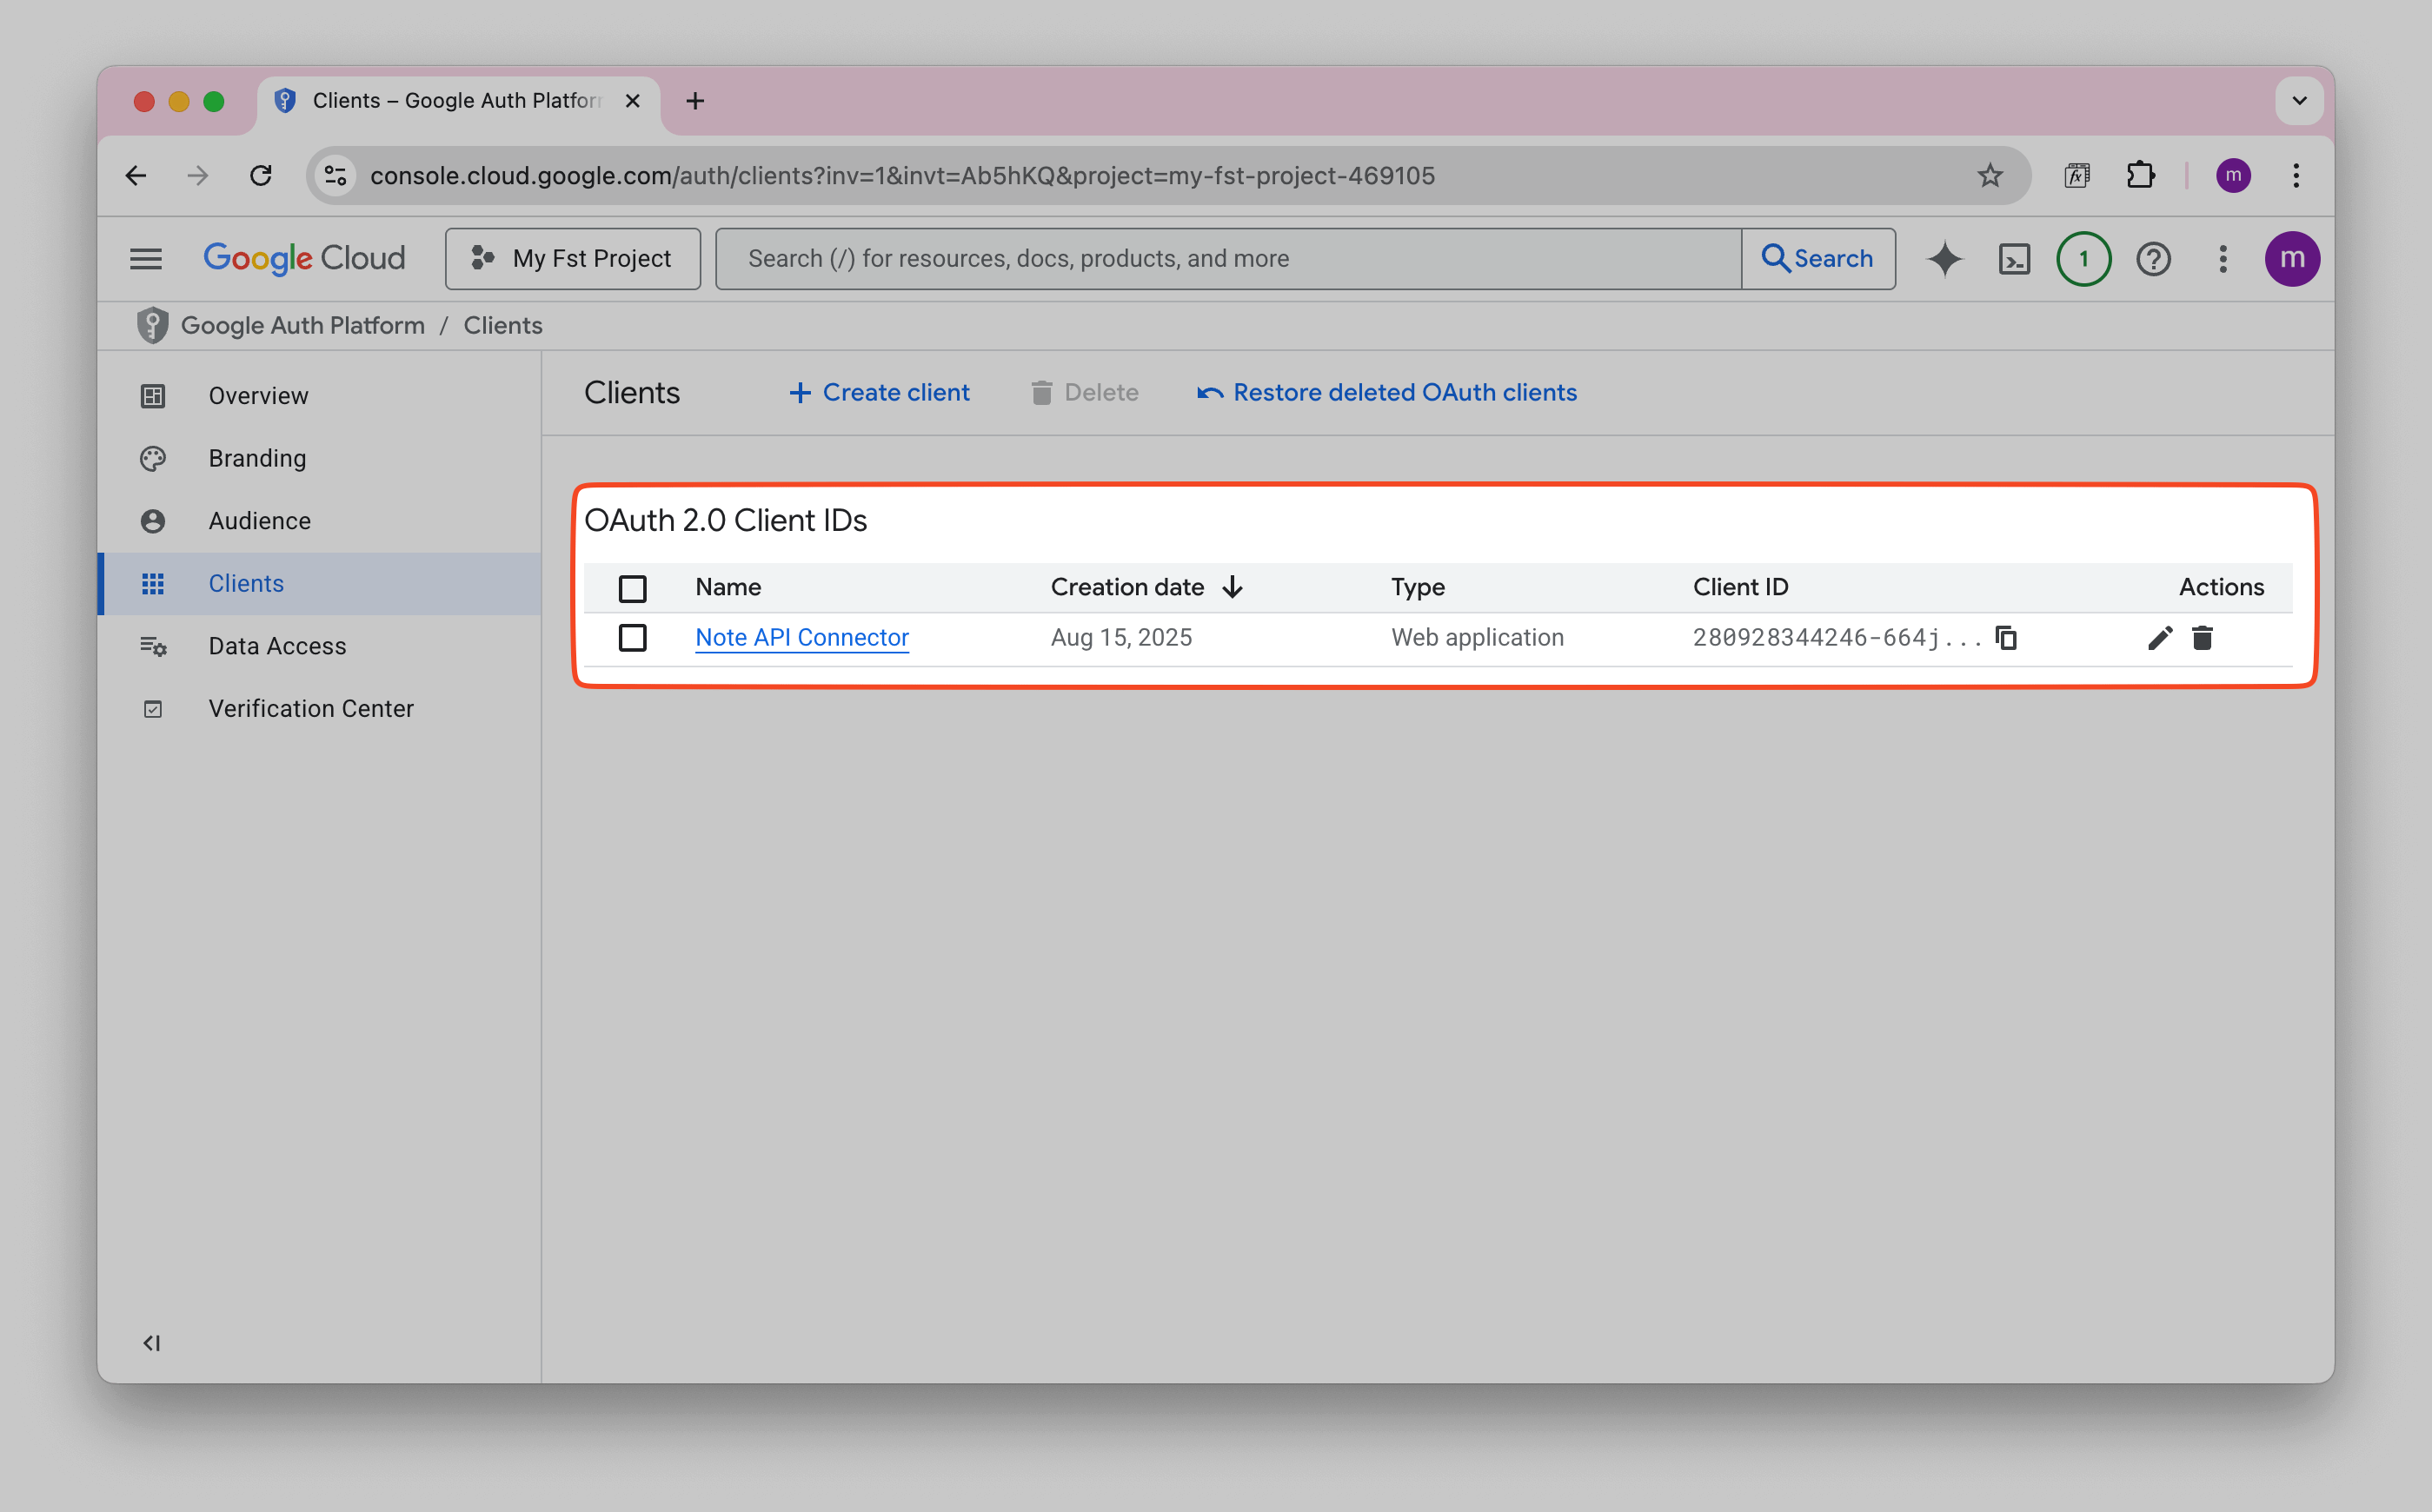
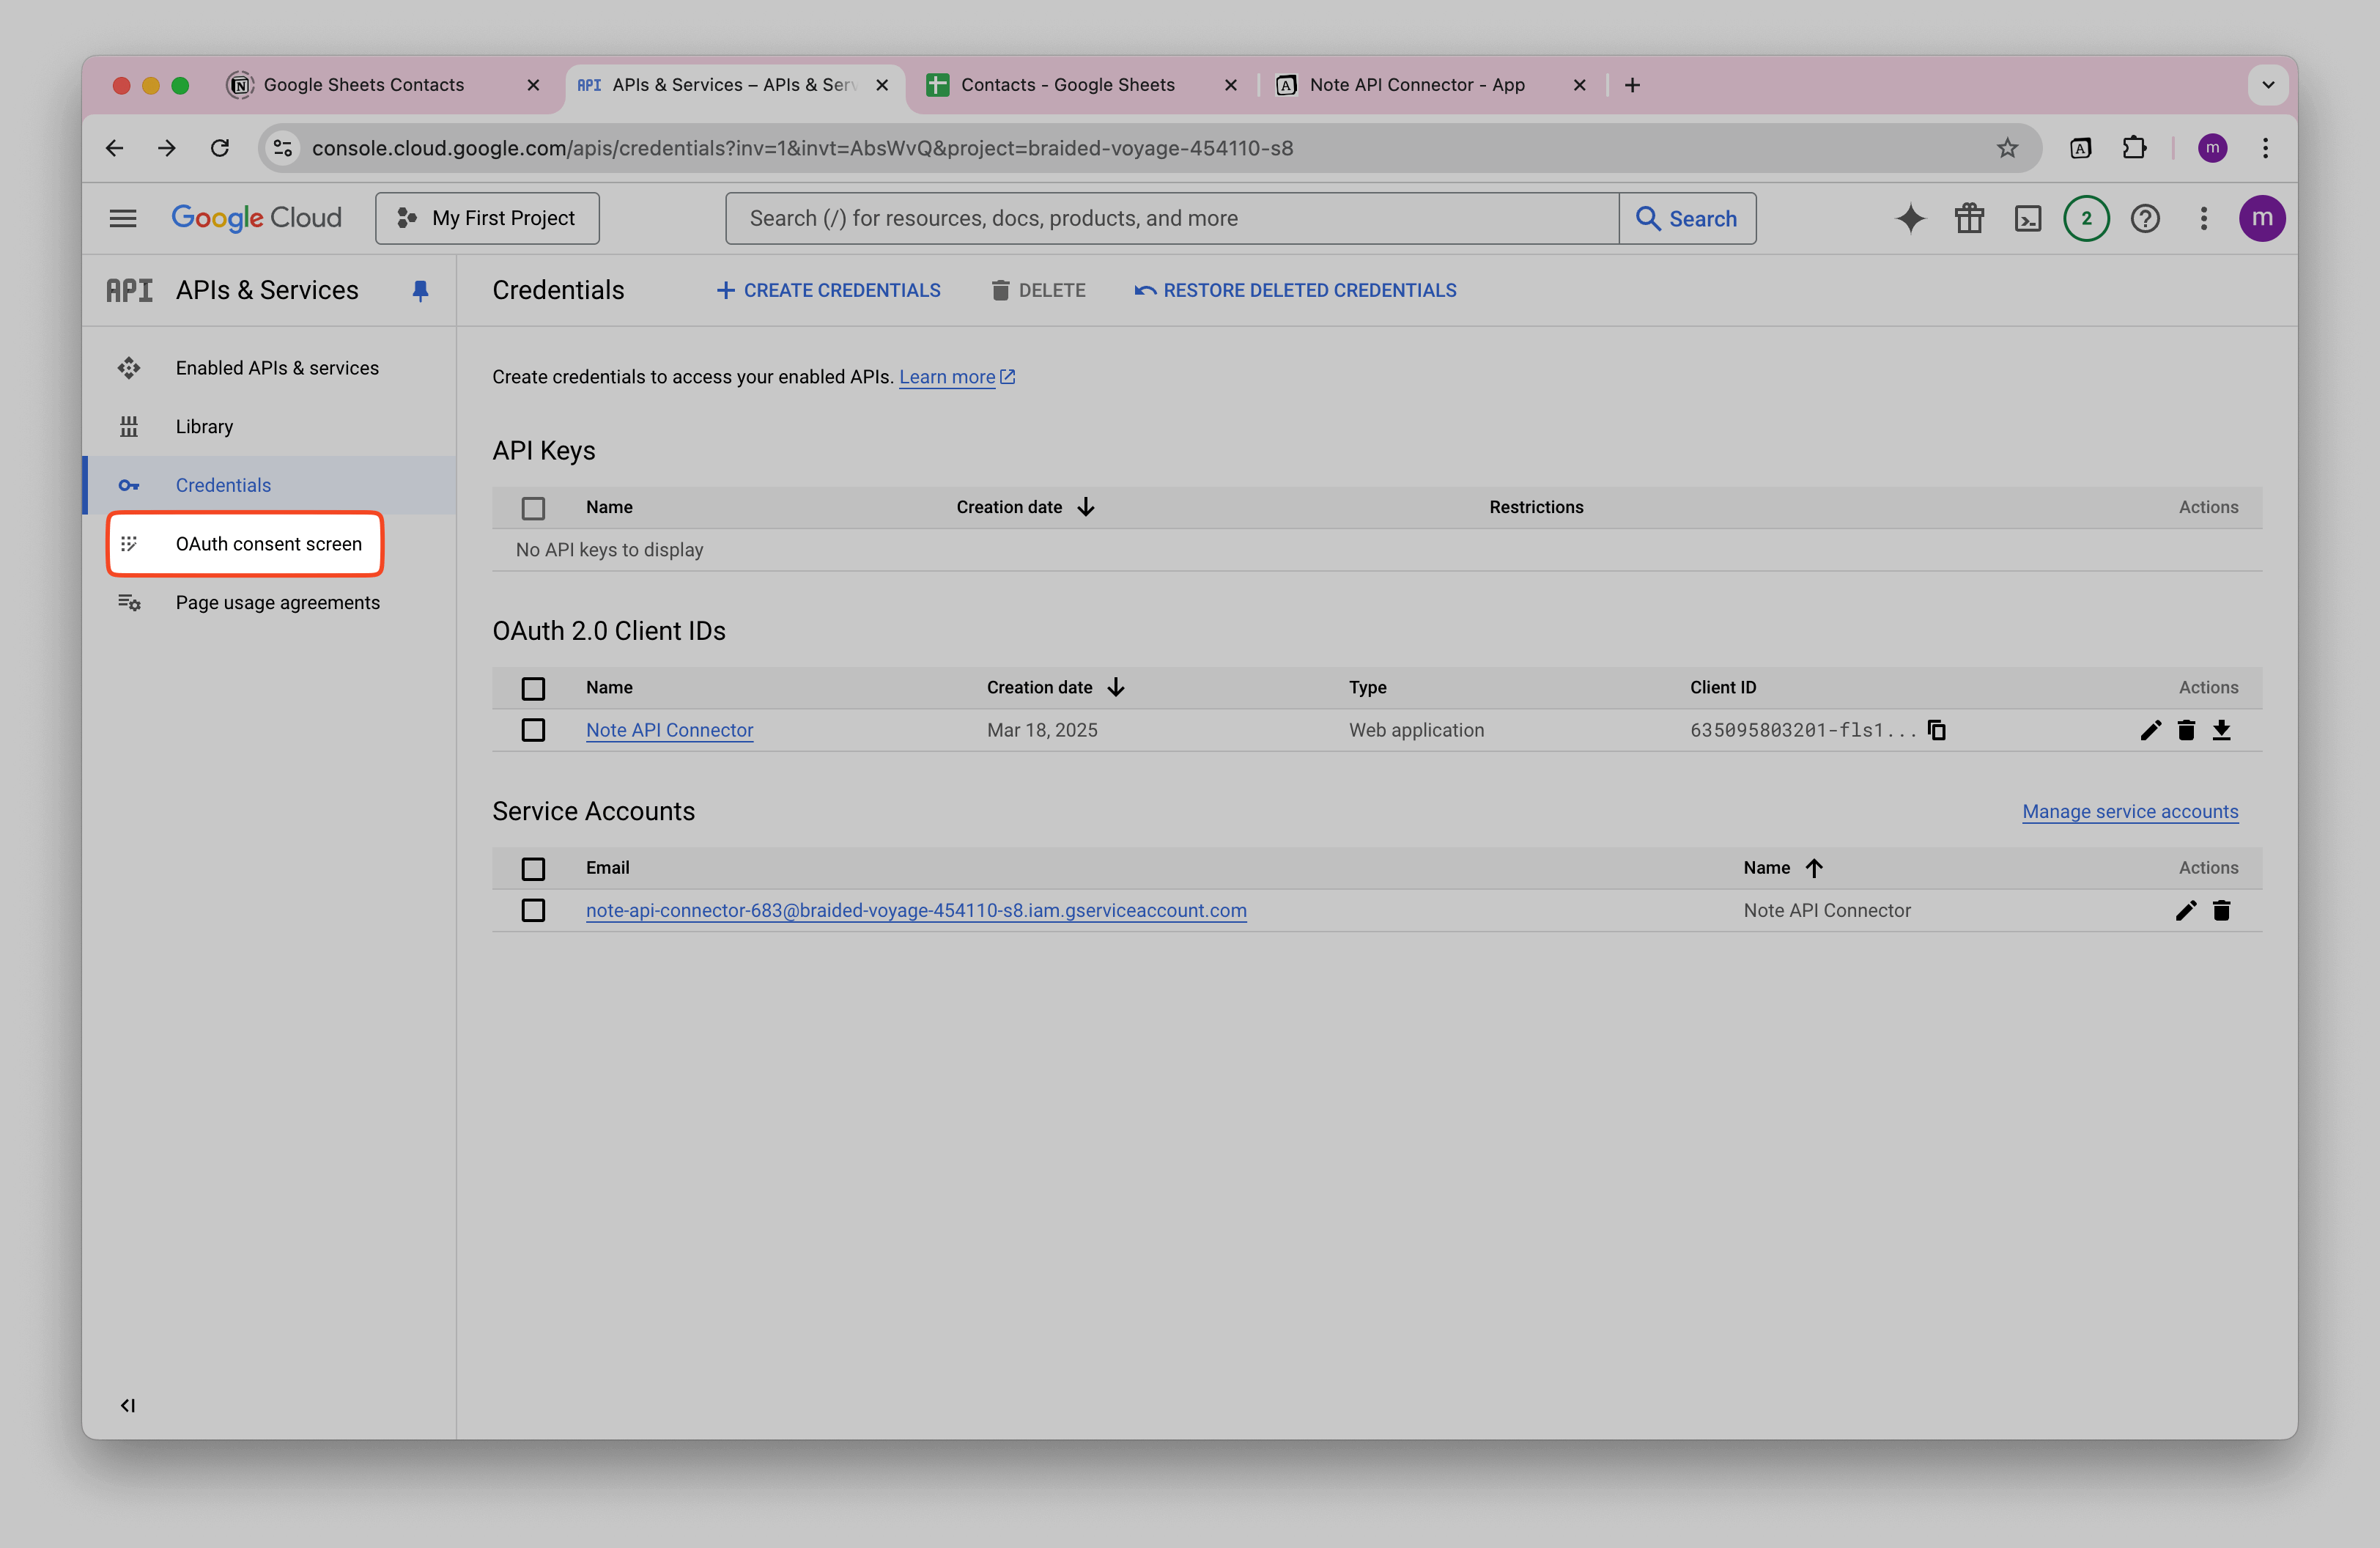
When you open Credentials for My first project, you should see your OAuth Client.
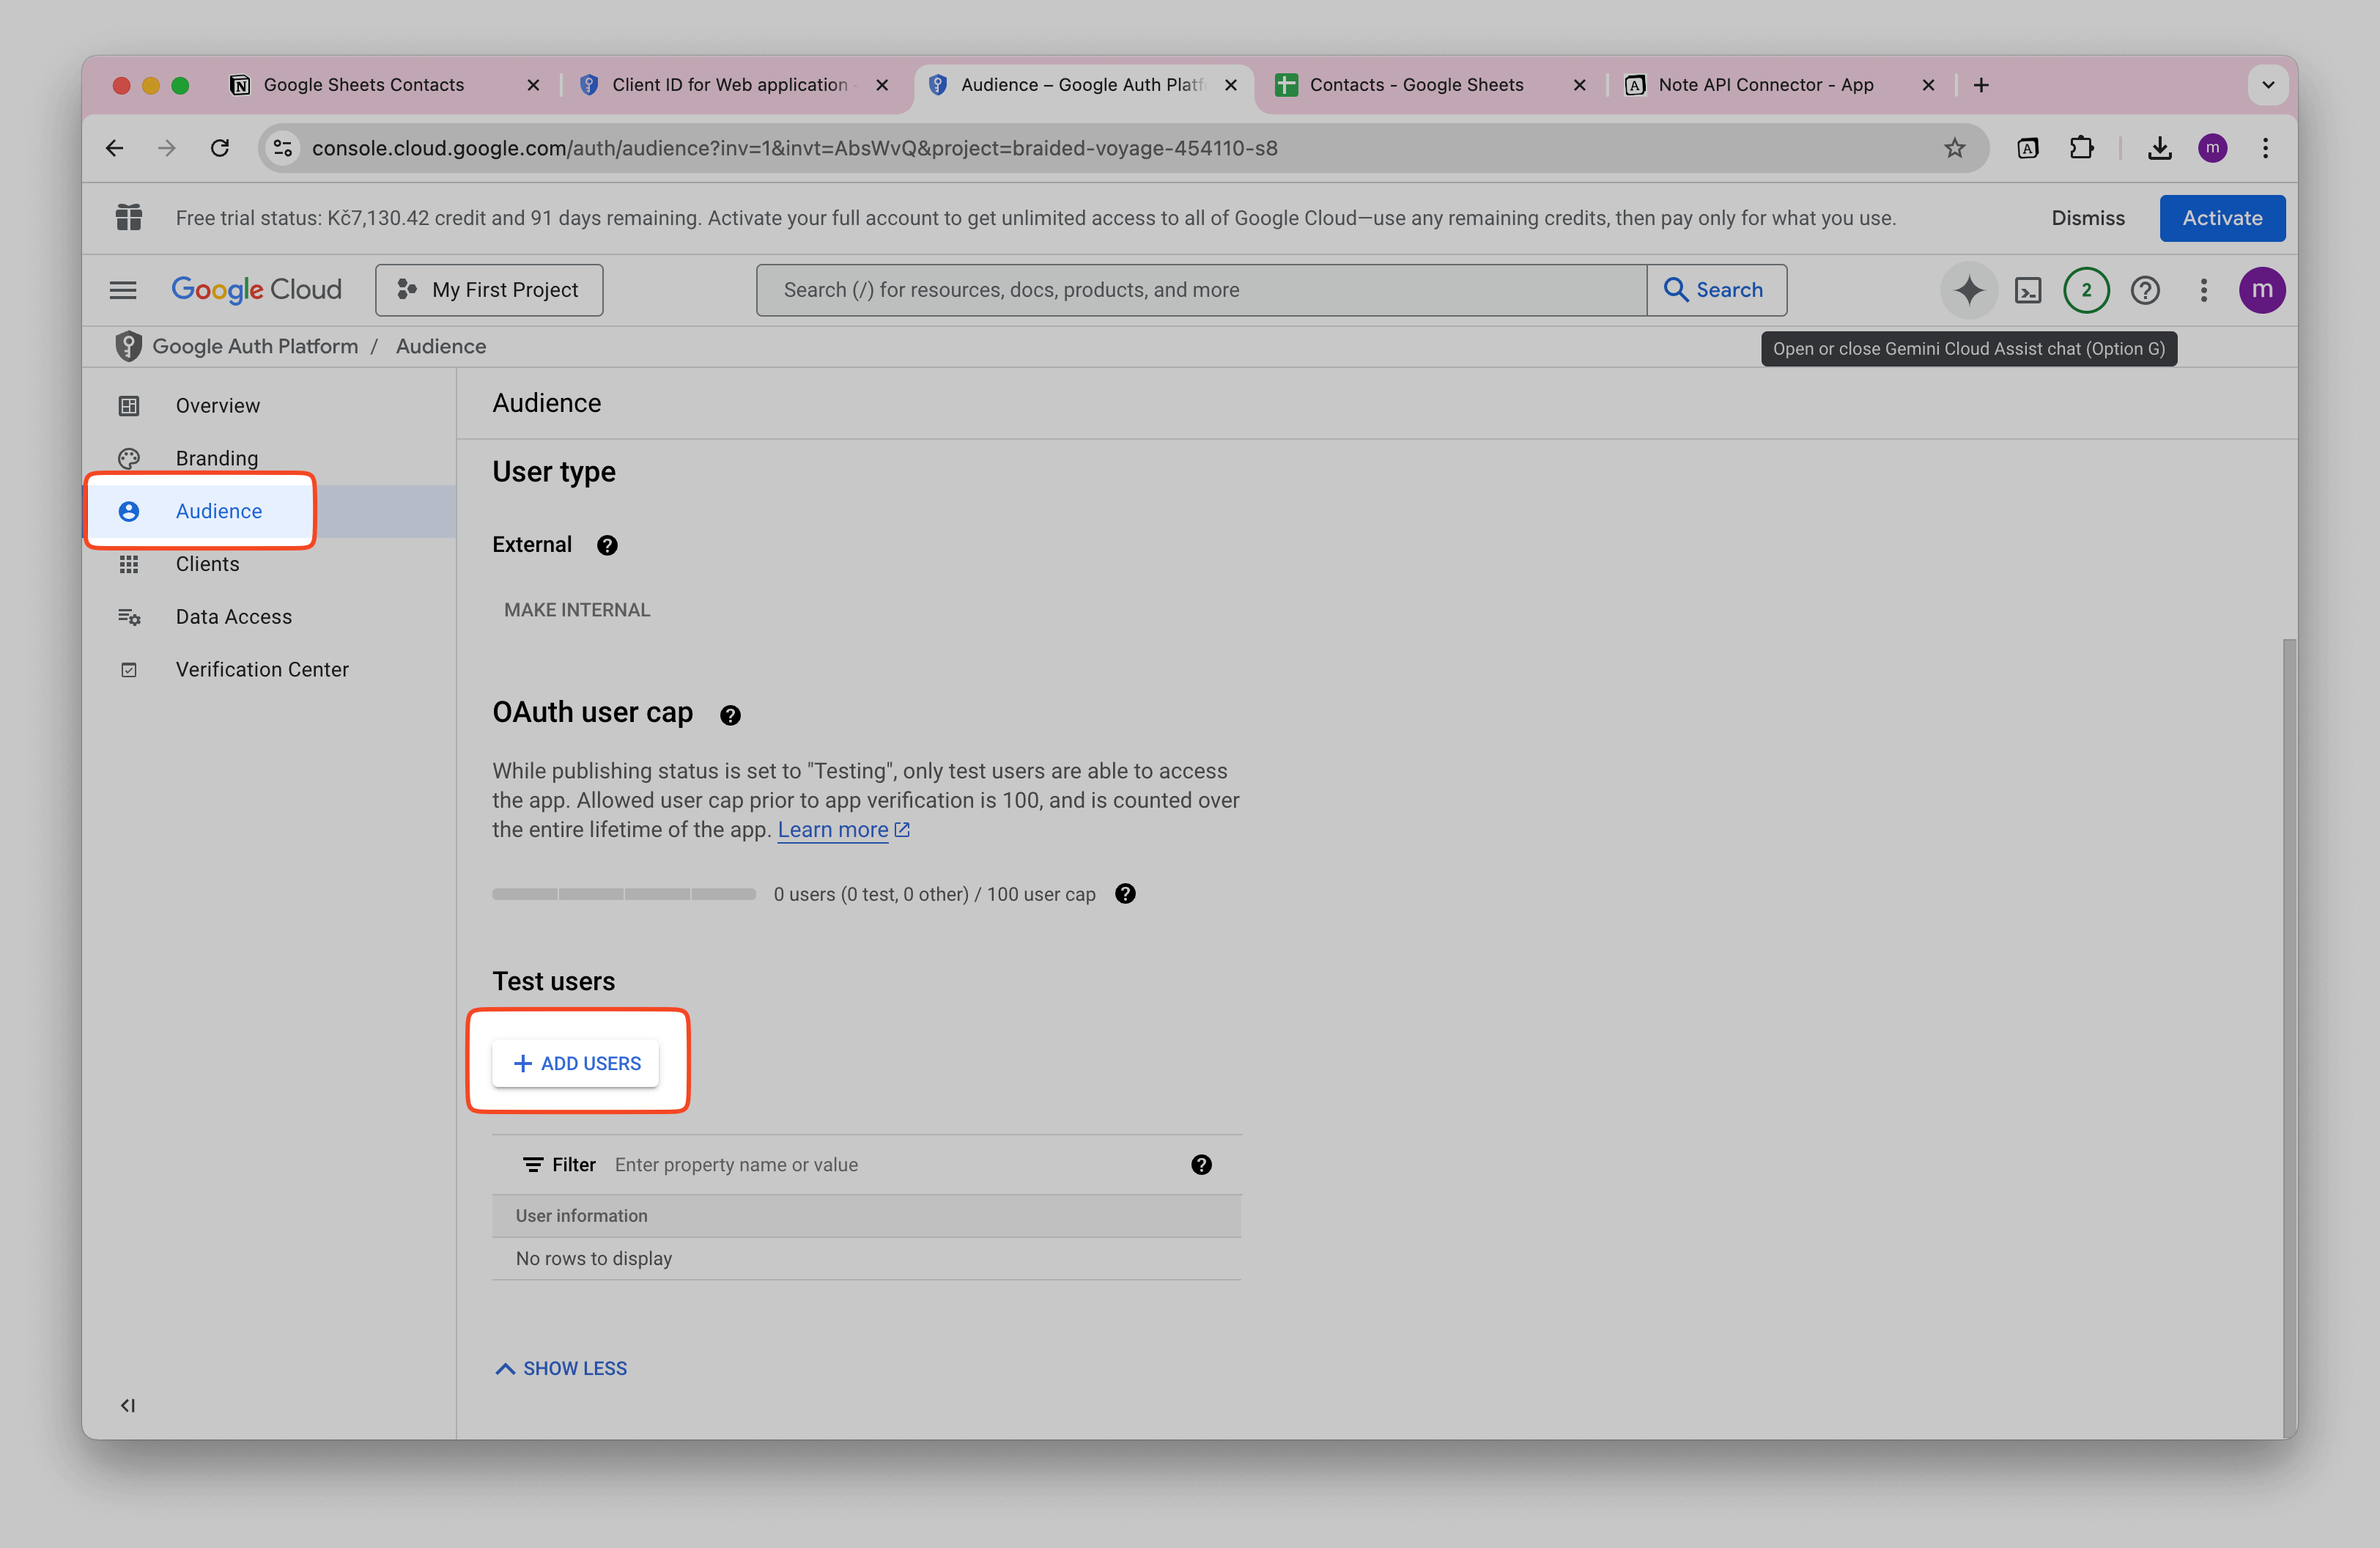
Add yourself as a test user
Now, open OAuth consent screen in the sidebar.
Click Audience → ADD USERS.
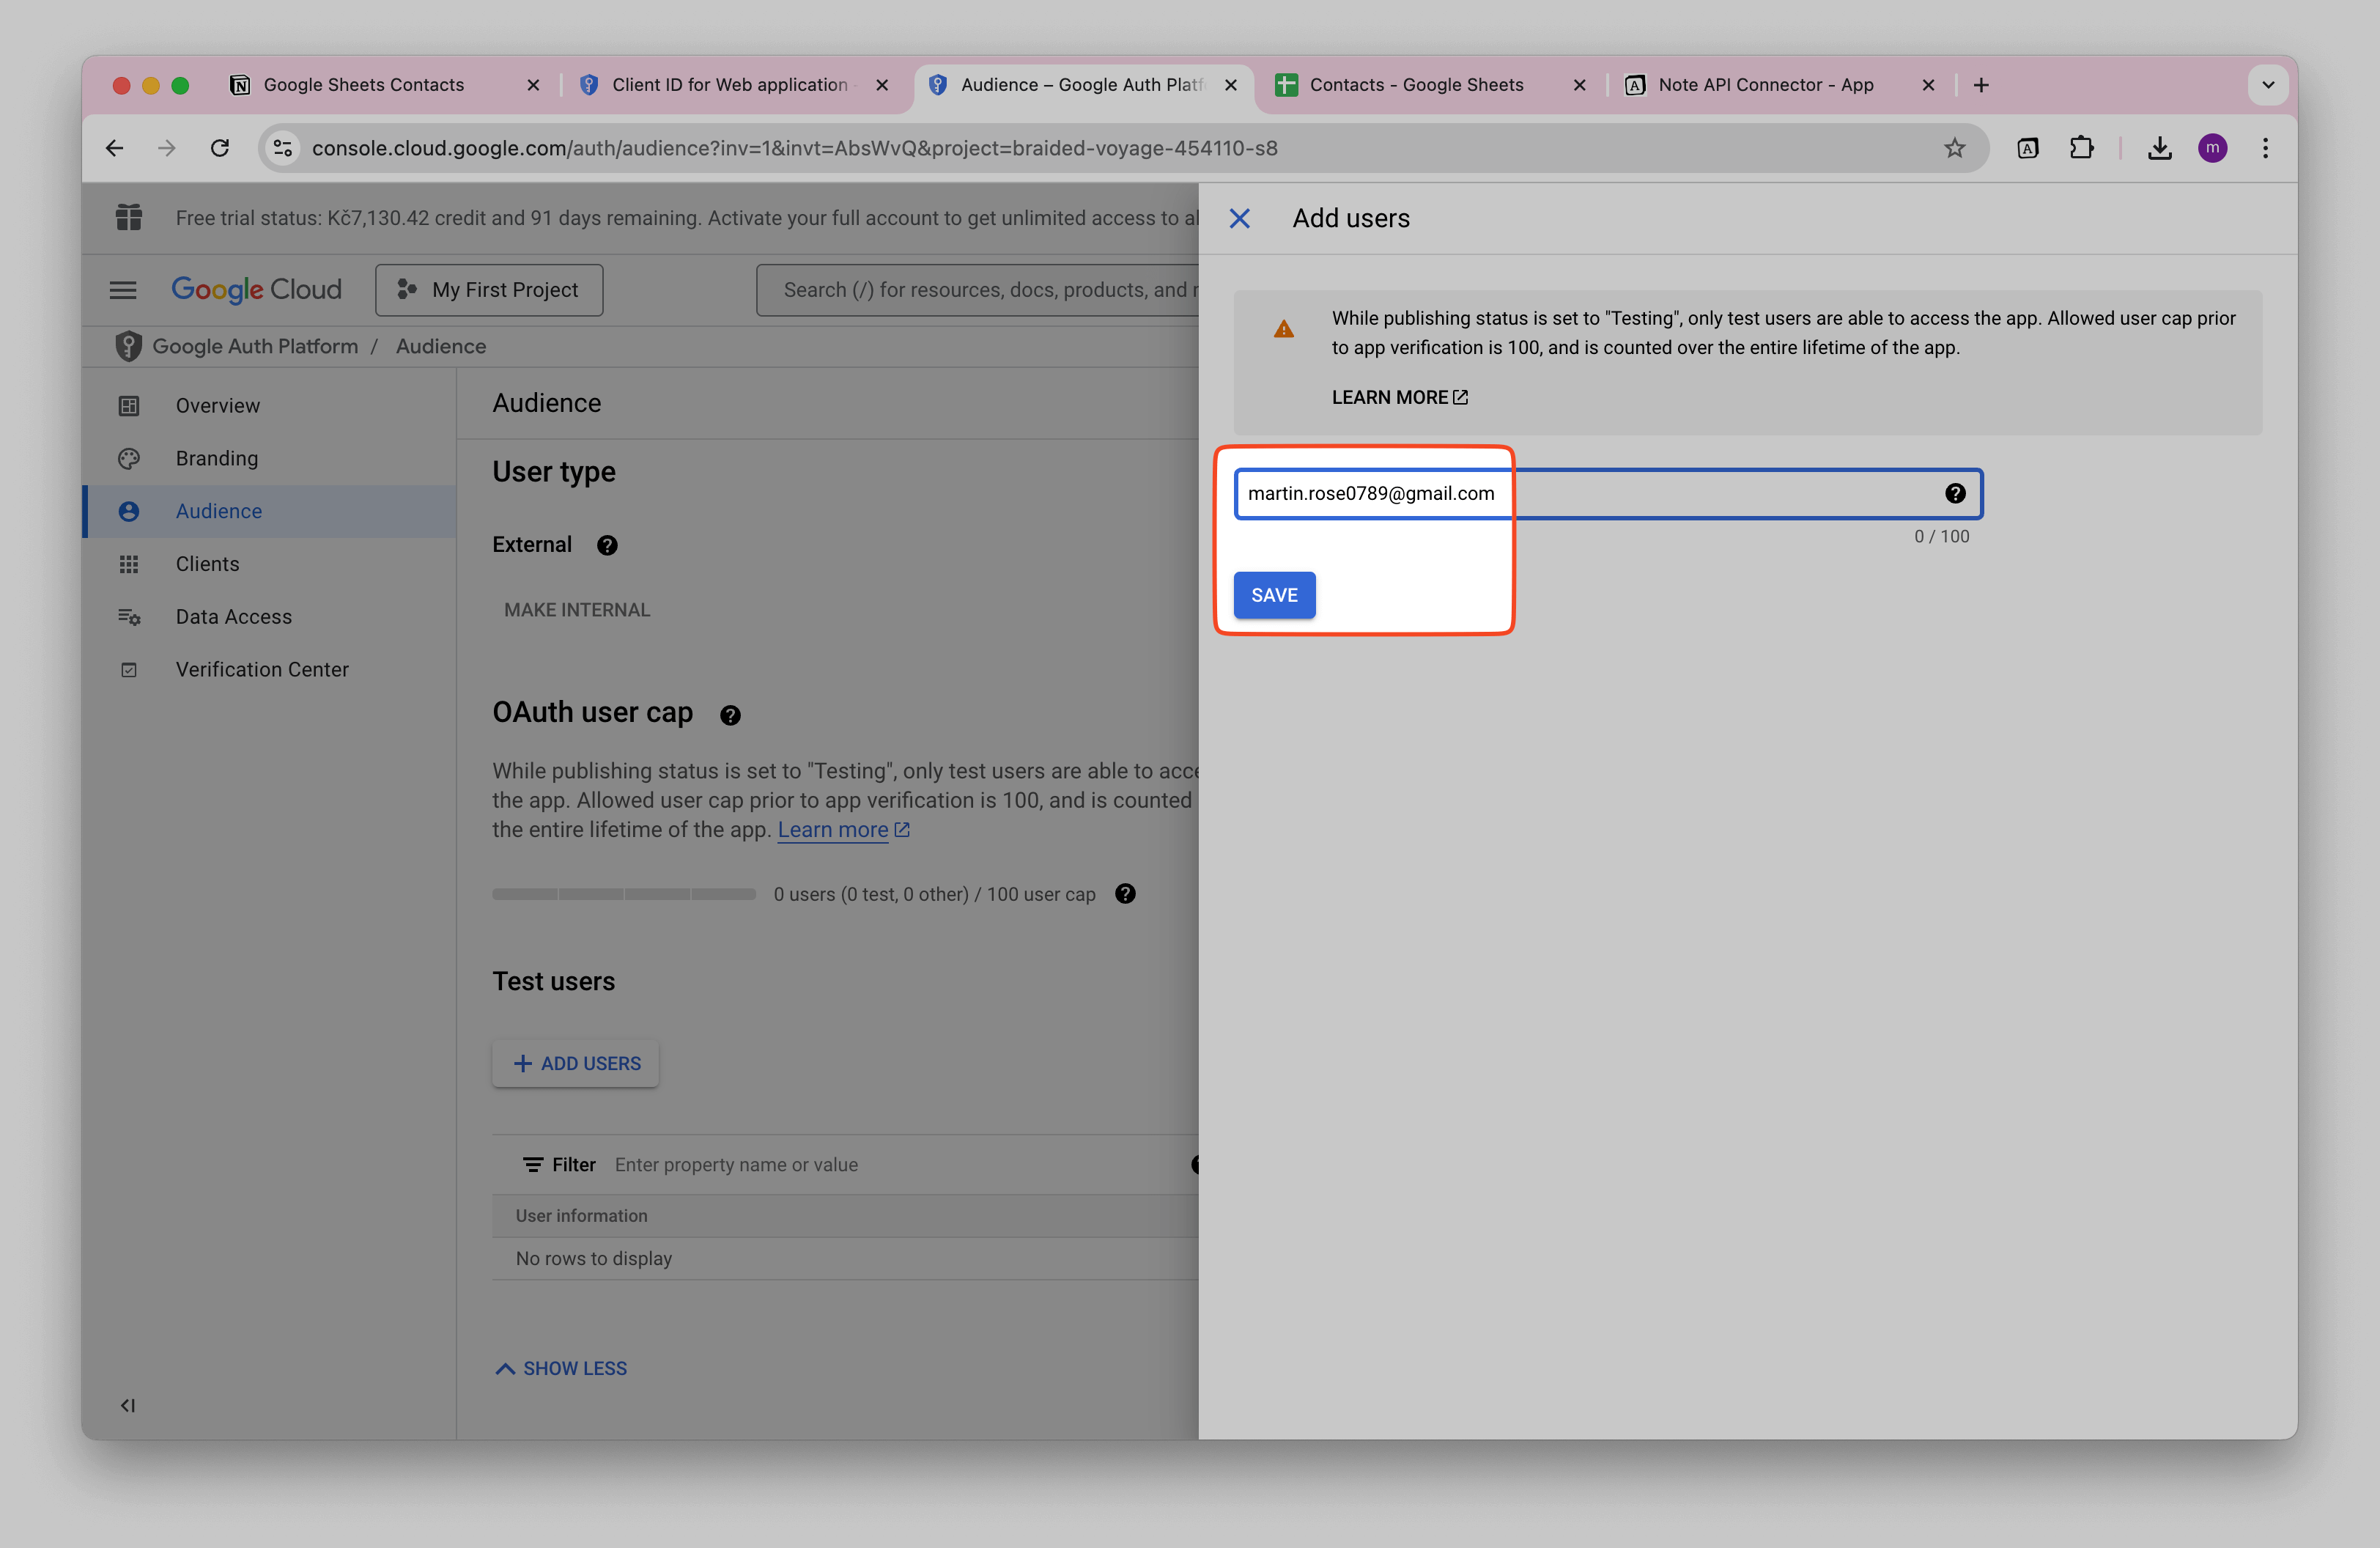
Add your Google email for authentication and click SAVE.
Enable the Google API(s) for your project
Before you connect, turn on the specific Google API you plan to call:
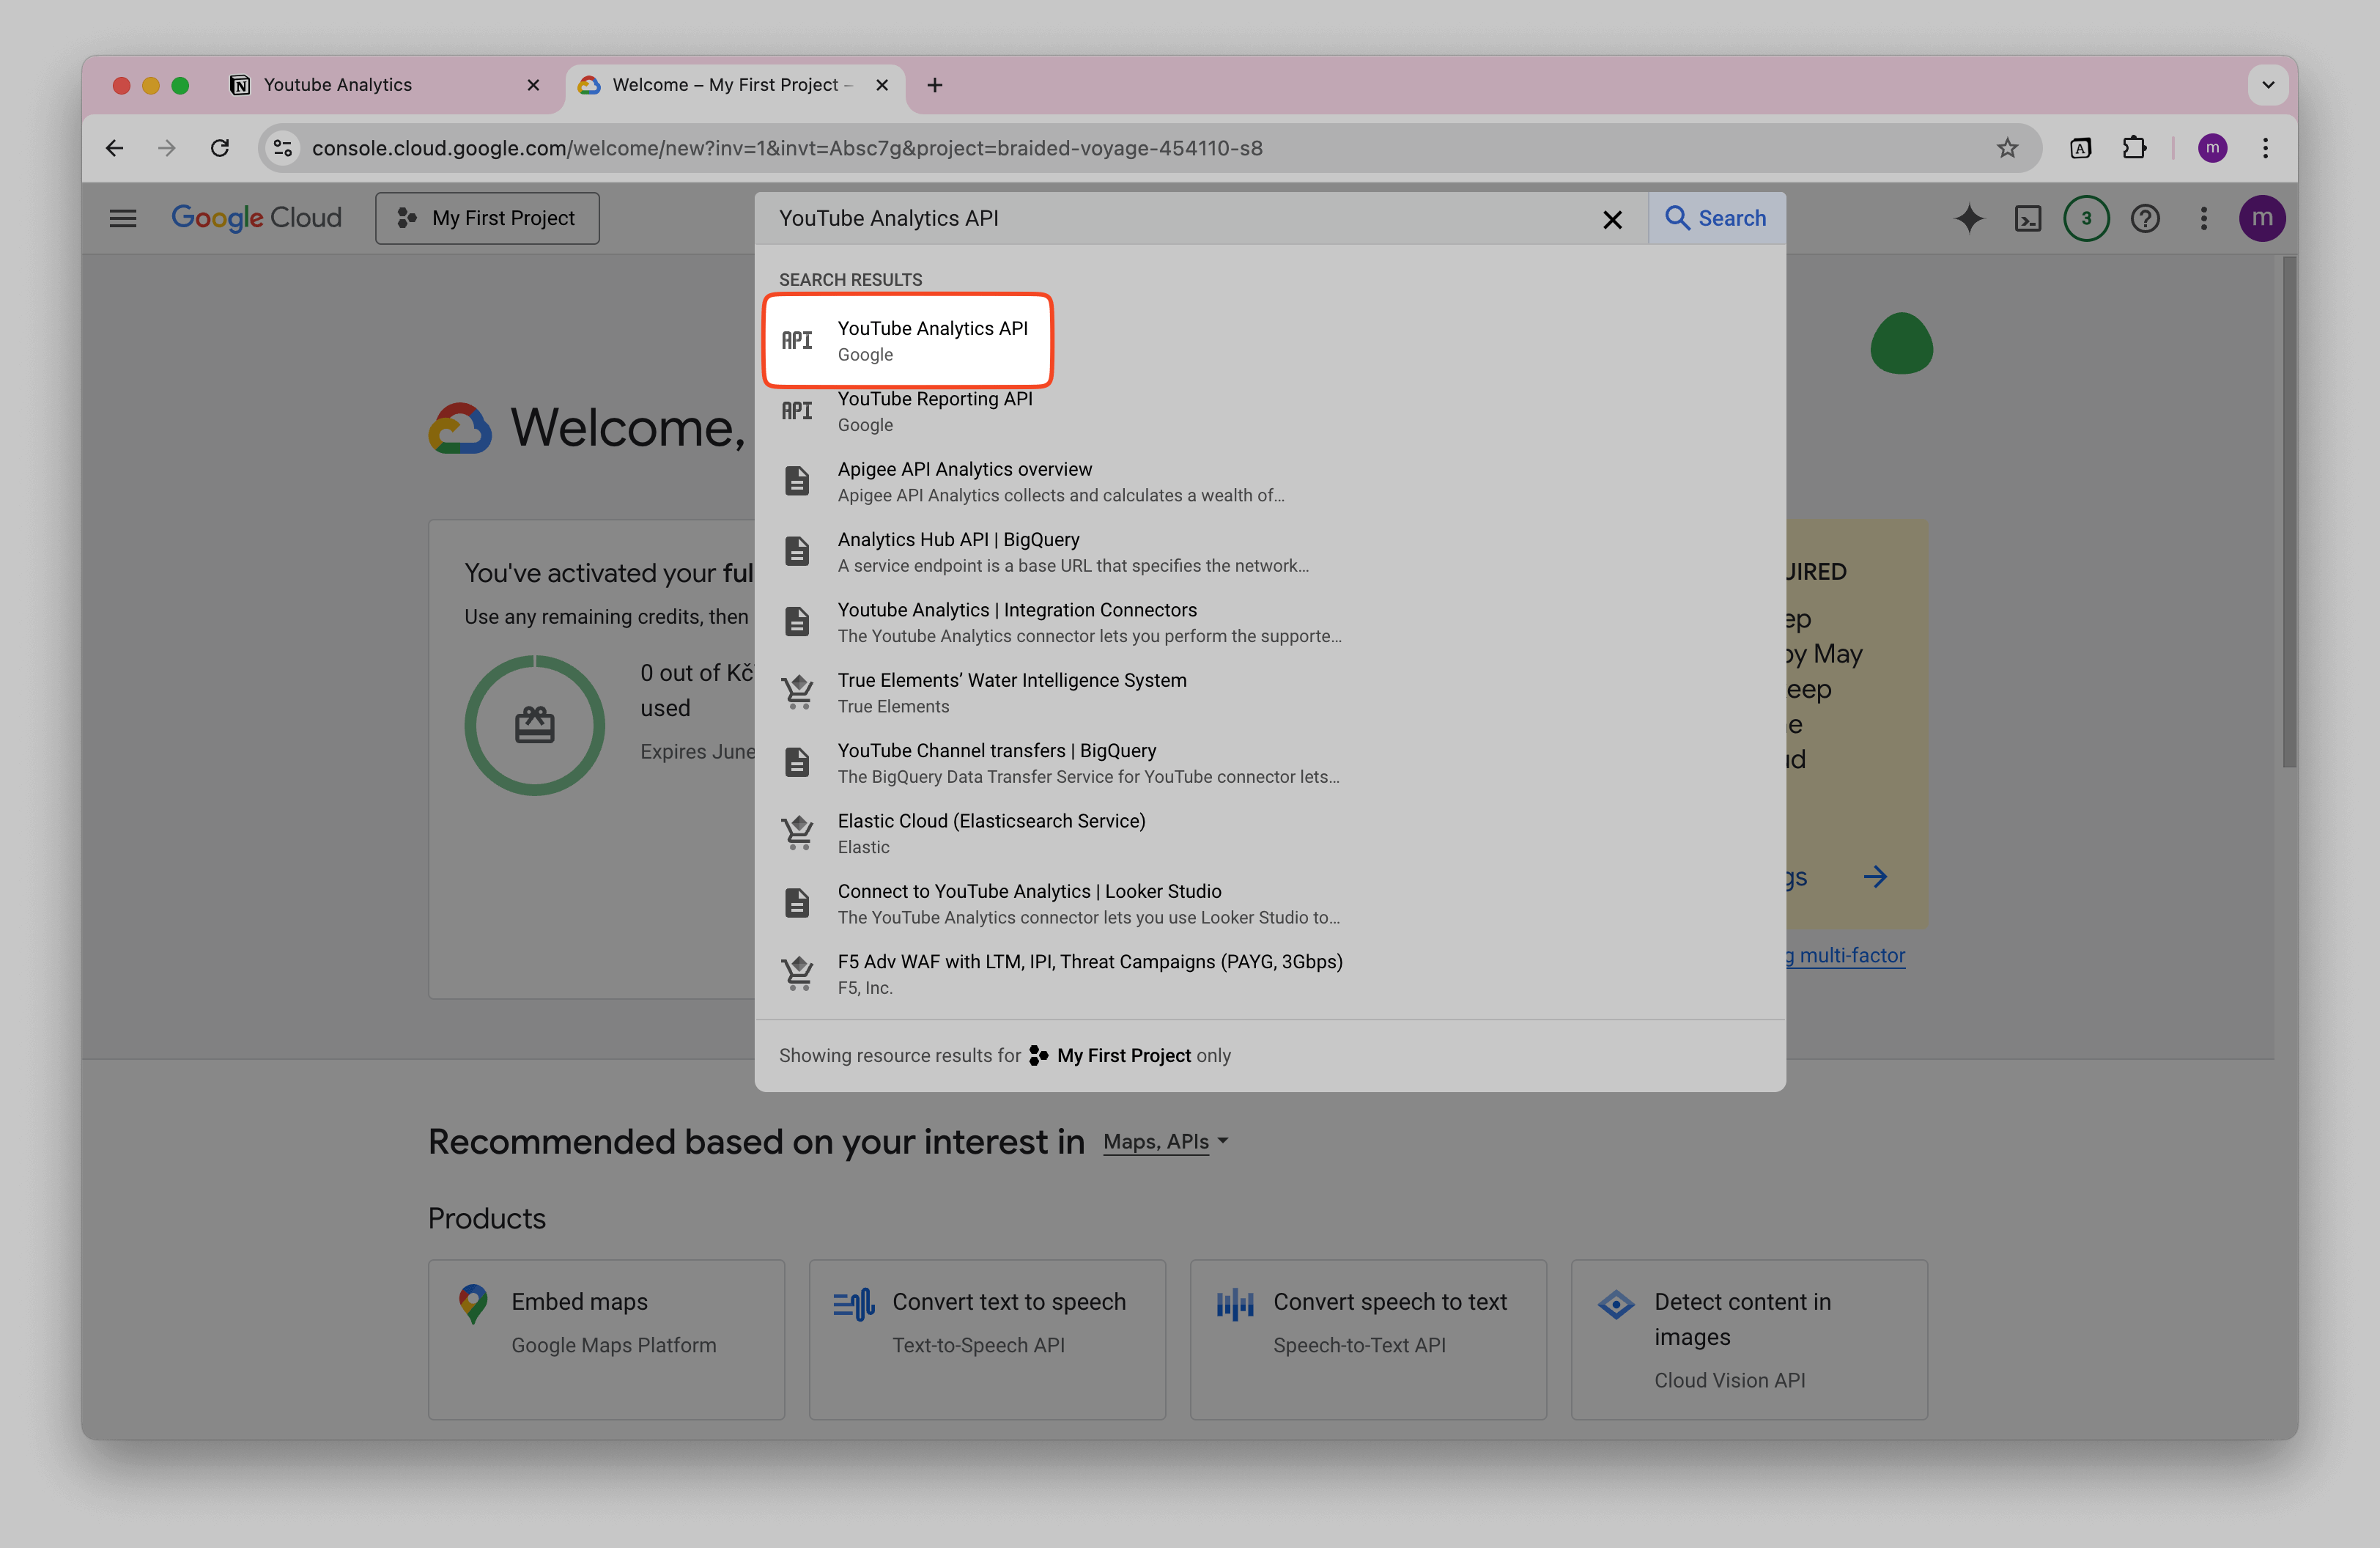
- In Google Cloud Console, go to APIs & Services → Library.
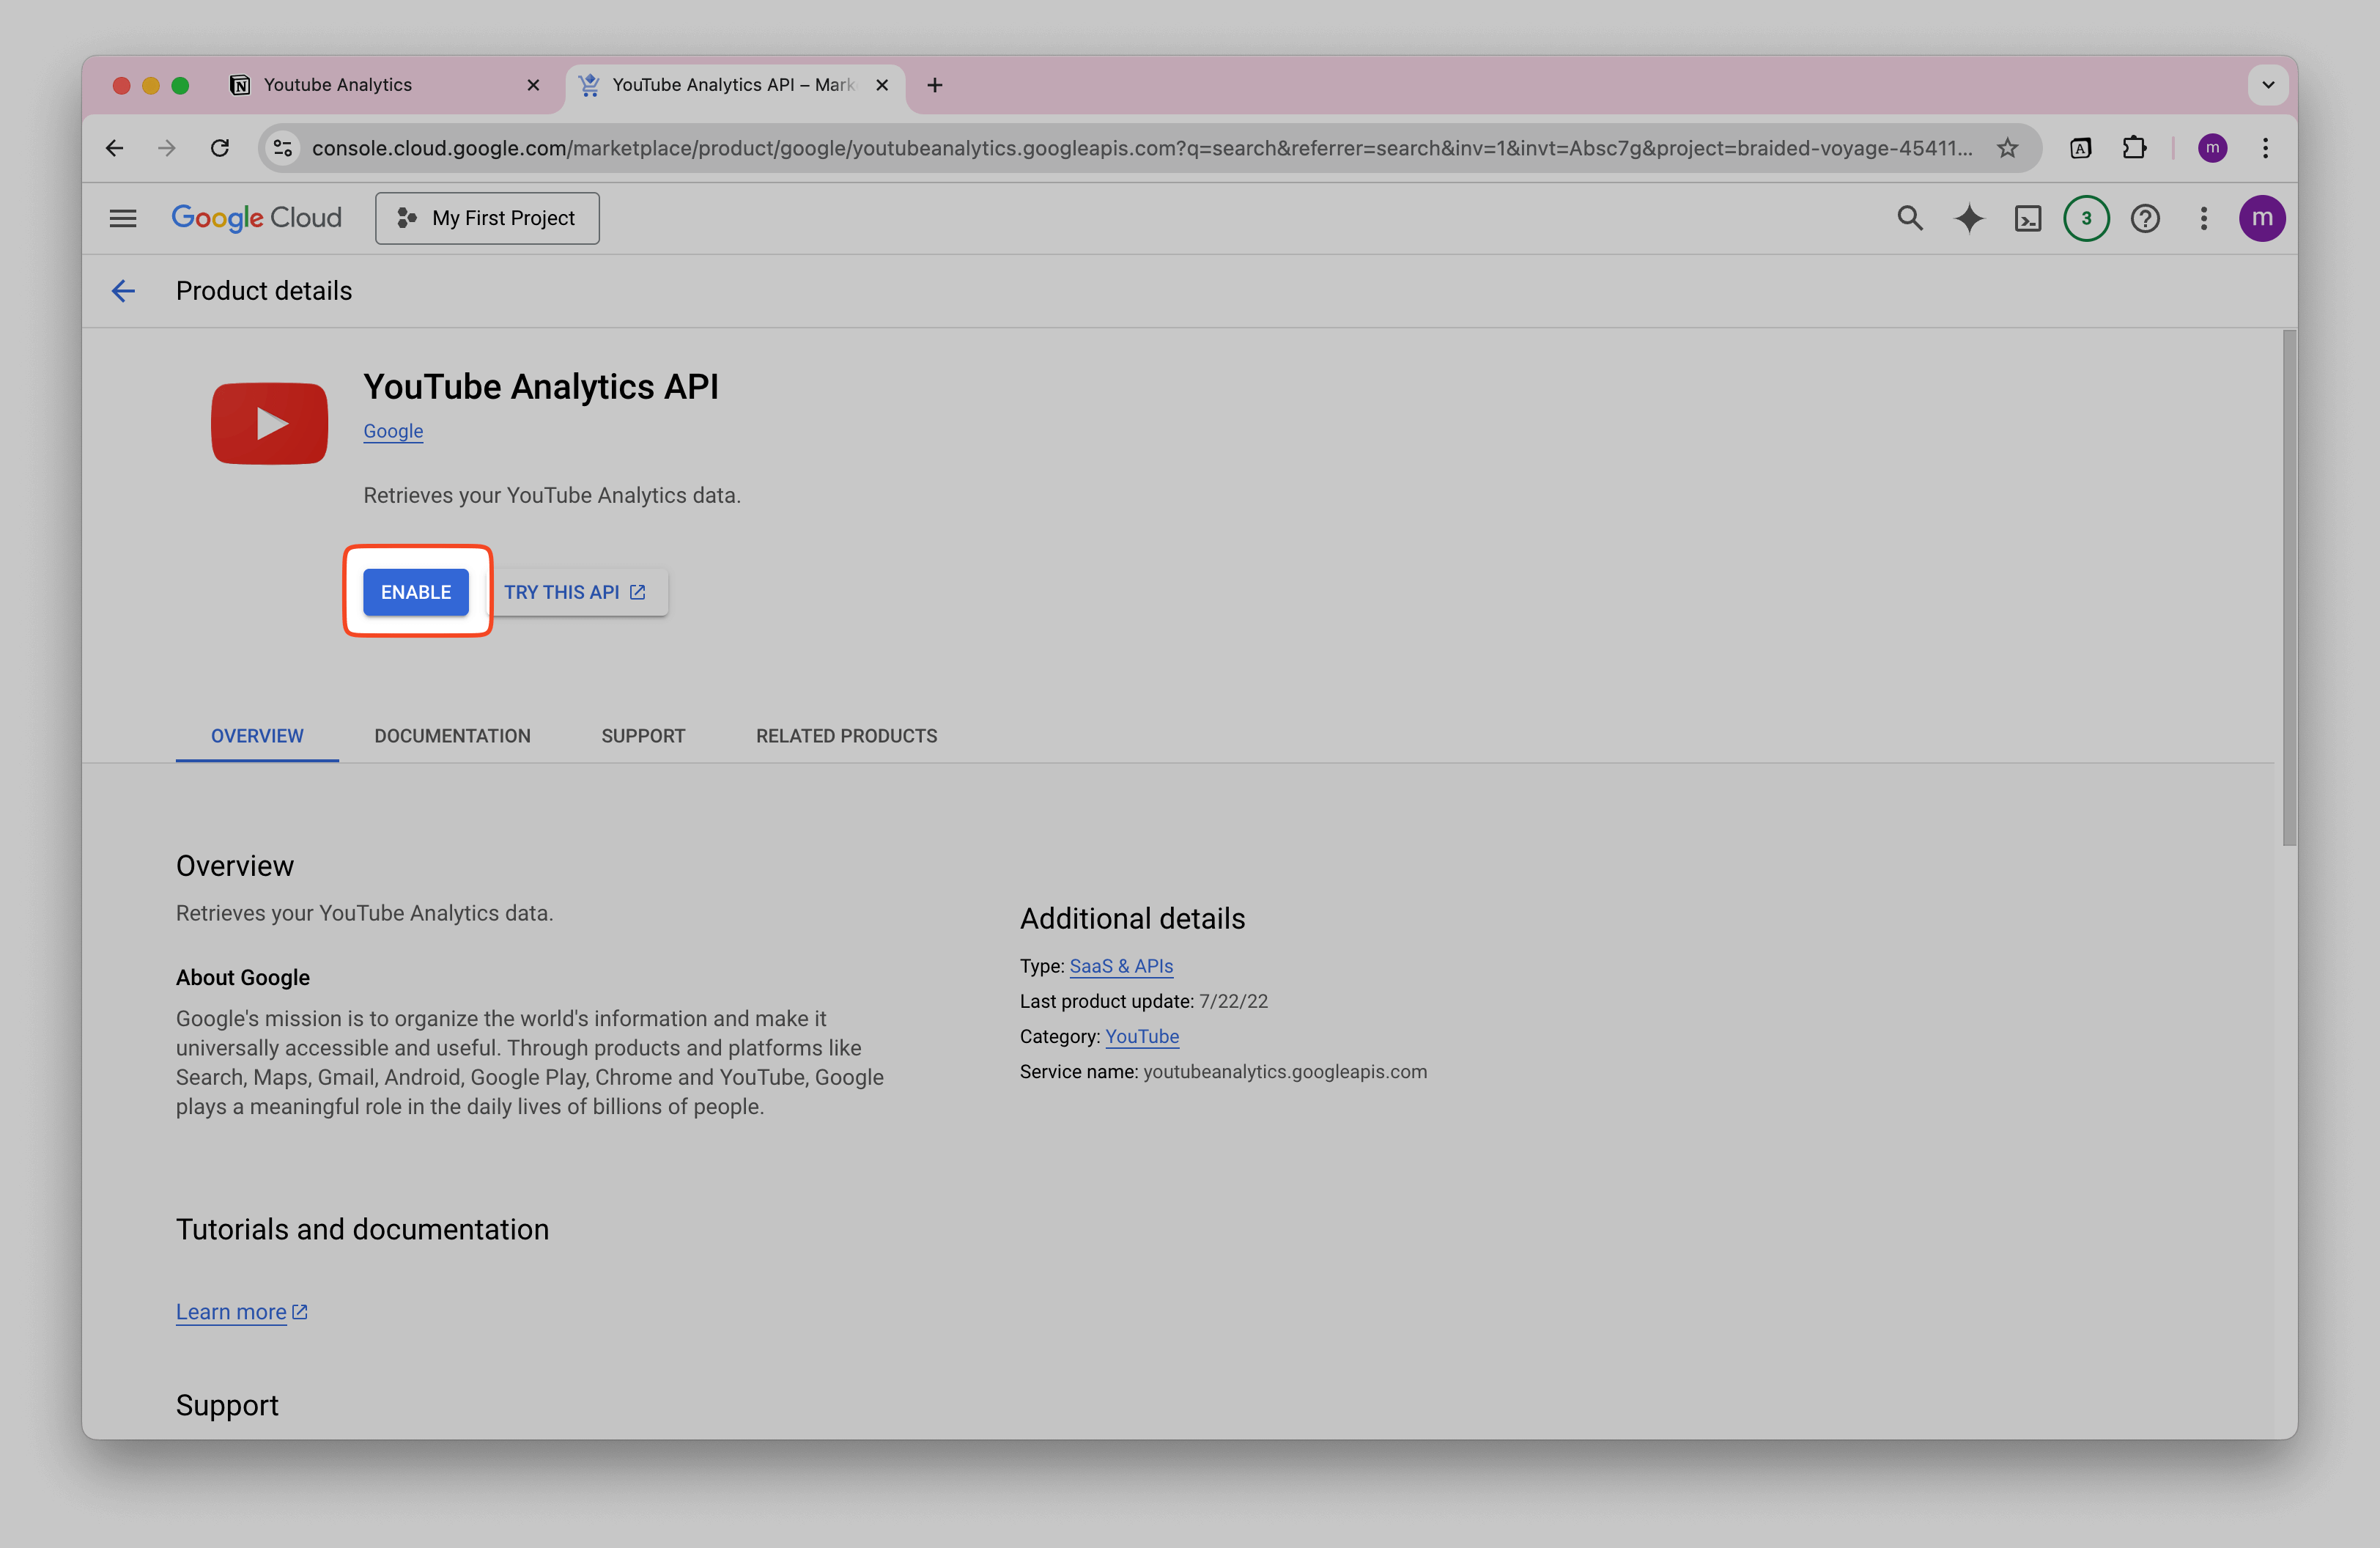
- Search for the API (e.g., YouTube Analytics API).
- Click the API → ENABLE.
- Confirm it appears under APIs & Services → Enabled APIs & services.
If you see a 403 like “This API has not been used in project … before”, it means the API isn’t enabled yet—return here and click ENABLE.
🎉 Congratulations! You now have a Google Cloud App and OAuth Client set up. You can start using Google Cloud APIs for free.
Connect in Note API Connector
If you still need the custom connection:
- Open Create Request → Authorization tab → OAuth
- Click Add Custom OAuth (or select your saved Google connection)
- Enter Client ID, Client Secret, Scopes, and the standard Google OAuth endpoints if needed
- Click Create connection (or Reconnect) and complete Google sign-in
For field details and examples, see Create a custom OAuth connection.